Lessons
Photographic Characteristics
06:36 2Camera Types
02:53 3Shutter System
08:51 4Shutter Speed Basics
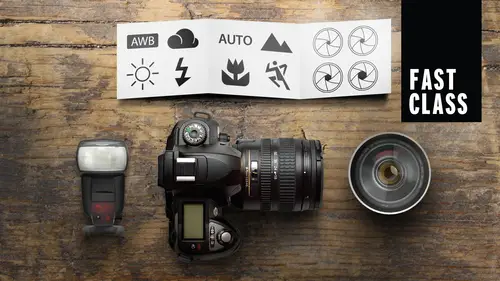
10:06 5Camera Settings Overview
16:02 6Camera Settings - Details
06:05 7Sensor Size: Basics
16:26 8Focal Length
11:26Practicing Angle of View
04:49 10Lens Speed
08:53 11Aperture
08:15 12Depth of Field (DOF)
12:32 13Lens Quality
06:56 14Light Meter Basics
08:54 15Histogram
11:38 16Dynamic Range
07:15 17Exposure Bracketing
07:59 18Focusing Basics
12:58 19Manual Focus
07:04 20Digital Focus Assistance
07:25 21Shutter Speeds & Depth of Field (DOF)
05:08 22DOF Preview & Focusing Screens
04:45 23Camera Movement
08:13 24Focus Stacking
07:48 25Lens Adaptors & Cleaning
08:24 26Flash & Lighting
04:37 27Tripods
14:03 28Cases
02:53 29Natural Light: Mixed
04:10 30Sunrise & Sunset Light
17:14 31Silhouette & Starburst: Sunrise & Sunset Light
05:25 32Golden Hour: Sunrise & Sunset Light
07:42 33Light Management
10:06 34Speedlights
04:02 35Built-In & Add-On Flash
10:37 36Editing Assessments & Goals
08:48 37Editing Set-Up
06:49 38Importing Images
03:49 39Culling Images
13:47 40Adjusting Exposure
07:53 41Remove Distractions
03:52 42Cropping Your Images
09:43 43Angle of View
14:25 44Framing Your Shot
07:17 45Foreground & Background & Scale
03:41 46Rule of Odds
04:50 47Visual Drama
12:20 48Elements of Design
09:14 49Texture & Negative Space
03:47 50Black & White & Color
10:23 51The Photographic Process
08:58 52What Makes a Great Photograph?
06:39Lesson Info
Camera Settings Overview
all right. It is time to continue our exploration of the camera, and we're now gonna be getting into the camera settings. There's a lot of secondary features in your camera that are very important, and I think this is a good time to go over those and some of the recommendations and what they control first up and probably the most important is thief file type. So when you have a digital image, it needs to be stored in some sort of file that you can write to a memory device. And one of the options is J picks and all photographers, no matter what level they shoot, deal with J pegs in some way or another, because whenever we send photos online or we email people photos were usually sending J pegs in many situations. So something we're definitely going to be used. Cameras can shoot JPEG straight out of the camera, of course, and what happens in these is it goes through processing. And so that means the camera is going to determine the final look of your image doesn't just come out exactly a...
s the camera saw it. It adds a little bit of contrast changes the colors a little bit. There's certain things that traditionally look good in a photograph in the camera adds that in automatically on JPEG images. It also goes through compression to reduce the file size to make it faster to transfer so that we can storm or images on a memory card and hard drop. The problem with compression is when you compress something, you are generally throwing something else out. And in this case, if you were to compress this image over and over and over again, those subtle differences in the blue become very large differences, and the colors are not as smooth as they could be. And so that's what would happen kind of in theory if you go too far with the idea of compression, reducing the file size down. And so it's not the best option for photographers who are trying to gather the most amount of data. But you do end up with the all convenient J peg. And so when you want to post a picture of your favorite social media site, the JPEG image is the way to go. That is still the standard, and it looks like it's gonna be the standard for quite some time. Right now, it's just so very common. All of our computers, phones and every other device can read J pegs. It's built into the standard operating systems. It's very easy to deal with. In virtually all cameras, you will have the option of shooting raw, and this is the original. Information from the sensor gets the original data. It does go through a raw converters so that it can actually convert analog information into digital information. And it does apply the white balance, which we will talk about in a moment. But the nice thing is that it is removable. So if you made a mistake and how you set the white balance, you can fix it with raw and no implications. No damage to the final photograph. You end up with this raw image, and every manufacturer has their own proprietary raw language, which is a little bit of a frustration, cause they have their own ideas of how they think it should be stored. And this is gets to be a little bit of problem because this is often too big to send to somebody via email. It's not the type of image that's going to be accepted. A lot of websites for being posted and so forth. And so this is your original negative. And if you can think back to the days of film where you had negatives, photographers kept the negatives. That was really important. But you want to share your negatives with other people. You would make a print and you'd share the print. But you always keep the negatives. And so photographers these days keep the raws. They'll make J pegs from those according to the needs, and they'll keep very close track of their original raw images to work with the raw you're gonna need software. Your camera comes with free software. In most every case, there are other companies, like Adobe that make products that work with these raw images from all the different manufacturers. And so most photographers thes days air, working with some sort of program that can read a wide variety of raw images and make adjustments and then save it as a JPEG and so forth. So if you shoot raw, you get a raw and if you want, you can make a J pick were different, a pig or a different type of JP. If you shoot J. Peg, you can't get raw, you're done, it's over. You've skipped that face. And so that's why most photographers want to shoot raw cause It's the original data from the sensor, so JPEG images are processed in compressed data. Raws the unprocessed original data. And so the J pegs are smaller. They're easier to work with. And so somebody new to this might be a little worried like, Well, I like the easy to use J Peg option, but the Raw is gonna have a lot more benefits down the road. So I wanted to do a little test. So in the studio, I am shooting to playing cards, but one's kind of hidden in the shadows, and this is kind of true in real life. You'll shoot something for the highlights, and they'll be something kind of dark and you want it brighter. Well, what's the difference between Raw and J pay? Well, in a lot of different programs, you can just brighten things up, right? So let's brighten up the J peg image and let's brighten up the raw image. Can you see a difference in how far we can push things after the fact. And so if you need to make any sort of adjustment, Raw is gonna give you more options. Now. In the next example, let's overexpose portions of our scene, and this will happen from time to time. There's a bright spot of light, and you'd like to pull some detail back out of that light. Well, let's try to darken up these areas and see what happens. Okay, not too much with the J peg and the raw holds a lot more color information there, and that's because it hasn't thrown out that original information that came from the sensor. And so, if you want to make adjustments, you want to be working with raw images because it just gives you more latitude. If we were to look at the history Graham and we'll talk more about the history grams later on. But I know a lot of you are already quite familiar with him. This shows us the range of brightness, and you can see the JPEG images are either kind of scattered in the data that they've collected or it's completely cropped off, and it's just thrown away. Ah, lot of information from that particular image. And so for most photographers, image quality is really important, and that starts with the raw image from the camera. Here's an example. I was shooting in a slot canyon and on the back of the camera. Things seem to be okay. There was some highlights and shadows. And then, with several different software programs, you can turn on clipping information that will show you highlights and shadows that are beyond the range of the sensor. And you can see here there's actually a lot of stuff that's beyond the range of the sensor. Now you can play with images that R J pegs, and you can adjust the shadows in the highlights and correct for some things. And I did that in this case, and I was able to kind of resurrect some of the shadow information and some of the highlight information. But when you shoot with the raw image, I went into a just that, and the only thing that I continued to lose was a couple of the very most bright spots spots right there. And so this is a really tough situation to shoot because it's bright and it's dark. The raw image captured a larger dynamic range of shooting, and so it should be the preferred choice for most people most of the time. Now, some people are a little bit more strict about this than I am. They're shoot raw all the time, no questions asked. Well, there are some reasons to shoot J picks. And if you know that you're getting the right exposure file size transferring is really important. So, for instance, you're shooting your friend's wedding justice a nice little gift, and they want really high quality photographs. You're gonna shoot raw for that. But they said, Could we have a slide show at the reception you're thinking? Wow, I'm gonna have to download the raw images that's gonna take 10 minutes per card. Then I need to send them through a software program to tournament to J pegs so I could get him into the standard slideshow programs. That's gonna take like, another half hour. It's gonna take me like an hour and 1/2 sitting at a computer to do this. Complete waste of time shoot raw. Plus J. Peg used the J pegs to do your slideshow. Use the raw for the final prints and so there are several cases I know some sports photographers that they know their exposures pretty well. That's kind of dialed in. They need to shoot fast on their cameras because J pigs are smaller and file size. Your cameras will be able to shoot faster and through more photos more quickly. And so they're sports photographers who will shoot in JP, and it's because they know that they're getting good results, and it's good enough for the purposes that they're shooting. But if you don't know what you're gonna be doing with them, and you want the full file to go back to, you want to be shooting in raw so in your cameras is gonna be a menu setting that's going to give you the option for changing these images. Changing J pegs. You'll have different options, usually between small, medium and large, depending on what signs you want. Now I know this is kind of strange for a lot of people watching, like Why do you want to shoot a medium sized JP? Can't you just make it smaller in post production on your computer? Yeah, but you know what? Not everyone who has a camera has a computer, and some people need to shoot a particular size image right in the camera because that's all the half. And so there are a few cases where you know you do not need 50 megapixels of little fluffy. You know, you just want a small basic shot to post online for some reason, and so you can do this in different sizes. But if you are going to shoot JPEG, at least go in there and make sure that you're shooting a large J pig for most of your photographs, you didn't spend all that money for all those megapixels not to use them. We want to try to get the highest quality possible. Now. Many camera companies will also have different versions of large images. It's the same number of pixels, but it's compressed, and they're throwing away extra color information to reduce the file size. And so you want to keep the largest size file that you can handle. General is going to be the largest option that they have there. I don't think there are many good reasons for shooting smaller size images other than you know, for sure. You don't need a larger size image. I know I have shot my camera on small Jay Peak. That's right. I shoot small J. Peg. Occasionally, I need something for a presentation on on a screen, and I know that on screen it's only going to be pixels by 600 pixels. I'm not gonna waste 42 megapixels or 30 megapixels of information, if that's what I know, that that final picture is. But when I'm out shooting and I don't know what I want, what it's gonna be used for, I want the most possible. Now each company will have their own different layout. Nikon uses fine, normal and basic for their compression settings. So you want the fine quality with Nikon. With Sony, they call it extra fine, just different names. Different companies will use these different names, so take a look at what they are. And I know like with Nikon, it comes by default to normal, and you can bump it up to find to get a little bit higher quality. So besides J Peg, we now have the raw option. Many companies are now starting to offer multiple size raw images so you could shoot small, medium or large. Once again, you would normally shoot the largest one you can unless you know that you don't need as much for a period of time. I had a camera that had a whole lot of megapixels, and I just didn't need all those megapixels when I was traveling doing street photography. It was just overkill. And I set my camera to medium raw just because I knew what those photos would be used for. I just don't need the giant megapixels. That was kind of like the turbo mode from my camera. And so you do have to be aware, because you don't want to be wasteful, but you want to be prepared for anything that you might need those images for, so the file size will depend a little bit on your camera. We'll talk more about that in a bet, and the J pegs usually compressed things down to about 1/3 the size, which means you can get three times as many images on a memory card or hard drive. Like some people like, Wow, I could storm or images. No, that's not necessarily better. Memory cards are basically cheap at this point. I recently spent. I don't know how much? 30 bucks. 40 bucks and I have a memory card that stores 1000 raw images. All right, that's gonna last me a long time. I was in Europe for a month traveling and not about $100 in memory cards. I stored all my photos, and I get to use them over and over and over again. And so memory cards not a big deal. Hard drives have gotten very cheap. And so, uh, you should be shooting the large size and list you specifically. No, you need something smaller. White balance is a setting in your camera that controls the color of your photographs. And it is there because your camera doesn't know what color the lights are that are illuminating your subject. And so it thinks everything is white. And so it's gonna see these different colored lights if they are colored. And so this is a scale that goes from 2000 Kelvin, which is very reddish to 10,000 Kelvin, which is very, very blue. Now there's gonna be usually three different settings for normal daylight settings, which have slightly different color temperature to them. And then there's a number of one's for artificial light, the one that's most different than all of them is tungsten, those of the lights that a lot of us have in our homes, and it's got a very warm orange glow to them. And so, if you're taking photos of people inside their skin, tones are not gonna look correct. You need to adjust your white balance to tungsten. If that's the type of lights that you have, there are a couple of other settings in here. One is a Kelvin setting. It's a manual setting where you get to choose where it is on a specific Kelvin temperature. There's another one option where you can shoot a great card or something that is neutral and white, and the camera will figure out what color is illuminating it, and it will correct for it. And that will vary from camera to camera. Not all cameras have that. And then there is the automatic option, where the camera will just look at the information and try to give you the best color balance that it can give in that particular situation. As we go through this class, you're gonna find out I am not a big fan of auto. I'm really glad my parents didn't name the auto. I just would have been horrible. I generally don't like auto, but this is one of the rare cases where auto white balance is one of the most frequent choices I make. And it's partly because it does a pretty good job most of the time. And secondly, I shoot raw for most everything. And if I shoot raw, I can correct it later without any degradation to the original image. And so if there is a little tweak I need to make, I can safely make it later on. If I'm shooting an image and the color doesn't look right, it's got too much blue in Adobe Light room, which is the program I use. There is a temperature slider, and I'll just grab that temperature slider and I'll adjust it over to the other side and go OK, well, that's too much yellow. Let's find a happy medium somewhere in between here. And so no damage to the original image and Aiken quickly corrected. In that case, if I am out in the field and I notice I'm not getting the right color I will adjust my white balance because I like to have positive feedback on the back of the camera. Like to really get a feel for what's going on. And so if I know it's gonna be cloudy all day, yeah, I'll probably switch it over to cloudy. But it's not my first priority to worry about. I leave it in auto and then adjusted as necessary. From there, your camera has two different color space is that it can record colors in neither of which are the full visible spectrum that we can see. Cameras by default will come with their cameras, usually set to J peg and JPEG images. Record images in an S RGB in most cases, and so the color space on many cameras is set here, but you can set it to a larger color gamut. And if you hope to do editing on your pictures or you plan to print your pictures, you want to choose Theodore B. RGB. The truth is, is that there's not a huge difference between the two, but it does give you a slightly larger color gamut, which will be advent ations when you're printing your images and your editing and you're working and you're adjusting the brightness levels. Most all of the Internet at this point is still on s rgb just trying to keep the fewer colors so that the data tree transfers a little bit faster. But if you have something on Adobe RGB, you can export it as the smaller size. You could make things smaller, but you can't make things bigger after the fact.
Class Materials
Bonus Materials with Purchase