Lessons
Lesson Info
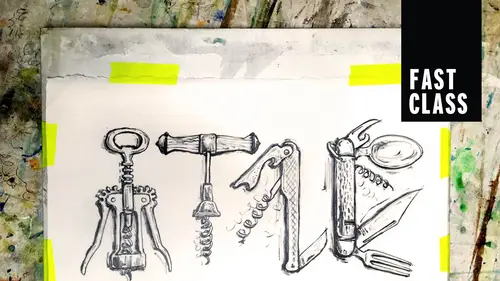
Shading
So just like lying quality, you can probably make up 10 different ways to shade. You've probably done some already yourself. Um here are some of the basics hatching. Hatching, I think it was kind of invented because um when people were printing you can't print shades and values, you have to just print lines. So this is when you take really fine lines and I'm gonna go in here. Mhm. Do some hatching on this pair of scissors. So I'm looking for a dark spot, you look at your object, that's not the right pair scissors. You try and find a dark spot. What's the darkest spot? And you kind of circle it a little, I know this area in here is gonna be really dark and I'm gonna hatchet just kind of drawing Lines in one direction. These are also very dark. Got a really dark spot here. So just draw lines in one direction and that's called hatch marks. Then there's also cross hatching, that's when something gets really dark, darker than you can do in lines in one direction, and you start doing lines t...
he other direction. Hatching can be very tidy, kind of what I'm doing now with the fine pencil or it can be kind of more scrubby and rough over here. So here, so hatched pair of scissors, okay, make that darker. Do that again over here and that one's kind of lighter, there's just a little bit of a dark line. So you don't have to cover the whole area with hatching just kind of in spots. Now to start shading, I always do is you squint your eyes down. I put this on a white piece of paper. You able to see a better well put well put it right here you squint your eyes really low and you should be able to pick out where the darkest spots are and also where the highlights are. So before I start shading I'm just kind of like oh well here is a big highlight right here. I'm just gonna very lightly circle it just so I know I'm not gonna put any shading in that area. Then when I come back in with my hatches because I know this is a very rusty pair of scissors, I'm going to totally avoid that mark and not put anything on it. Okay then they're stippling stippling is like the dotted line. That's when you just come in. Look for highlights. That's different prices. Okay here we go. Look for highlights. Oh already missed some. Already. Here we go. That's a very special part of that scissors. Yeah right there, that's my highlight. So I'm going to circle it so I know not to touch it. There we go. Then there's a little shading down here. So if I'm gonna staple this, I would come in with all the little dots symbols as you can see they can be very light or they can get really dark or again loose pharmacy. Okay so as you can see you can skip all this whole thing. Just leaving the highlight. The next one is using the edge. So as we were using the edge of our pencil just to draw the lines a little bit. You can use your edge to do block in big areas really fast or do a shadow underneath them. So I think this still needs to be a lot darker. So I'm just gonna like there goes again. This is really breaking one. We're gonna move on to the other council soon. Okay. Yeah. Okay, I'm gonna use the edge of my pencil. I'm going to just block this one in real quickly because I want this to be a very dark. That's it. Just there's the other thing about this edge of your pencil technique is it? It works not only on the actual object, but it's great for doing the shadow underneath the object. Okay, so for example, on this one, I decided I wanted to keep this scissors really, really simple, but I'm going to come back in and do shadows underneath all of these so you can focus on what they're called the negative space. So the positive space would be the scissors themselves. And I feel like since they're kind of delicate and they have that nice pin, I want to leave them simple, but my negative spaces all the space around them, I'm going to make that a lot darker. This light is broken. That's why it's not working Blending. Is this next 1? Now the first way people would naturally come to blend is this I'm going to use the edge of my pencil. I'm gonna rough this in a little bit. First instinct lick your finger and smudge it out. That's blending. The only problem with that is your finger gets graphite all over it and you can't like it again. So I do like using this technique a lot but I usually have like dirty artist pants on and all I put on my pants or you just have a nice little wet paper towel right here, you wipe it on your paper towel and then if your paper towels wet you can keep blending but it makes a really soft smooth transition. This is for when you're doing like really soft light on something. Yeah. Yeah. Um You can also blend with a blender. So the way you do is you get some graphite on there. So graphic is really you know just like some powdery stuff happens to be hardened into a lead and then you would use your blender instead of your finger. If you get really into it you can put a little bit of like paint thinner on that or something and get it really washing. Okay so that's blending, get it really light really dark and then we have the scum ble the stumble and the scrub of the lines are very similar things to each other. I also do them all the time. You can kind of follow the contour of something these objects were doing are pretty flat but so if something's going around and you want to do the contour of it you would maybe like you could kind of, let's see here can kind of stumble like going over these contours a little kind of, it's really just like scrubbing and filling in. You do this a lot when you're sketching quickly, just kind of let your pencil just kind of dig into any areas that you think are deeper. I'm just like it's just a big scribble. This area is dark. Okay and then also eraser, the eraser is a blending tool, it's just as much a drawing tool as any of the other ones. It's not just for getting rid of mistakes. So I use it if I want to draw highlights. Oh that looks pretty light there. Just bring your eraser in and draw a white line with it and knock out a highlight. Yeah now we're down to these shadow and reflected light and this is another art school basic that you see all the time. You see the sphere, the cube, the cone and the cylinder. And how do you shake him basically if the lights coming from this way that's the thing that is closest to the light is probably going to be your highlight and on the other side is going to be your shadow. Um So I'm just gonna give quick little examples of those things. Um gets a little boring when you're just drawing spheres and cubes. But if you break down whatever object your drawing, say I'm gonna draw a trophy. Like here's a trophy right here, you can look at it and you can break down each object into those four forms. So this is kind of round, this is not the exact same trophy, but you can see there's a round belly of it and it does look a lot like a sphere. So the thing that is closest, if my son is coming from over here, the thing that's closest to it is going to be your highlight and I would like to draw easy little circle around that and the edge that's furthest from it, that's gonna be my shadow. So it ends up looking like that. This is kind of like a cone, it's just upside down. Same thing to more cones and then this down here that's gonna be the cylinder. So the thing that's closest, it's going to be the highlight. I'm going to draw a little circle around that and then I'm gonna really scrub in dark here and then it just kind of fades out when you're looking at the object, especially shiny object, you're gonna find all kinds of different little reflections, You'll see yourself your light, anything that's on your desk so you might want to start out with just, I like to use really tarnished things or you could spray paint an item if you're having getting distracted by all the reflections. So then up here these handles are just flat they're kind of like the cube, they just have the edges go around. Now there's one kind of important thing that it might seem like it's getting a little ahead of you but so just kind of remember it and and put it in there even if you don't see it, if something is wrong with your drawing this is why it's called, it's the reflected light. Okay so if we were going to draw the cylinder like this okay I'm like okay well I got a highlight and I'm gonna come around here and I'm gonna do the shadow okay real quick. So it's kind of a lighter here, it's darker and darker and darker and darker and darker. And yeah this is this is a white sphere. I say cylinder, this is a white sphere. Then I'm gonna say okay well my sphere is sitting on a white piece of paper so that thing that is closest to it, the shadow there is gonna be darkest. Right? So then I'm gonna draw that dark too and it's on the dark side and then you get this shape where everything here in this spot is really dark. Yeah and it kind of flattens out there now you have sort of a white spot next to a dark hole. So just keep in mind that there's this thing called reflected light and what it is is it's the light bouncing off the surface that the thing is sitting on and hitting the other side of the sphere that's furthest from the light. So if you draw your sphere just add it in there and it's gonna and it shows up right here, it shows up in the queue because it's closest to the ground and it shows up there anything that's like on the shadow side closest to the object, So usually I'm going to tell you to draw what you see. But oftentimes it's really hard to see that stuff.
Class Materials
Bonus Materials with Purchase