Crappy Lighting Condition: Backlight
Lesson 6 from: FAST CLASS: Conquering Crappy LightLindsay Adler, Erik Valind
Crappy Lighting Condition: Backlight
Lesson 6 from: FAST CLASS: Conquering Crappy LightLindsay Adler, Erik Valind
Lesson Info
6. Crappy Lighting Condition: Backlight
Lessons
Crappy Lighting Conditions: Direct Sunlight
27:40 2Crappy Lighting Conditions: Fluorescent and Mixed
16:55 3Crappy Lighting Conditions: Low Light
22:14 4Crappy Lighting: Dappled, Backlit, and Overcast
11:04 5Setting Your Camera Up for Crappy Light
19:18 6Crappy Lighting Condition: Backlight
26:06 7Crappy Lighting Condition: Low Light Outdoors
18:53Lesson Info
Crappy Lighting Condition: Backlight
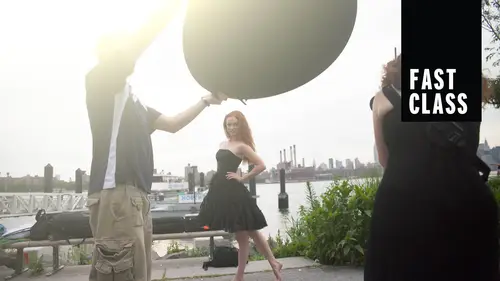
when I'm shooting in this particular situation, this is one of my favorite times issue. At the end of the day, the lights really, really low, heavily backlit, and one of the others and that's it's not always great, but it's pretty good about that because the sun is behind their head, the light on their faces usually pretty good and flat. You don't really need to modify it too much because it's basically it's open shade. We talked about that a little bit yesterday. The whole sky is the light source feeling in their face. It's just really dim compared to light behind them. So it's nice hair light and then open sky. So when I first grab my camera, if I do my own kind of valued of metering, stick it on aperture priority and point it at the subject. Unfortunately, I have to be smarter than my camera because what it gives me is not so great. So let's take a look at what it gives me right off the bat. This is what it gives me to start with. And so right off the bat, um, this is my appetite. L...
ike to shoot at. I made it up. I like to point to, but right off the bat wouldn't saying is okay, She's really dark. There's not much light on her, but that sky's really bright, so we're gonna try to meet in the middle. And so it gives me bad on both. I don't have a nice guy, and I don't have nice light on her face. So what I have to do again is to be smarter than my camera. And so what I like to do is use aperture priority. And the reason that, like few temperature priority is a later in the day. Let's say I'm shooting an event or a portrait or something, and every minute at that end of the day it gets darker quickly. I mean, within 10 minutes, it could be two stops, different lights from when the sun's out, when the sun's behind the horizon. And so if I'm shooting manual, which is actually usually gives you more control when I'm shooting back. Like if I'm shooting manual and I forget in that 10 minute times spring, it might have gone to substrate and, like, maybe can't save those images. So for me, I'd rather just you aperture priority Use exposure, compensation. Check the back once in a while to tweak it because it gets me pretty close. So in this instance, I went from 1 32 100 of a second knowing okay, that's way too dark. And the more that you practice that this the better that you get. I know from me like I can look at an image and say at this point how much brighter I wanted to be. If you can't, I would go, OK, I need it. Stop brighter, maybe a stop in the third or stopping to third So I would look at something like that, and I would know that at minimum it's a stop brighter, and I'm probably for my personal taste. How I like to shoot it would be a stop in 2/3. Many photographers would look at that and say, OK, it's maybe it's a little bit too bright, but it's personal taste like if you look at a lot of wedding photography, a lot of the portrait overexposed cause everyone skins look looks nicer when it's over exposed. It's OK, it's to taste. I think commonly I tend to shoot 1/ to 2/3 of a stop brighter than what a meter might actually tell you is correct. It's personal taste. So let's scrub this over and take a look. When I use my aperture priority that 1 32 hundreds of a second, I'm gonna move it. I go toe 11 thousands of a second and it brightens it up. So if you're looking, the light on her face isn't great. But it's not bad. Like if you had to do a portrait like that, you could you could take a reflector from underneath and try to kick a little bit of light if you just want a little bit of sparkle in the eyes. Um, but depending on how it is, that's actually terrible. It's more less that the color is kind of lacking for me. That's why at the beginning of this session, you didn't see, um, I used took a picture of a color checker because then later on, in post, I can use my eye dropper on the things that we just showed you and not grab the neutral point because the neutral point to me is too cool. I'm gonna grab one of those warmer patches, and so it'll give me a warmer sunset feel instead of right now. It's just a little bit too dull for me. So let's play a little bit more. And by the way, I'm using my evaluative with a center focused point because she's in the center and I could just recompose because I'm using backward and focus. So let's was it on? Move it back, I said, Let's take a look So I had Eric take a shot here, help me out here and you can see just barely a little bit more light in the top of her eyes. And you see, this side of her face is a little bit warmer. I had him come in with a reflector and just hold it. He's actually using a silver reflector because it's late in the day. It's warm, warm light. That's why he's holding it and it looks warmer. Silver is bouncing the warm sunlight so it looks warm. This is why I've heard people say, like, Oh, at the end of the day, you want to use a gold to match like a gold reflector to match the the gold Son. No, it's already going to be gold because the light you're catching is warm yellow light, so I don't ever bring out that that gold reflector silver gold mix in limited situations. With this, the silver is just fine. So same shutter speed I'm using Back button focuses Well, like if I'm needed to recompose, I'd lock in my focus on her and recompose. That's how I would work. Doesn't matter. You could still lock in your focus on your trigger, if that's what you have. All right, so let's take a look. This is when Eric was standing. I don't know how far back were you five feet back, and then I brought him in as close as we could get, because if you could kind of see in this scene from the overview shots, it's not the ideal backlit situation that I wanted. It wasn't like light pouring in from behind where you pop a reflector and it catches a tunnel light and illuminates her face. There were clouds, it was dull, and so there's can't really see too much. So I had him come in closer. The same thing is bringing the bucket in closer like we talked about. He's far back and there's not much water or light to throw. It won't reach them. So I had to bring the reflector into, like, a foot away, basically, so you'll take a look at that. So I asked him to bring the reflector and a little bit right there to try to kick a little bit of light. And then you see it there, a little bit on her face, and it just warms up the side of her face. A little bit fills in the shadowed I on a bright day where it's actually full sun. Where he was standing originally probably would have been totally fine in a situation like this without much like maybe it hold the reflector underneath to try to kick in, fill in the shadows in the eyes. But normally this is what I would be teaching normally strong backlight. You would want to hold the reflector above because that's going to be the main source of illumination, versus if you're just trying to fill a tiny bit. You hold the reflector down beneath just a little bit of Phil and you were using silver, right? So we got solid silver, solid silver. All right, so What I decided is not to significantly difference different between them. It's all kind of acceptable. But the fashion photographer and me likes this one, the one that's, like, really quiet and natural looking. If it were strong backlit, it would be so bright behind her that I'd have to kick some light in to just not have that background. Just go start wrapping around your face. So this one is okay as well. What I ended up doing is re composing. And in this case, instead of having the sun which was in the other shots, it was right here. Did this part of her head I stuck that the sun behind your head hoping to get like, a little bit more glow around the hair recomposed a little bit. And then I did photo shop. You want to see my photo shop? You like it? Okay, that's what I didn't photo shop because this is what I would like to catch in reality. Why didn't photo shop is a ground? A picture that I had taken of out of focus Christmas lights. It's the picture autofocus, Christmas lights and I over laid on the picture and in photo shop. I change the blend mode too soft light if you don't know how to do that. First of all that, that DVD that I had in the swag bag has it on that. But it's also on the three day creativelive that it done retouching as well. But this is why I love backlight because I love when I can get actual Ensler. But the day that we were shooting, there wasn't enough lights actually do lens for So this is augmenting on a truly backlit day. What I would try to get try to get some nicely on her face exposed for her face. I don't care about the background. I'm gonna let it go solid way. It doesn't matter, but notice in the areas that's not plain sky, for example, the horizon. It makes a really nice effect because all of the light sources become out of focus. Gives me a nice bouquet. Looks really nice. So this is probably what I would go for again. It wasn't exactly the situation that I wanted, so it's kind of halfway between what I would demo. So I'm gonna leave it at that because I'm thinking I don't care about the background. I care about the quality of light in the direction of light. It looks pretty and Eric's going No, no, I like there's clouds in the sky today. It's backlit. I want to see some of those clouds. I want to do something that's actually showing those clouds. And I'm, like, cares about clouds. Let's make it look dreamy. All right, so he's gonna dio his version. So, um, what Lindsay showed is awesome. Usually, when you have that beautiful back life, if there's no clouds in the sky like she mentioned, you could take a reflector and oftentimes bounce enough light back to really kind of under exposed that background to see a little bit more detail. It was rough because we did have the clouds. So she's over there like, Drat! And I'm thinking in my head like, oh, cavities, a flash next, like these clouds are gonna look awesome. So I was really kind of excited about this, but that's honestly, that's the joys of shooting on location. I mean, last night we were we didn't want car. Two nights ago, we didn't want clouds when we were recording this and we got him today We're like rain dance, rain, dance, rain Yes, we want clouds and we come out here and it's the most beautiful day like Seattle's probably seen all summer. So, um, that's the joys of shooting outdoors, and it's not always the crappiest light. It might not just be the light that you were looking for that day, and that constitutes crappy in another way. So it's neat that were ableto you guys are tuning in for all these different parts because you might only have a Saturday or Sunday to go shoot on, and you have to be able to get great images regardless of what you plan for. So let's hop in here, and we've got the same pretty model. But now we're going to go ahead and augment with some flash. So the very first photo that I've got coming up here I've got on my Nikon D 885 millimeter 1.4, just like Lindsay was shooting. So about the same model, the same lens and the same environment. I'm in full manual mode here, so for me, the composite is here. The first shot that I got was at 1.4 at I s 0 100 at 1/50 of a second. So I'm shooting pretty wide open at a pretty slow shutter speed so you can see it's letting in a whole ton of light. And the very first shot was cute. Artsy. If I made this black and white and crank the contrast it could it could stand right. It could work. But what I wanted is those clouds. So I had to do something here to get some exposure back in those clouds. So what I did, is it just the camera a little bit? Take another shot and you'll see right here. I went from F 4 to 2.8. So basically, I closed down my aperture to full stops to go to F two F 2. That cut down two stops of light, which is good, because now our models faces an overexposed but the same time we're kind of where you started your 2.2. Yeah, basically what my picture looks like. We have to start. We're still seeing no sky. So I have to go a step further because I have to expose for that sky first to make sure that I get the detail in those clouds. We're gonna try something else. Here, take one more shot. Now, this is what we're working with. So I stayed at F 2.8 because I want that shallow depth of field does. He pointed out that when you have a shallow depth of field, when you're using a 2.0, or 2.8, your background goes out of focus really quickly. So you get that beautiful kind of defused background look at soft focus, which was what I was going for. But now, having closed down two stops and made my shutter speed a lot faster, you can see we're starting to get details in the clouds. That's good. But look what happened to our model like she's completely in the dark now. And it's almost what my A V mode gave me to begin with the very first time. So her camera and I are on the same page, except neither of us were right this time, so she had to use exposure compensation, and I'm gonna have to add a flash to make this right. So what I did here is, or what Lindsay did rather for me. I think it's jumped on the flash. I'm gonna hit play if it wants to play for us. Yeah, There we go. So here's the very quick side by side comparison, this is what we started with F 1.4 at 1/50 of a 2nd 100 I s 02 stops of light down by up in our closing down our aperture a whole bunch more stops 50 Probably 2.5 more stops to get over to 2.8. So here's where we are. We were almost 45 stops overexposed to begin with, and over here is now going to be our new based foundation to start building in some flash. So my goal when I'm shooting on location I know I want to expose for those clouds is to manually set my camera to expose for my environment first, because I can't use a flash to go ahead light up the rest of the world. But I know if she is dark and I get my ambient light where I want it, I can use a flash to at least light her up. So when you're using small flashes. You kind of want to think intelligently, faras what you're lighting that your camera and your ambient light do most of the work for you, and then just use the limited power you have in your small flash to kind of just like your subject. We're gonna hit, play over here, and I'll show you how we're now. Start building up our model now that we have our background where we want it. So we've got our 60 inch bounce umbrella right up there, and I think we're gonna go over. That's a nice place deposit. We're gonna go over the gear that I'm using right here. So we have that 60 inch bounce umbrella that John brought over for me earlier. You got it. So Lindsay is going to show us that, and I have it in the bounce orientation. I have the black cover over here on the back. The light does not go through this black cover. I see some people make the mistake sometimes of reading that. Okay, that can shoot through this umbrella too. So they just never take the black cover off you. When this is on, this is a bounce umbrella. So the light hits this and is going forward. But the reason I used it here is because I wanted to maybe do a head shot of this model and also do a full body shot. So by having a 60 inch umbrella, you can see how, when it's on her, it always almost covers all of Lindsay. And now imagine if you backed it up a little bit, it's gonna have a nice big spread of soft light. So it gives me the option to evenly light a tall model, a photographer or anyone that I want to put in front of it. And I'm controlling it with these guys up here. So I have to send some kind of trigger over to my flash and that tells it to fire. And I'm using the pocket wizard system. These air the mini TT one in flex TT five units. We cover them in the flash primer on Day one, and what these do is they communicate a signal from a camera to my flash, and this is own controller on the top. If you look closely here, see the A, B and C those air different zones or different groups of speed lights that I can set up. And on the top it has manual motor automatic mode, which b T t l and on the base over here you have exposure compensation or that's how you would dial up and down your manual settings. So for me, I put the flash on a light stand, bounced into a 60 inch umbrella, turned on my zone controller, and what I'm gonna do is flip it over to manual mode and go ahead and just take a shot. Probably 1/8 power just to kind of get like a feeler and see how much flash up what we have. And then I'll adjust that up and down accordingly to light my model. Gonna let this guy run there. Without that, you're just running t t l. That's why there's own controller is so important because it gives you that manual control. You can see the full set up there, and this is what happens when I turn on my flash again at 1 1/8 power. It's an arbitrary number when you do this. If you're shooting manual mode, unless you're using a light meter, you're gonna want to turn on your flash and take a shot. But we're doing this in a very methodical way so that we only one if we set up our flash and she is over exposed, we know we're not having to change a bunch of things. We're only having to change our flash output because by keeping her Cameron manual, this isn't changing. No matter where my autofocus sensor point is, doesn't matter. My cameras not gonna be giving me fluctuating exposures. I know regardless, that my background is going to stay the same every single photograph, less, of course, the sun setting. But we'll get to that in a second. Um, so I we lucked out. We got her first shot. It was good, evenly exposed and again, here's my manual camera setting. So now we're able to evenly balanced her out with that background a little bit more here. Now we're doing something else, though, because if you look at her, she's a pretty tan girl. I mean, for living in Seattle. She had a good like a good shine, that skin. It's summertime, but what I want to do is she looked a little bit pale there, so I want to take this up a notch and I want to make her a little bit warmer at the same time to it gets really, really warm in the sun setting. I mean, there's a reason they call the golden hour, right? I mean, as soon as that son gets down in the sky, it's burning through a lot atmosphere and warms up a whole bunch. So what I'm doing now is I'm taking my jealous a cto Joe. I'm gonna warm up my flash because I have a really warm background and I have ah, tan girl, but I hit her with a white flash. So in comparison, it's a white flash, but are a mind is kind of seeing it as a cooler light compared to the light that's exists out there. So by putting on that CTO or color temperature gel, it's one of the road correction gels. I'm gonna go ahead and warm it up so these gels correct four tungsten light indoors, like we did yesterday or in a church. But they also correct for that super warm light that you get outside because you see a lot of people going outdoors and they like to take the shots at sunset on the beach or just sunset, period anywhere in the world. And you kind of something is always off. When you look at those photos, their subject on the ground is all pure white, and then everything else is really orange and nice. So by putting that gel on there, everything kind of goes to the same color temperature and you get a universal warm feeling. And what did you use here? This is probably I think I probably used a full cut right here. So to a 1/2 or a full cut Pretty warm, because, I mean, the sun's coming pretty warm. The lower it gets in the sky, the warmer your son gets so right before sunset, you're probably gonna want to add maybe a little bit more. Be a good question. Probably about 1/2 for a full cup there. I want to make her look tan, but not make her look like she just got out of, like, spray tan. So it was that easy to attach them. So it's super quick because we are chasing daylight here. We don't have a lot of time to mess around, so it's nice to have gear that just kind of gets up and goes with you. There you go. So now we look a lot warmer and she's balanced out a lot more with the background. So if you're sitting here in the studio looks atrocious on this TV. But hopefully you guys at home, it looks a little bit better on your monitors. And here this is Lindsay's flashing fashion flare. She can can't be on set without making something like Where a little bit. So she's like, Hang on. Wait. Wait a minute. Wait a minute. Let me get this reflector started fanning. And sure enough, the very next shot looked way cooler, like way more. Ah, a little more action and stuff in the static photo I had beforehand. So you saw a little bit earlier. Second scroll over here and give you guys a comparison. There you go. You saw what that gel did that gel warm things up and now we've gone ahead and we've gotten a good photo where we can see the background. OK, we've got our jelled flash here on our models. So she's got a good skin tone that matches. We've got all of our camera settings in flash setting so that we have a good exposure on everything. And here's where I have a lot of fun shooting with manual mode because my back dial on my camera controls my shutter speed and everything remains constant now other than the setting sun. Right? So the ambient light is the only thing fluctuating. The ambient light is going down as we speak because the sunset and just getting darker. So with everything set up, if I sit there and ride my shutter button now I can turn the lights up and down on the entire world. So we've got our jails. We've got a nice, warm background. What if I think like, Oh, I like the shot that Lindsay got with the the background light with a blown out. All I have to do is now slow down my shutter speed, and I have control, and I could get that same look. But do you notice something different here with the background, just kind of heavily, heavily backlit. We had a flat, nice, pleasing light on the face, right. When you add your flash now you can get that blown out background. But now you control the direction and the quality of light on the model's face too. So it takes another step further. You no longer have to be stuck with flat light on the back. Now you can use that, like to shape toe, add contour to really define someone's face the warm up their skin tones And then just by dialing your shutter speed up and down you can go from light skies like this all the way to dark skies Like I'm gonna show you here in a second. So here we go 1/30 of a second. Nothing else is gonna change on my camera except for my shutter speed. I'm gonna speed it back up again. We're gonna get this photo right here and again I'm back upto 1 250th of a second And now I see all the details in my sky I see a nice, beautiful color saturation My work I love color, you know Lindsay's got flair. We've got she Everyone has a thing that defines them. One of the things that defines my style is a photographer is energetic, vivid colors. So for me, I want the sky most of the time But if you're not your jam, maybe you just want to go with the overexposed look like Lindsey prefers. You can do both of them really quickly with exposure, compensation or with shutter speed when you're controlling with manual camera settings, so think that's there you go. There's are side by side comparison, so those were taken a fraction of a second apart from each other. One on the left is 1/30 of a second. The one on the right is 1 250th of a second. All of the things remain constant. You have two entirely different stylistic photos, so it's really cool, because once you get this all dialed in and with a little bit of practice, I mean, you can run out there and really get a variety of looks in the five or 10 minutes that we have right before sunset. So it's really cool. Been able to walk away with different variations, more things to show your client more things to possibly print and sell or put on your website. So perfect. All right, so I go ahead and in the same scene, I see what he just got. But I look behind him and the clouds are becoming bright pink and purple beautiful. And so now my technique won't work anymore because here's the problem since before she was backlit. But what I like now is the purple, the other direction. She won't be back. What should be front lit and there's not enough light. So this is This is what I end up getting if I use my normal approach. So we're facing the opposite direction now the sun would be in front of her, and this is what I get if I correctly exposed her metering off of her face because she's correctly lit. But there's no sky in the whole point for me. Is that the purple clouds? And so my exposure compensation will not help May. In this instance, there's nothing Aiken dio by under exposed for the clouds. I lose her by correctly exposed for her. I lose the cloud, so I'm like, OK, I love my natural light, but Slash is gonna win in this instance, Pretty, My photos were totally like I got to do it, but I have to do it my way because when I was watching, the color was changing every a couple of seconds. It was fast. The color would pop up and it was going to be gone. So for me, I don't want to have my camera on manual and try to find the right exposure. And I didn't want to have to put my flash and manual and have to guess what the correct exposure is. So what I did is say OK. What I'm going to do is make those clouds look good. So before when I took my aperture priority and exposure compensation, I dialed it to the right, which lit everything up that made her look brighter. In this instance, I'm doing the opposite. Gonna dial It's the left to make everything darker because I want to see those clouds. So when I do so take my shutter speed from 30th of a second. Okay, looking better toe. 1 2/100 of a second so I can see some of that purple. But now I have toe like her since I don't feel as comfortable. Thank you. Um, since I don't feel comfortable with manual, so I don't have toe figure it out. And guess I used the system that I usually use, which is the 600 Artie's with the radio transmitter, and so what it allows you to dio when you turn it on. I already already have it set up so that my flashes channel A and it's talking Channel A right here. What I'm clicking on is the ability to adjust my flash compensation. So right now I have it reading Ah, third of a stop brighter. I can dial it down to minus the third, minus 2/3. What end up doing is just let me just put it on correctly exposed no compensation zero and take a shot. This is what I ended up getting. So I under exposed my background using aperture priority and exposure compensation dialed down. And then I just put the flash with no compensation. Let's just see what it looks like. And so the camera's pretty darn smart because since I'm not trying to compensate by dialing the flash down more suddenly, I just want her to be correctly lit. It correctly lights her, And so I ended up doing just let me a little bit less, couldn't want to look to flashed. Um, this is a look that I was going for If you wanted her to be brighter. You dial it up. If you want it to be darker, you dial it down. And then I asked Eric toe add a reflector in maybe to fill in a little bit of the shadows. I think this is the shot that I prefer, though, and you guys will be able to make that decision in a second. And just, you know, that color in the sky there. I think I had that color from maybe a minute. And so for me personally, for the way that I works, they only had one minute to get that color. I was going to use what I'm comfortable with. Say, make background darker, put the flash without compensation shoot, because that's what I'm comfortable with. And so he had a reflector. It filled in a little bit. So same effect. His was backlit. Mine was just trying to get the color of the sky. But fundamentally, we're doing the same thing. I did it tco t t l and he did it manual. Same approach, same technique, different approaches. So I think we're both were both white balance flash, right, because that was one. Yeah, the white balance flash gives you pretty much a white light kind of, ah, starting point for your white balance. That's why her model skin tones look perfect there. And it also allows those natural colors to the background cloud. Because if she had done a different white balance, it would have changed the color of those clouds as well as the color of the skin. And that's why you were like, Oh, crap here, Eric, help me with this. Let's go. And I was like, the selector lights turn around and I mean, the clouds were incredible that day, so we don't get the backlit how we quite wanted, but I walked away with two killer photos.
Class Materials
Bonus Materials with Purchase
Ratings and Reviews
Jessica Garner
Student Work
Related Classes
Lighting