Lessons
Class Introduction
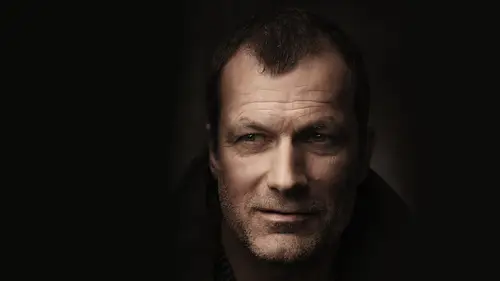
12:53 2What Is Low-Key Lighting?
11:11 3Bringing in the Subject
05:01 4Lighting Patterns
19:21 5Lighting Patterns: Broad vs. Short
09:25 6Giving Your Light a Job
12:07 7How to Create Separation
06:58 8Shoot: Putting it All Together
08:34Developing the Raw for Low-Key
12:40 10Enhance with Local Adjustments in Lightroom
12:31 11Creating Different Interpretations in Lightroom
16:19 12Clean Up Image in Photoshop
09:11 13Dodge and Burn in Photoshop
11:00 14Liquify in Photoshop
09:40 15Adjust Color and Contrast in Photoshop
11:17Lesson Info
Clean Up Image in Photoshop
Where do you wanna bring this? In a photo shop, Right click. Edit in edit in photo shop is my preferred way to go about it. And this is just the default photography workspace, and we're looking pretty good. I I tend to go to Ah, dark, a dark grey on here. That's the interface that I like when you are shooting a lot of dark imagery. It's helpful, Teoh See it on a dark background. Same goes for the way you present your images on the website. If you have lots of dark imagery, don't put it on a white background because it blows out the contrast to the eyes and it makes it very difficult to see what you're looking at. Whereas if I were to put this on a light background, obviously just it looks different. So gonna. So if we go to white, this looks very different to the I, then this right? And so it just helps When you're when you're working on that format, don't shoot yourself in the foot visually with people who are looking at your work. If you have lots of light images, use a white backgro...
und. If you have lots of dark images. Use a dark background, and it'll help with the presentation a lot. All right, so, uh, we're gonna be doing a little bit of clean up. First. I'm going to kind of show you basically how to approach this from a relatively speedy perspective. So again, we're bringing in a photo shop. We're gonna talk about this in the speeding up photo shop class a little bit, but approach the images non destructively as possible. Photoshopped has this great ability to basically work like a stackable set of transparencies where the top most layer is visible and if at all possible, avoid duplicating unnecessary information. So, back, back in the day, we used Teoh duplicate the background layer for cleanup. I personally feel that this is unnecessary and it's unnecessary because most of what photo shop tools are now capable of doing the healing tool spot healing tool clone stamp is you can work on a blank layer with them. And if you work in a blank layer with them, you don't get in the background layer. And if you're not duplicating the background later, you're saving yourself a lot of space. A lot of space for example, this image right here is 300 Meg. If I duplicate it, it goes to 585. Just by duplicating the background layer. That's big. If I'm it to 92 I create a new blank layer, the size didn't change. And so if you can work now destructively, it's gonna make your file smaller. And it's gonna make photo shop less weighted down by how you how you're working. My files are huge. When I'm working on a big, complicated image. It's not unusual when you're shooting 50 something megapixel. Camera 10 15 Gigs for an Image. By the time it's all edited and finished, it's a hog for the system, so anywhere I can save. I can save space anywhere. I can save speed. It's gonna be very helpful to me. And so I'm a big fan of when I'm doing my cleanup work. I do it on a new blank layer instead of a duplicated background layer. It's a little bit on necessary that usedto it used to be necessary. Um, healing tool clone stamp usedto have to do them on a layer you don't anymore. And so just create a new background there now. The only that's really slightly different is the patch tool, which you can use not destructively, but it's not. Not the same, it's not. Not great, but I'm not a big user of the patch tool anyway. Personally, um, there is one other thing that I like to use that does require me to work on a pixel base layer, and I'm usually pretty confident in this step doing it on the background layer. Um, it's very slight. If I run into an instance where I've got you can kind of see this tiny sliver of a flag over on the left hand side. Right? See that right there? What I what I like to do when you have to do this on the on a pixel based life so I could duplicate the background. But I generally know that I'm not ever going toe to fix. This is what I'll do is I'll make a selection and I go to my filled dialogue, which you can get to buy going to shift delete, and I fill with content aware and what this does. This is kind of like the patch tool, but it just kind of guesses the information based on a selection, and it usually does a pretty good job. I mean, it's not the most amazing thing in the world, so sometimes you may have to come in and fix it. But generally speaking, it's it's pretty good. So so you right now you can see that it set for current layer. I would want to change this to other current and below or all layers. Same with the spot healing sample, all layers and the regular healing current and below. So I use this all the time non destructively, so I can use on a blank layer. Okay, so what I'll do here on this blank layer? It's just my little sample point, and I just kind of eat it into it, and that will fix any weird issues that I have. You may also find that you could just take a little selection on an instance like this because there's not really a huge amount of stuff happening over there. I just make a little marquee selection, hit command T for free transform, and you just go and dragged that right over. And that will also help you hide any weird issues so if you look at the absolute before, it was kind of here, and so I just kind of transformed it over and stretch the side without touching the face. And you could just stretch the sides a little bit, fix little background elements pretty easily. I actually don't mind the, uh, the little filling over there, So I'm gonna leave it now on this step. I'm gonna also come back in, and I'm going to get anything that I want to clean up. So, like, I've got, like, some little little stray hairs I'm gonna come through infects and what I'm using right here is the spot healing tool. Because, generally speaking, it's fine. It's pretty good. It's good for speed. That's a button. And I'm just going to kind of work through and fix some of these little areas in terms of what I want to keep What I don't some little things that are distracting, like these little one off hairs that just kind of stick off. I'm gonna I'm gonna get rid of those. Generally speaking, I'm gonna I'm gonna keep most of this. I like I like the character. I'm just gonna get some some little little distractions taking care of and this step maybe massive for you. It may be very, very quick. It depends on the subject matter. It depends what you are working to achieve, but usually it's not super crazy. Complicated for May. You may find that you want to lighten up. Some of these things are or not. It's It's really a matter of personal, personal taste. I'm just gonna kind of work through here and clean up a few different elements, not too much. So here's a button that you can kind of see part of. I don't love it. So I'm just gonna remove the highlights, and I think it'll be less distracting, and I think that looks a little bit better. Okay, so this is looking pretty good. Um, pretty happy with it in terms of the cleanup again, Not to too much. A little bit right There is. There is one little thing, but I do tend to do from time to time. I like to make sure that I got a catch light in both eyes, and you just happen to be kind of making that that little a motive expression, and it kind of blocked the light from hitting this I So what I'm going to dio is grab the regular healing tool, not the spot healing the regular. I'm going to sample this catch light. I'm gonna bring it right over. Yeah, and that just adds a little bit of sparkle to both eyes. And I like the effect of that. So I'm usually a big proponent of making sure I get the catch light in both eyes and I just copy it over. The healing to was a great, easy way to do that. Some people like to do the clone stamp. Some people like to copy and paste. This is like super easy just and it works. Brings it over quite nicely.
Ratings and Reviews
Brenda Pollock Smith
Thank you Chris Knight and Creative Live for another excellent class. I appreciate both the actual shooting and post instruction. Right before your eyes you will see how simple applications of light, shadow combined with post production can create gorgeous, dark images. Chris has a great relaxed manner, easy to follow while offering a ton of tips and tricks. I can hardly wait to try my hand at producing some hauntingly beautiful images like Chris.
a Creativelive Student
I don't have a ton of time to spare and largely catch segments of courses on short breaks. One of the things i like best about this course Chris's ability to communicate so effectively and efficiently. He covers a lot of ground in not a lot of time, but the course doesn't feel at all rushed. He's just a good speaker/instructor. One of the other reviewers mentioned that this instructor brings no ego to the stage, and I have to agree. He's a confident and competent instructor without being obnoxious. Rock solid course with terrific instruction. I will definitely check out more of Knight's classes.
a Creativelive Student
Truly amazing class. Chris taught me a few things, as well as providing a structure to organize (previously) disparate facts I already knew. Background is important: I have 40+ years of experience in photography, and I love (and shoot) Low Key Portraiture. I took Chris' class to keep current. Most of the information wasn't new to me, but I enjoyed Chris' tight, concise presentation and his organized approach to this subject. There is value to this. But I also learned a couple of really useful tricks from this class; things that I'll use. What's the value of that? Hard to know, but easily many, many times the cost of this exciting class. Well done, Chris! CL, please: more Chris Knight!!!
Student Work
Related Classes
Portrait Photography