Hollow Fabricated Ring: Constructing the Ring Part 2
Lesson 13 from: Explorations in Metalsmithing: Hollow FabricationMegan Auman
Hollow Fabricated Ring: Constructing the Ring Part 2
Lesson 13 from: Explorations in Metalsmithing: Hollow FabricationMegan Auman
Lesson Info
13. Hollow Fabricated Ring: Constructing the Ring Part 2
Lessons
Prerequisite #1: Basic Metalsmithing Tools
18:08 2Prerequisite #2: Tools for Soldering
14:21 3Prerequisite #3: Soldering Basics
21:14 4Class Introduction
07:42 5Design Considerations: Making Paper Models and Thinking Three Dimensionally
14:40 6Creating Non-Soldered Forms: Bending and Folding
18:38 7Creating Non-Soldered Forms: Dapping and Sinking
17:19 8Pendant Preparation & Soldering Basic Forms
22:56Creating a Soldered Cone
06:29 10Hollow Fabricated Ring: Sizing and Making the Internal Ring Band
09:05 11Hollow Fabricated Ring: Making the External Shape
37:59 12Hollow Fabricated Ring: Constructing the Ring Part 1
22:05 13Hollow Fabricated Ring: Constructing the Ring Part 2
38:06 14Hollow Fabricated Ring: Finishing the Ring
04:18 15Variations on the Hollow Fabricated Ring
05:02 16Building a Locket
08:06 17Making a Tube Rivet Hinge
11:45 18Creating a Hinge & Clasp from Tubing: Part 1
14:26 19Creating a Hinge & Clasp from Tubing: Part 2
21:32 20Adding a Pin Back to a Hollow Fab Form
14:32 21Finishing Your Hollow Fabricated Jewelry
07:59 22Turning Your Hollow Fab Projects into a Cohesive Jewelry Line
07:54Lesson Info
Hollow Fabricated Ring: Constructing the Ring Part 2
We're actually going to solder our inner band in here as well. Now some people at this point would probably cut off this excess material but I like to leave it on through this next step 'cause it gives me a place to wrap the binding wire if I need to. So just like we did with our outer wall, I took my inner wall here. Went ahead and just gave that a little touch with my sand paper so that it's clean and I'm also going to go in here to the inside of this and even though I just pulled this out of the pickle and it's pretty nice and clean, I'm just gonna give this a little sanding in here as well. So that's nice and clean and let's get our sand paper out of our way so we don't get that covered in flex. So just like we did with the last step I'm gonna go ahead, put a little flex in here on the inside and so that I don't forget, 'cause this is a little bit harder. The inner band is a little bit trickier because, it's a little bit of a tighter space to work in so I'm gonna flex that before I...
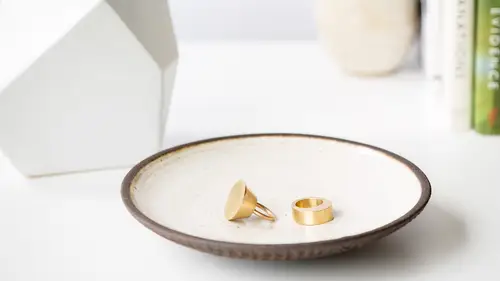
put it down. And then I'm gonna go ahead and I am gonna give this a little bit of binding wire. As I mentioned before the reason that a lot of people like to do the inner band first is just because obviously it's easier to binding wire that alone than when it's kind of in the middle of this but I think you can still make it work and I just like putting that big band on when I can get all of my solder there for the inside of the big ring or outer wall and I can put all my solder in there where I know I don't have to clean it up and it's a little bit easier to place. So I'm just gonna go ahead, wrap my binding wire and get that kind of nice and tight. I accidentally pinched this wall a little bit here when I did that. I'm not super worried about that, I'll come back and, ideally it's not perfect but I'll come back in and just straighten that up once we're out of the pickle again. So I just said before I'm gonna tighten my binding wire. Make sure that stays in place. And I think in this case, I'm kind of just really at this point using my binding wire to keep this from sliding all over the place so I might just stick with one piece of binding wire here and not worry about, if I was really concerned about keeping this perfectly placed, I might add a second piece but I think we'll be okay. Now this is where our solder placement gets a little bit trickier because in a perfect world, where I would love to put my solder is on the outside of my inner ring so in between my inner ring and my outer ring and again the reason for that is, if I have a lot of excess solder in there, I never have to clean that up. But let's be realistic about right in here, I'm probably never gonna get in there to actually place my solder even though on this camera screen, it looks giant, like there's so much space, it's definitely not a lot of space when I'm in here with my tweezers so, I just want to push my binding wire down a little bit more, so that it sticks. So what I do is anywhere that I actually can get my solder placed, I'm gonna go ahead and put it in the ideal location and where I can, I'm just gonna put it on the inside of the band and make do. And so I'm gonna go ahead with this second step and still use medium solder. Because I don't, even if I reflow this outer wall, it's fine, it's not gonna go anywhere. I'm also going to just use my finger and soak up a little bit, there is a lot of flex and a lot of liquid happening in there. So I'm just gonna go ahead and place our solder around here. Now I'm doing that, I'm happy to answer more questions if you have any that have come up. Yeah just a quick one Megan, do you ever wear any leather gloves or any types of those things when you're doing any of this stuff whether it be patinas or Texan or. I generally don't, I'm just really good about washing my hands right away, I'm afraid I wash my hands constantly, not as if say you were a nurse but I wash my hands pretty often so I don't, if it makes you feel better you certainly could wear rubber gloves, it's just one of those that I like to be able to touch things and also there is that slight concern where if you're wearing rubber gloves and you accidentally touch something hot, now you're like melting rubber gloves to your skin which isn't really fun, so that's another reason that I usually, I know it's kind of like, well now you just touched your bare skin to something hot, that's not ideal either. No, it's why we try not to touch hot things but sometimes it happens and so, that's another reason that I usually don't. I don't like to introduce flammable stuff when I can avoid it. So you can see here how, about this point I'm gonna have to switch and start placing my solder. So I'll just make sure we've got enough solder in here. So this is kind of a one two punch, you'll do the outside. So the outside is done already so now I'm doing the inside. When we do the second half of our wall we'll be able to do this all in one step by the next one we want to do it. So we've done the outside now we're just getting that inside band in. And but on the inside band, you will have some solder on the outside and some on the inside. Yes, so in a perfect world I would have all of the solder on the outside, I would have it all in here but I just can't get in there with my tweezers so that's why I'm putting it on the inside of the band. The nice thing about most of this is that, because so much of this material is gonna get cut away in a few seconds we can really, even if there's a little excess solder, we'll have to clean it up but it's not gonna be the end of the world. Alright so now we can go ahead if we want to turn off our lights, actually I'm just gonna move some solder back in place. I'm a little bit concerned 'cause there's a lot of flex happening here so hopefully we don't totally send our solder flying. So we'll just kinda try to dry that. And patience is the key there. Patience is definitely the key here, I'm just trying to keep, my flex is definitely pretty liquidy right now and so I'm just trying to get that to kind of dry without necessarily sending solder pieces flying everywhere. And again this is literally what I would do in my own studio so I have become much more impatient as I've gotten older, I don't have that, maybe it's because I run my own business instead of having the leisure of time that is graduate school and so now I wouldn't set it up and by the way I would do exactly what we're doing, just kinda keep an eye on it, make sure that there is enough solder still where I need it to be, a little bit of poison is happening there, for whatever reason I think it's just where I dipped the brush in, I just ended up getting my flex which is really liquid. So there is just a lot of water in there and it really just wants to bubble so we just want to make sure, see though it goes, really wants to bubble. Hopefully if we give it a second to dry it will at least bubble and kinda stay in place. Alright, now I think we're getting to a point where we can get in there. So this is one of those tricky ones where it's kind of like you just get in there where you can and then kinda move the solder around so obviously we can't quite get on the inside and outside like we did with other things and I'm kinda focusing my heat where I need that flex to stop bubbling there for me and again I've lost some, I've had some solder move so I'll just kinda come in there, push it back in place. Hopefully we can get this guy to go. There I can start to see it, there we go and I come in there now try to get that other side and then I have to heat that up from the outside a little bit. So it looks like I got everything all the way around, that looks pretty good. So you can see how it's really just this idea of, responding to our, responding to what's happening, moving the flame, if you see okay this area has solder, this area hasn't, just kinda moving around and getting yourself to where you need to be. You guys can go ahead and turn up the lights. I'm gonna throw this in the pickle for a hot minute but before I do so that we can go ahead and prep for our next step, I'm just gonna really quickly, obviously we need to make a second sheet so I'm gonna go ahead and just give myself a little measurement here. So that way while this is in the pickle, we can go ahead and cut out that second sheet so we're gonna be, that's really warm, we're gonna turn that down to warm instead of low. So that is one of those things where you always wanna think about if I have something in the pickle where I'm waiting, what else can I be doing. So in this case we're gonna get our second sheet prepped and ready. Even though that's actually about two steps ahead of where we are, it's at least nice to know that while our piece is in the pickle, we're doing something a little bit productive. So I'm just gonna come in here and again, doesn't have to be pretty, just has to be done. Are there other questions that anyone has while we're working, even if they're how do I do that questions. We actually have a few people asking about cleanup. Yeah. And sort of your best practices for cleanup, whether you have a Shop-Vac, what type of cloth you use to wipe off your stuff after they come out of the pickle. So um, most of the time, so to wipe stuff off the pickle when I take stuff out of the pickle, you do want to rinse it in water so either I just, here I've been dunking it in our crunch bowl and I might just run it under the sink and then I just dry it off either with a rag or paper towels, anything as long as you've earmarked it specifically for your studio and not something that you're gonna then use in the kitchen for food. So that's the first thing, in terms of cleaning my work surface like as things start to get messy, I generally find that you're usually okay, I do have a Shop-Vac in my studio but most of the time I just use a dust pan and a brush and then you can take a sponge and wipe down your work surface again keep that earmarked separate from the things that you're using to say wash the dishes but basically your normal household cleaning stuff works just fine, I usually just like to keep a separate set for my studio. Great thank you. Perfect, and while we're waiting for that in the pickle, I'm also gonna go ahead and just clean the surface of this guy, it's really gunky, looks like probably because I was using it to cut out some other designs so there's a little bit of a lot bit of rubber cement on it honestly so wanna really kinda clean that really well. And then I think we should be able to pop our guy out of the pickle, we'll find out in a second. Alright so let's check our pickle here. Like I said I kept that pretty warm on purpose. Yeah so that will be, that's clean enough that we can move forward with and obviously you can see our brass is looking pretty coppery here. That's okay we're gonna deal with that at the very end, there's no point in worrying about it until we get there. So I'm just gonna go ahead, dry this off a little bit. So now at this point, what we need to do, is first I'm gonna fix that little wall that I pinched, I might not be able to actually get my pliers in there, so I'm gonna use my tweezers. So that spot where I bent the wall with my binding wire I'm just gonna push that back out. So that looks pretty good. So now what we need to do before we put the second side on is we actually have to trim off this excess material because we won't be able to deal with that once the other side is on. So your goal here, someone asked me at lunch, they were like I'm really nervous about the amount of filing that I think is gonna have to happen to get this and the truth is that if you have enough control with your saw you can really avoid a lot of filing. So as you can see, what we're about to do and this is one of those where you should really take a minute to actually get this nice and dry because if you don't what you're gonna see start to happen for us here and of course I am not that patient, so we're just gonna plow ahead is that we get a little bit of kind of like gunk built up in our edges while we're working, it's not the end of the world, it's more so that it hinders your ability to see because all the dust from cutting is going to want to get stuck on your wet metal but we're gonna push forward. So our goal here is really to cut as close to this edge as possible without actually cutting into the wall itself and so when we do that, it's going to make our lives so much easier because we should have very very little filing to do and I am obviously going to try to do this kind of, find that balance of cutting it quickly because everyone's watching me cut it but also trying to cut it well so that I don't have a ton of cleanup so just gonna keep following it on here. And Megan as much as possible are you trying to stay completely at a 90 degree angle. Yes. Of that wall that you're cutting against. Yes, so I'm trying to keep my saw blade as vertical as possible 'cause I don't want to cut into my wall there, but I want to cut as close to it as I possibly can. So I'm just gonna keep working my way around here. You guys have more questions while I'm cutting this, you are more than welcome to ask. So Rachel Aplin had wanted to know about using brass for rings and the type of coating that you might use as far as to avoid any discoloration. Yeah I mean so the thing with brass and bronze and copper is that you're never going to 100% necessarily protect it from the skin because any coating that you put on there could potentially wear off over time. I like the Sculpt Nouveau lacquer product, so the Sculpt Nouveau spray, they also make a paint on lacquer, I think that's pretty decent, really any kind of paintable lacquer is probably your best bet because it's gonna have a slightly longer lifespan than anything else. And honestly in the pinch for something like the, an inner ring band, even a nice coat of clear nail polish 'cause it's kinda a really thick lacquer can actually help you out there. Yeah it's one of those challenges, especially now that brass has become such a popular material for jewelry where it's really not ideal for jewelry because it does tarnish on the skin and there's nothing you can do about it and it actually doesn't, it used to be like oh it turned my finger green, it's cheap, it's poorly made, it actually has nothing to do with being cheap and poorly made and everything to do with that's what brass does so just one of those that you kind of have to protect it. So we also need to cut out, we've got our exterior shape cut out here and we also need to now cut out our interior shape so in order to that, we're just going to center punch here really quickly. So find my center punch. And it doesn't matter where you put this, I try to stay close to the edge but I'm just gonna go ahead and center punch this guy here so that I can drill and I've already got a drill bit pre-loaded into my flag shaft, this is really hard to see without completely leaning over it. Alright so now just like we do when we cut any other kind of center piece, I'm gonna call Michelle up here so that she can lean on my table for me. So I'm gonna thread this on here, so all the same rules of cutting out the center apply if I can get this in there perfect, alright. So I'm just gonna thread this in, Michelle's gonna lean on my table, get that in all nice and tight, perfect, thank you. And now just like I did on the outside, I'm gonna go ahead and cut out this interior shape. That shape that you're cutting out, is that a nicely reusable disk that you would use for something else potentially or no. Not necessarily, I didn't drill the hole very close to the edge and I would say in this case because it's brass and it's not that expensive and it's been soldered a bunch of times it actually has solder on it, I wouldn't worry about reusing it. If it were silver, you could think about cutting something else smaller out of it in the future but in something like brass, I wouldn't worry about it and even with silver truthfully, I'd probably just scrap it. So you can see here this is where the fact that it's still a little wet. Now I've got all of this brass dust clumping up in here and it may be a little hard to see what I'm doing. So what you're doing is staying as vertical as possible. I'm staying as vertical as possible other than the fact that I can't actually see what's happening. So that's my goal, is to stay as vertical as I can. Alright. So now from one side we actually have something that looks pretty much like half a ring. And just as a little sidebar here, if you are into things like resin, you can use this technique to make forms that you could fill with resin, you could even do that in this ring right, in that case I wouldn't have put the little air escape holes in, obviously those would cause problems and they wouldn't need them if we were making this frame. But you can use this technique to literally make open frames and fill them with things if you want and do not ask me to teach you resin class I won't do it because I am not a fan of working with it personally but that is something you can put in there. Alright so there are two schools of thought at this point. One is don't worry about filing this, just go ahead and get our other side deck on. I'm gonna do the file cleanup on this side for two reasons, one, I just think it makes it easier to cut out the second side if the first side is nicely filed and cleaned up and two, this way if I show you this kind of filing process now then we can solder the second deck on and you don't have to sit here and watch me cut the other half out because you'll understand where we've gone from here. Right, make sense. So what I'm gonna do is my goal here is I want to take off all of this lip, I don't want to feel any of this. So if I got an outside shape like this, I'm gonna come in, with my flat file or flat needle file and I'm just gonna file this. And so you'll actually get to a point where you're starting to, you'll feel and you'll start to see that you're actually getting on to the wall itself. So you can go ahead and do that the whole way around on the outside. And this is the case where if you've got a fairly aggressive file, this can go pretty quick but you can certainly do this with the flex shaft as well just know especially if you're working with a thinner gauge metal like we did in this case, you want to be careful because the flex shaft is going to be much more aggressive than your file and you don't want to accidentally take off too much material because you can't put it back. So it's up to you whether you want to use like a rotary tool like the flex shaft or a Dremel or if you want to just file it but you can see here because I cut this pretty close, I'm making pretty short work on this. We're moving around here pretty fast and I'm really taking this off so, you can do that. And then the same thing with our interior shape here. So I'm gonna grab a new file that's half round, let's see, somewhere in here, we had one. It may have gotten lost, no there it is. They all kinda look the same when you're under the light. And so because this is a rounded shape I'm gonna take the half round in here and now I'm gonna file this off. On the inside as well. So my goal is to get rid of this whole lip so that as I feel it, if I put my finger here I don't feel any lip, it feels nice and smooth. And as I said you don't necessarily have to do this all in a step before you put the second half on. I'm just trying to get us a little bit further and show you guys the process here of what's happening. Now in doing this sort of really aggressive filing, I'm gonna end up with a little bit of a bur on here, that's fine we can take that off later with our sand paper. So for now I'm just keeping this, I'm not doing any kind of rounding, I'm keeping this totally parallel to the surface, I'm just trying to take off any of the lip where I didn't quite saw close enough, that make sense. Alright, perfect so, I won't quite do the whole thing so let's go ahead and now prep this to put our second half on here and this is the spot where it actually gets easier because now we can do this in all one step. So the first thing and really the longest part of this next half of the process is that I need to get this whole thing nice and flat. This is where you want to really make sure that you've measured when you cut your strips. When I actually built the sample ring, somehow I ended up with my inner band about 16th of an inch taller than my outer band. There is a lot of filing that had to happen to make that fit on the second side. So we have one or two little spots there yet that aren't going, but luckily we were pretty close in terms of our shape so, you also find out with this pretty quickly if you've got funky things happening on your table 'cause they all catch. Alright so that looks really good and again, what's kinda nice about what's happening here is because right now it's pretty coppery from our pickle, I can see where this has worked because I can see now this nice clean line of the brass where it's all cleaned up. So now we can go ahead and we'll flex the bottom of our bottom sheet. And just, because it will make my life easier, I'm gonna flex this before I put it down. Plus that way I can't forget to put my binding wire on, get excited and start putting my flex on like I did before or start putting my solder on without actually flexing it like I did before. Alright, so we will set this guy down here on our sheet. And again I'm gonna binding wire this, the placement on a sheet isn't critical but occasionally and especially if you're doing a bigger form like a bracelet or if you've just kinda gotten a little over zealous about how big you've cut this form, there is a chance that that bottom sheet will want to warp while you're soldering. And so binding wire is gonna help prevent that. It's gonna keep things in place. And if that happens, like sometimes it just happens, it happened to me when I was doing some of the locket prep work, you just put it in the pickle, you let everything get clean and you try again, it's not the end of the world so I'm gonna binding wire this guy down, again give some extra little kinks in there, it's what's really gonna suck it in place. Cut off my excess and I am gonna binding wire both sides of this just so it can't really go anywhere. So I'll take another piece of binding wire. And now at this point I am going to drop down and use some easy solder for this final joint just because that way I don't have to worry about reflowing anything else so that will kinda make life nice and easy with our easy solder. So I'm gonna go ahead and tighten that. Alright so I've got that guy all kinda sucked down in place, now the unfortunate part about this side is we can't hide our solder sand, we can't get back into the interior anymore so we are unfortunately stuck placing our solder on the outside, so this is the point where you should fight every instinct that I have and try not to put too much solder on here. And so I'm gonna put solder on both our outer wall and our inner wall because we have to solder both of those and unfortunately for whatever reason, I could not find, I thought I had easy chip solder but apparently I didn't and so, I actually had to use some sheet solder and so I had to cut that up myself and so, so sheet solder just comes in little sheets and then you do your own cutting and so that's actually why if you're looking at these thinking like these solder pieces seem bigger, it's because they are and that's not intentional it's because it's really hard to cut solder as small as the chip solder that it comes in, I tried my best but it didn't happen. So, I'm probably gonna have a lot of solder cleanup to do here, but it's not the end of the world. That's what files are for. You can tell that I don't actually have an annealing pan, that's on a Lazy Susan in my studio because my dad has to slide to turn the piece itself when I can just rotate the Lazy Susan. Just to (mumbles) again. Absolutely. When you're doing sawing and filing do you ever find it necessary to use a dust mask. I don't but if it's something that you are concerned about you certainly could, actually where I would probably be more inclined to want to wear a dust mask is where, when you're doing a lot of sanding because you're kicking up even finer particles with sanding and if you look at sand paper, often sand paper will have on the back on it, the recommended PPE, which is your personal protective equipment. A lot of times sand paper will recommend that you in fact where a dust mask so, and that's the biggest point of concern. I might also want to just point out from a safety standpoint, I know some people may think, oh well if I'm soldering and I don't have ventilation or I don't have good airflow, you might have this instinct to wanna wear a dust mask while you're soldering, but most dust masks are designed for dust not vapor so if you're really concerned for soldering and you don't have any kind of ventilation system like we have or you just want to be overly cautious, you should get a respirator for that, not a dust mask. Cool. Awesome, any other questions from the internet. Yeah from Bicoco. Go for it. Wanting to know is there any concern that you are trapping flex inside the hollow part of the ring. So there isn't necessarily concern that you're trapping flex because when we put that in the pickle, the pickle is going to get into the hollow part of the ring and clean up any excess flex that's in there. What we do actually have to be concerned about is the second step when we pickle so what you actually wanna be concerned about is getting pickle trapped in there and we're gonna talk about how to neutralize that and take care of that in a little bit when we talk about cleanup. Great, thank you. Sure, other questions from anyone while I'm placing my solder in here. From an equipment standpoint everything that we've been really talking about and what you're showing is usable and doable to create these hollow fabricated pieces of jewelry correct? Yes absolutely, so what I really love about this process is even though it's a little bit technical and it does require a torch, we haven't been using any particularly expensive or crazy tools or pieces of equipment. We've used our jeweler saw, we've used maybe some pliers, we used our ring mandrel and a rawhide mallet and that's pretty much it other than our torch so this is actually really accessible in terms of tools. Great, thank you. Hey Megan. Yeah. I can really, it is a great angle so I can really see the solder. Yeah. Is that too much? It probably is a smidge because they're big pieces but I'm not so worried about it, I'm not afraid of filing. I'm not afraid of it either but it's just the first time that I've been really able, been able to see it, so I was just wondering trying to get a sense of what's right and what's not. This is actually okay and what I've done is I've actually spaced this a little bit further apart than when I even did the chip solder because they are slightly bigger pieces. So I gave myself a little bit more room. It's probably gonna be a little, a little bit messy but it's not like there's crazy amounts of solder in here it's pretty close to where you want to be. Alright, we can turn the lights down. Flammable things out of the way. Always important, yeah it's really always important to do that little visual check because stuff accumulates in, especially if you have one workspace like I said, I have two workspaces in my studio, I solder in a completely different space than where I do all of my prep work and so it's easy I just don't carry anything flammable in there. But if you're working in one space like we are here, you always just want to do that visual check before you turn on the torch. No paper towels, no rags, no pieces of sand paper, no notebooks, make sure it's all out of there. Most of the time, if you're gonna have problems with a torch where you set something on fire it's because you weren't paying attention to what was in your workspace, not because the torch itself was inherently dangerous. So I am just, and of course it also helps that we have a bowl of water sitting here so if we really had to put a fire out we could do that. I remember once, I was in, I came back to visit my undergrad studio and these seniors were working and it was right before finals and everyone was stressed out and someone lit a paper towel on fire in the soldering area and they were all so stressed out that they just stood there and they're like what do we do, and I just walked over and dumped them a cup of water and I said guys we're fine. But so you know, just do that visual sweep of what's in your soldering area, make sure things are okay so, my outside is kinda drying nicely and my inside, we're starting to get a little bit of like crazy popping in there. So I just want to put some solder back to where it needs to be. So and again, you can move solder pieces, you can always stop, if you don't like, if you really hate your setup, just stop, take the binding wire off, throw it in the pickle, start again. There is no kind of, need to push something if it feels like it's not setup right. All of this, if it takes you two times to get the walls on, it takes you two times to get the walls on. If it takes you five times to get the walls on, that's okay too. It's okay if stuff doesn't go right, you can always fix it. So now I'm just starting to turn this up as my flex is drying and so I can start to see there we go, we're starting to get there, maybe, like (mumbles) seeing one I think. There we go. I was like we gotta be getting close so you can see okay there's a little, a lot, kind of a lot of solder happening in there. But that said, so it's really important that we actually make sure we get this interior piece here oh missed a section. So that said, what you'll notice is that the way I'm kind of applying the heat and the way my solder is flowing, there is a lot of excess solder happening, most of it, I think I got everything in there. Most of it is happening on that flange that's gonna get cut off anyway. So well really, because I'm just keeping my heat concentrated down there I think I have that whole middle piece, if not, we can always check it later. But so because I was keeping a lot of my heat, because I was keeping my flame kind of out here, the solder wanted to just sort of flow out to that flange and so I can always, that's gonna get trimmed off, there's actually not a lot creeping up my walls. So that was why I was kinda keeping my torch low, if I really kept my torch on the top, all that excess solder would have flown out my walls and then I would have had a ton of filing but I really pulled it out and so that means that I don't really have to clean it all up because when I cut it out, it's gonna be good to go. Alright, we can turn the lights back up. So I'm gonna take our binding wire off here and sometimes like with this middle piece I'm really not gonna know if all my solder flowed until I can get this binding wire off and have a really good look at it. Oh yeah that looks really good in there, I don't see any gaps happening and again just a reminder, solder cannot fill gaps. So part of the reason there is no gaps in here is because there were no gaps before we started. So solder can't fill those. Alright, so I'm gonna go ahead and throw that in our pickle and then we're gonna let that go. So as far as workflow, from this point, what we would end up doing is we would take that out, we would cut out the first, the second side, just like we did the first side and then continue to file and cleanup so let's just talk a little bit more about our cleanup process. So what I would do in terms of filing is exactly what I was doing there, I would cut as close as possible and then get all of that filed out so it's nice and smooth. So if we look out our finished example again, so you can see here there's no lip, even though there's technically a solder line, I really can't even see that. I filed all of that off so that it's nice and clean.
Class Materials
Bonus Materials
Bonus Materials with Purchase
Ratings and Reviews
user-d7f7ae
After watching Megan solder in this class, I felt like it was something I could take on. There's a lot of soldering in this class! But there's also a lot you can do without soldering that's covered. I have a better understanding of how jewelry is made from this class. I'm looking at things that I own and thinking that I now know how to recreate them!
Silvia Rossi
I liked this course, Megan explains a lot of things about techniques and materials and it's simple follow all the operations to create these types of rings. I think I'd purchase other classes of her.