Making Different Shaped Links by Wrapping and Bending
Lesson 12 from: Explorations in Metalsmithing: Creative Chain MakingMegan Auman
Making Different Shaped Links by Wrapping and Bending
Lesson 12 from: Explorations in Metalsmithing: Creative Chain MakingMegan Auman
Lesson Info
12. Making Different Shaped Links by Wrapping and Bending
Lessons
Prerequisite #1: Basic Metalsmithing Tools
18:10 2Prerequisite #2: Tools for Soldering
14:23 3Prerequisite #3: Soldering Basics
21:16 4Class Overview: Creative Explorations in Chain Making
06:42 5The 10 Variables of Chain Making
04:24 6Finding Your Aesthetic
08:17 7Choosing Your Wire and Link Size
18:21 8How to Make Jump Rings
19:09Assembling and Soldering a Basic Chain
05:10 10Soldering Demo: Soldering Links Closed
50:24 11Hot Seat: Soldering Links
11:55 12Making Different Shaped Links by Wrapping and Bending
30:20 13Making Different Shaped Links by Joining
07:19 14Changing the Shape of Links After Soldering
12:26 15Creating More Variation With Multiple Links
13:46 16Soldering Demo: Soldering Complex Chains
05:18 17Making an S-Hook Clasp
08:14 18Making and Soldering a Toggle Clasp
10:55 19Pickling, Cleaning, and Polishing Your Chain
34:37 20Adding Hammer Texture and Flattening Links
08:35 21Making Ear Wires
08:03 22Turning Your Chain Explorations into a Cohesive Jewelry Line
10:35Lesson Info
Making Different Shaped Links by Wrapping and Bending
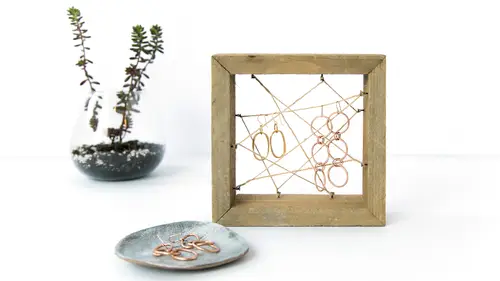
So we're gonna start this lesson by learning how to make different shaped links by wrapping and bending. So if you remember way back from the beginning of the class, it's starting to feel like a while ago now, I talked to you guys about the 10 variable of chainmaking, and if you guys don't wanna try to write all of these down really fast, just remember, if you purchase this class, you get a PDF with this whole list on here, plus a worksheet with some prompts. So we're not gonna read through this whole list again right now. So far, we've covered our first four variables. We've talked about type of metal. We've talked about our thickness or gauge of wire. We talked about the shape of our wire, and we talked about the size of links. So, now it's time to get in and have some fun by playing with the shape of our links, and there are two different ways that you can manipulate the shape. One is before soldering and one is after soldering, and we're gonna tackle those both separately. So, let'...
s dive in. There are a lot of different ways to make different shapes. I'm kind of gonna give you guys the laundry list of options and hopefully that sparks some creativity for you guys. The first one and one of the one's that's easiest because it fits into the same process that we've been using is that you can use different shaped mandrels. In the first segment, we learned how to make jump rings by simply wrapping wire around dalrod. Well the easiest way to make different shapes is to actually wrap wire around different shapes of dalrods. Now one of my favorite tricks is literally just to tape two dalrods together to make an oval, and that is what I did here, and pretty much all our samples on our sample board were all made using this kind of trick. There's a lot of schools of thought on how you should make ovals. Some people say, you should make ovals after you've soldered links by manipulating your round links, but I like to make them on a dalrod 'cause you really have control over the shape. So I'm just gonna show you guys here. The process is really similar in terms of doing this the same as our initial process. So the first thing you'll see is that I wrapped two ends but I didn't wrap this end with my painter's tape and the reason I did that is because the wire doesn't really want to slide so nicely over the painter's tape. So this is the end I'm gonna cut on. So just like we did, get a little wire here. Just like we did before, I'm gonna go ahead and just take a little wire, and I'm gonna wrap. This is definitely one where I find the wire, it's a little tricky to get started. It wants to be a little bit springy in the beginning. So if you need to again, drill a hole in your dalrod before you start wrapping or putting in an a vice, all those little tricks we talked about, those can help in our oval dalrods. So just like before, I'm gonna wrap this. What i love about the oval is that when we come over here to our bench pin to cut, our oval wants to sit so much flatter on our bench pin. So we'll go ahead, grab our little painter's tape and just like I did before, I'm gonna go ahead, tape this guy down and I wanna show you guys this just 'cause it is a little bit trickier to kind of cut as the wire wants to sort of spring apart. So I want you guys to see what that looks like. So I'm gonna put this on here. Just a little extra weight on that. Get that torch out of the way. We don't need that guy quite yet. So what I like to do when I'm cutting an oval, there's a lot of glasses/hair situation happening here, is try to cut right in the center so that I've kept it fairly even. I somehow have a tendency to always get mine to twist, and you can see what happens. See how this end wants to just like spring up a little. I don't know if you guys saw that. So that's just something you kind of have to be mindful of and really try to kind of give it a pinch closed when you're cutting it. So I always think with oval jump rings, just take a little bit more care when you're on the bench 'cause it is going to want to spring open like this. So you'll notice that it's not actually, I'll put that here in our little, our little guy there so you guys can see. It's not actually like a perfect oval. Let me cut another one here. So typically what I recommend doing is after you cut this apart, go ahead in with a little hammer or a little rawhide mallet and I actually like to just tap this closed because this is really sprung open. So I'll just go ahead and kind of tap that down and see how it's now the flatter oval again, and then you can just like before, twist it open and close. So that's the oval, and the nice thing with this is if you really wanted to go crazy and make super long ovals, you could tape three together, you could tape four together, kind of the sky's the limit there with the ovals. So that's our first one. Then in addition to ovals, you can also get things like square or rectangular-shaped dalrods and the thing to remember about these, we're gonna go through about four different ways to make a square-shaped length until it's all said and done. The thing to know about these kinds of mandrels is that what you're actually getting, I'll put these here under our little camera is not a true square when you wrap this. I like to think of this as sort of like a retro-mod square, a retro-mod rectangle because it's a little bit loose. So what you'll see is as we wrap this, we're gonna keep it a little loose for a reason. One, of course, it's just not gonna bend that tight just by hand, but if we really try to bend this crazy, crazy tight, it's gonna be actually hard to slide it back down our dalrod. It actually gets stuck. So I'm just gonna go ahead and wrap this just like I would with anything else and I think in that example, I used 18-gauge and right now I'm wrapping 16, but the same thing that happened with our oval is gonna wanna happen here. It sort of wants to spring back on itself. So again, when you're cutting, we just wanna be really careful about making sure that we're cutting that in the center, kind of keeping it held in place. Makes sense? You guys don't need to see me cut that, right? We're good, perfect. So that is option number one is just to find any other shaped mandrel that you wanna use and bend around and then literally do the same process. You can cut them open. If you're going to solder your links, you can go through our same singles to packets of three to packets of seven, all the way up. So that's our first option. Now, our next option, and this is where we're gonna kind of have a little bit of fun here is that you can also bend your wire to make pretty much any shape that you can imagine. So to start with, let me show you guys a couple of examples here. So a really kind of classic nice way to do some bends in your wire is to make two opposing links. So this is a nice way to think about why would we bend wire instead of just wrapping it around a jump ring, and this kind of double-shaped figure eight link is a really nice way to kind of think about that. So, what I recommend with something like this is just starting with equal lengths of wire and just to make our lives easier, I cut a ton of wire in advance, but the one thing you wanna think about is that technically, these chains should be soldered. Even if these chains are not going to be soldered, if you're gonna leave them open, like this is a pretty strong little chain. I could probably get away with not soldering it, but if I'm just cutting this wire with a wire-cutter it's gonna look yuck and unfinished. So when you're doing this and you're cutting these links, I recommend making sure that you file your ends and I would do that before you bend because you can see, now that I've bent this, if I was trying to get a file in there to clean that up, that would be kind of messy. So before I do any bending, I would go ahead and just take this to my bench pin and I would literally just file the ends of this flat. Now if you were in our previous class or later on, we're gonna talk about using some tools that round the ends of wire, but I would not do that in this case because if we are gonna solder we want our end to be flat 'cause that's what we can then butt against something else to make a nicer joint. You wanna go ahead and just file your ends and I know people are like, is there a faster way to do this. Of course, if you are using flush-cut wire cutters, you can just alternate the way you're cutting them, cut off that little extra nip and your flush cutters will give you a nice, sharper seam or you can even take the ends and lay a little bit of sandpaper down on your tabletop and go on your sandpaper if that noise doesn't drive you crazy. It might drive you crazy. (laughs) Kind of drives me crazy. So, now I've got some links, and let's just actually look at bending some wires. What I recommend is kind of measuring links and then experimenting with kind of what works and knowing what size you use so that you can repeat it if you need to. I kind of mixed all of my links in here but you can see, I've actually measured and cut things to a normal length, and when I'm measuring wire to cut, what I like to do, 'cause this is awkward to have to cut with this every single time is I'll say, okay, I wanna use a one-inch long piece. So I'm gonna cut this here at one inch, and then instead of always measuring one inch, I'll use that first one that I cut as my template. That's literally how I cut everything in my studio is I have a little pile of, these are my different lengths. So much easier than always trying to measure to that one inch. So let's look at a couple of different ways to bend this wire if we're doing these kind of like figure eight things. The first one is literally just to make that bend and I like to use either, I don't know what the technical term is, these are round nose pliers. This is like a half-round nose, half flat plier. This is actually my preference because this doesn't mar as much as the other rounded side does. So it doesn't leave quite as much of a mark. For a lot of this kind of bending, I'll go in and typically with a figure eight, you're gonna bend one direction and then you're gonna bend the other direction, and you can obviously if you need to, you can do things like take your pliers and kind of then work your edges tighter together. Just like we twisted, I don't know if you guys can see that, just like we twisted our other jump rings open and close, you can kind of twist your figure eights open and close so that they're a little tighter. You don't have to loop the figure eight. You can loop it opposite directions, but if you can see from a couple of our little samples here, you can also loop one way, but then literally orient it the other direction, like this guy or even this guy. Again, just kind of paying attention to which direction you're bending, and this is one of those things, you can sit there an grab a tray and sit in front of your TV and literally make links for hours and hours. Now I might bend this guy the other direction. Really just starting to play with which different directions you can do that, and you aren't limited by your pliers. In this example where I had the small link and then the big link, I actually took a longer piece here and wrapped that, let's get a bigger dalrod. That's too big of a dalrod, but you get the idea, wrapped that around the dalrod first and then bent my little loop. There's no rule that says you have to bend with pliers. You can bend, that's a little crazy. You guys get the idea. There's some craziness happening, but this is also really where chain making gets fun because I don't know what that little shape is, but I bet we could make a cool chain out of it if we really wanted to, this little, kind of funny bend there. Really, kind of the sky's the limit in terms of playing around. What I recommend when you're doing this, is that you always wanna make sure that you're using non-marring pliers. Basically anything that has a smooth surface, you're gonna be okay with. You can even wrap your pliers in a little bit of tape if you want that. You just wanna use something that doesn't have a serrated edge on it to make sure that you're doing as little marring to the metal as possible. Now you can also use this bend technique to make things like squares and triangles. As I mentioned, we're gonna talk about lots of different ways to make squares and triangles and geometric shapes. So what you can see here with this is this is bent with my flat pliers. So I used these guys to bend that. I don't know if you can see that in there. So I used my flat pliers to bend that, but you can see they're not perfect bends. It's still kind of that round bend. It's sharper if we compare it. It's sharper than our wrapped version, but it's still a little bit soft, and again, you can think about what your level of precision is. Clearly, geometry is not my jam. So I'm pretty flexible here, but in this case, the first thing I would do is take these flat pliers and literally clamp on my metal to flatten it out. So if you noticed before, we had a little bit of a bend to it, that's how it came off the coil. So I'm flattening it out before I try to make my square. Then if I were being precise, I would measure. I'm gonna eyeball kind of based on the size of my pliers and just literally bend a little square in the end. That should be measured so that that fits a little bit better, but that's one way that you can bend squares, triangles, anything with a sharp point. If you really want a sharper corner, what you can actually do is use a needle file and file little grooves into your wire to really get that corner. So I'm gonna show you guys what that looks like. First thing I'm gonna do here, this is where we go into precision mode, if you will. I'm gonna take my wire and I'm gonna flatten this out or pretty close to flatten it out, and now I will go ahead and measure. Hopefully you guys can see what's happening here. Let me grab a Sharpie. This is a three-inch long piece here, and I'm gonna make a triangle because the math is just easier. (laughs) I'm gonna mark this every inch. Then I'm gonna come over here to my bench pin, and hopefully we can kind of zoom nice and tight in here. What I'm gonna do is I'm going to take my triangle needle file and it is called a triangle needle file because it is in fact shaped like a triangle and I'm just gonna come across my line here, and I'm just gonna file in a little groove. So what this does is it now is taking out that material so that I can get a sharper corner, and the general rule of thumb with this is that you wanna take out a little over halfway of the material. If we were to look at an expanded version, my V should be just past the halfway point. I'll go ahead and file my little V in each of those. Obviously you can see how a link like this is going to take you longer. This is probably the kind of process that maybe you use for a few select links or something that you're going to then hang from a piece of commercial chain. You can certainly make an entire chain like this but obviously, it's going to be a much more time-consuming chain. Then once I file those grooves the other thing that I'll do while I'm sitting here at my bench pin is because I do want my ends to meet up nicely is I will also file that same basically angle in each of my ends. So you get what I'm saying there? I'm filing like a triangle angle in there so that when I put it together, those will meet. The closer you hold an end to the end of your bench pin, the easier it is to work with. So don't let it hang out in the air like I was. Hold it close to the edge and it'll be easier. We'll just file that, and now, you still wanna come in here and bend with your pliers, even though it's gonna wanna bend much nicer now. I'm still going to actually take my plier, come right in there, and bend. Truthfully because I'm doing a triangle, I probably could've taken a tiny little bit more material out of this, but it's bending pretty well. So I'm gonna go ahead and bend my other side and now I've got this. You can see, if I put this up here, this gives us a sharper bend than if we were just bending it by hand. So if you really want those nice, kind of geometric shapes, I recommend doing that. The other thing depending on how thin your wire and how much material you take out, when you go to solder this top joint, you may find that it's actually a good idea to stick a little tiny piece of solder in each of those corners as well because you've taken a lot of structural integrity out of it. So was the V on the outside when you bent? It was on the inside. Think it was a little hard to see. Yes. Perfect. Yeah, on the inside so if this is my hand, this is literally that V, and then I folded it up. Thank you. Good question. So that is how we get sharp corners, and it's always really important just to remember that if you are going to solder it that we always need to file our ends to get a good fit. In a lot of those little bent examples that I showed you, I would need to go back and again, before I bend this, actually go ahead and file that end 'cause right now, that's a pretty big gap, and as we know, solder does not fill gaps, but really when it comes to bending, there is no rule. There's no like, you must do this. Grab some wire, grab some pliers, grab some dalrods or some mandrels or things you can bend around and really just start playing with shapes because you can pretty much create any shape you want just by playing and bending. Do you guys have questions about shapes? Is anyone envisioning a shape in their head and they can't figure out how to make it? Yes, as a matter of fact, the folks out there on the Internet have a shape, asking about flowers. Flowers. There's a lot of different things that I would do, and I think it depends on probably the type of flower that you wanted to make. If I were going to do a flower just out of bending, I would take something like my round-nose pliers and I would bend a loop and then I would actually probably bend a little V. I did not measure this. So I'm not exactly sure if this is gonna work, but I would bend another loop, and then I probably did not have a long enough piece of wire, but I would bend another V, and then I would bend another loop, and I would keep repeating that process with a longer wire. So that's one thing that you could do. Truthfully, if I was going to make a flower and I really, really wanted it to look flower-like, I would actually do something that ended up being a multi-joint seam, which we're gonna talk about in a second, but I wanna kind of, let me find a jump ring here, and I'll show you guys what I'm envisioning. If I were going to make a flower, and I wanted it to really look flowery, what I would do is I would probably start with a center jump ring. Can you guys all see this there? Start with a center jump ring, and then I would actually take individual pieces and bend them. Where's my favorite? I would bend them into say the pedal shape that I wanted. Well that bend is not even. So I would cut that end off to make it even, and I would probably do something like this and keep bending. Let me see if I can find ones that are sort of the same shape. I might even do it with my finger. Keep bending shapes, and then I would solder all of that together. We're gonna talk more about this in a minute but if this were me, this is how I would make a flower, and I would just keep going around and then I would obviously go in and file all of those. If you didn't want that center circle, obviously, you can change the angle of this curve if you wanted big, giant loops so that you weren't making a million. You could do something like that. That's how I would build a flower, personally and then solder all of that together. Hopefully, that answers the Internet's question on that one. Definitely did, thank you. Question about how long your dalrods are and generally what sizes are you using? I believe these are either 9 or 10 inches long. They came in long lengths, and then I cut them. So for smaller diameter dalrods, I would say you can actually cut them with your jeweler saw. So I just go in with my jeweler saw, cut it, and if it gets close and I get impatient, I usually just snap it. That's what I did here. Got close enough, I snapped it. I only needed one good end. For bigger ones, I would recommend finding someone who has a bandsaw or a little circular saw or something like this 'cause when you get to this thickness, it gets a little tricky to cut with a jeweler saw. I basically took all the thick ones, handed them to my husband and said, "Please cut these down to nine inches," and he is way more anal-retentive than I am. So he was like measuring and cutting, and I was like, oh, any length is fine. (laughs) That's about the length that I like them. I wouldn't go much longer than this 'cause they get really unwieldy. Just to give you guys a range here, there really is no hard and fast rule. This is about a little over half an inch or for our metric friends, it's about 15 millimeters. That's about the biggest size. I might have one bigger than that, little over half an inch. This guy is about the same size apparently. (laughs) It kind of ranges from there. So I would say from about half an inch down to I know I've got some that are about as small as an eighth, but really there is kind of no limit, and like I said, when I want big links, I will use a PVC pipe that's an inch or two inches in diameter. Thank you. Awesome. Any other shapes or anything that you guys are thinking like, how do I make that? Yeah. I think I've seen, I don't know where someone wearing a necklace made out of spirals, like spiral-shaped. Spirals as in like kind of our jump ring coil? Like actual spirals and they're like attached to each other, I can't remember how. Let me pull out, I think I've got some little coils hiding down here. We can play with a couple of ideas. We'll just go into our bag of tricks here. So there's a couple of ways that you could do a coil or a spiral and most of them still start with wrapping on the dalrod, but then instead of actually cutting with the saw frame, spreading apart and cutting that way. So if I were doing something like that, you could take this guy, section of coil, and then literally spread it this way. I don't know if that's what you saw. So that's one thing that you could do. The other thing is you can take, if you want like a kind of coil like this. You can actually take your pliers and say bend out this end. See if I can do it here. So you see how now this end comes out? I'll put it in there a little. So you can do things like that too where you take the coil and twist the end out to make it loop so you could have like a short coil or a long coil and then link those together. Is that what you were thinking or is there a different way that it was spiraled? I guess I'm just thinking of an open-ended spiral. Are you saying it spirals into itself? Um hmm. Okay, so with that one, I would probably start with a flat piece of wire, like this guy and just bend it, and then you kind of just freehand your coil. I'm gonna run out of wire, but I'm thinking maybe this kind of idea is what you're thinking, like spiraling this way? Yes. Yeah, so that's how I would do that. I would just bend that kind of starting from the center. Clearly if you wanted a bigger coil, you would need to start with a much longer piece of wire, but yeah, that's how I would do that one. Any other, how-do-I-make-that-shape questions? Ah, yes, from Carolina or Carolina, curious if you could do a little demo on words like letters. Oh. (laughs) Now we're getting tricky, right? We are getting tricky 'cause that one is not one that I do very often. So let's see, you guys are putting me on the spot here. I kind of like it. So what I would probably do if I were trying to do letters is I would not try to freehand this. I would actually start by writing it. So I realized that this is gonna be upside down for your guys but if I wanted to do my name, I would actually start by writing my name so that I have something to trace instead of trying to freehand. You can see, obviously I wrote it in cursive so that it would be together. There's a little bit of trial and error here, for sure. Man, there are people who are probably really good at this and it's not something I do every day, but then I would literally just kind of follow along with this, and if you feel like you can't eyeball something take your Sharpie and go ahead and kind of mark where you need the bend and then in this case really, your round-nose pliers are gonna be your best friend. So I'll take my round-nose pliers and I'll make my first bend, and then I'll just come back here, and I'll line that up, and now that's a pretty tight bend on my end. So I might have to improvise that one a little bit, but I'll go ahead and again mark that. I'm also willing to bet that if you search how to do this, you're gonna find someone who's way faster at it than I am, but I'm gonna bend this, and in this case, because I want this line, that little M line to be really close together, I'll probably come in here with something like these pliers and actually smush that all the way closed, and then I would come back, I'm not gonna do my whole name because this is gonna take a long time, but you can see, I would kind of keep working my way through. Here's my next bend, grab my pliers again, go ahead and bend that. Clearly, it's getting a little wonky. Now I'll bend out from there, and I would just kind of keep going like that. This is a case where because of the way I wrote my name, there's gonna be some crossover. It's not gonna be totally flat, but that's basically how I would handle that one if I were making those.
Class Materials
Bonus Materials
Bonus Materials
Ratings and Reviews
Liz
Megan' an excellent instructor and lays things out very clearly, with a lot of good tips based on her extensive experience. I've experience making wire wrapped chain and have taken a beginning metalsmithing class before, and this class had some good refresher information. I particularly appreciated seeing her techniques and process for streamlining production.
a Creativelive Student
Megan is an awesome teacher! She is genuinely enthusiastic about sharing her metalsmithing skills with us. I am really looking forward to trying my hand at designing and making a chained necklace on my own soon.
Vernell Bevelander
Another excellent class! Thank you Megan!