Retouch And Reset The Panorama Center Point
Lesson 8 from: Editing 360 Degree Photos in Photoshop & After EffectsChris Converse

Retouch And Reset The Panorama Center Point
Lesson 8 from: Editing 360 Degree Photos in Photoshop & After EffectsChris Converse
Lesson Info
8. Retouch And Reset The Panorama Center Point
Lessons
Class Introduction
01:43 2Software You'll Need
00:36 3A Brief Intro To After Effects
01:54 4Class Materials
00:56 5Isolating The Tripod Area
07:17 6Seamless Tripod Removal
02:04 7Replacing Tripod From Bottom Of Sphere
03:37 8Retouch And Reset The Panorama Center Point
03:39Lesson Info
Retouch And Reset The Panorama Center Point
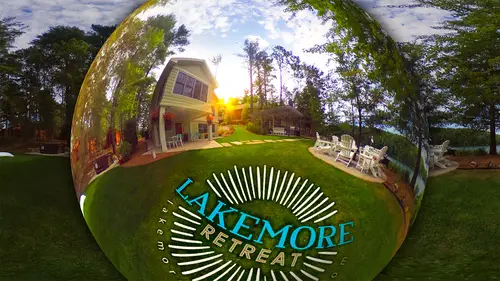
So at this point we have a new spiritual image to work with inside of our retouching folder. So let's open up lake more underscore retreat underscore modified PSD in Photoshop. Now in the layers panel, we'll see a whole series of folders just like we got earlier when we first exported our composition from After effects. So inside of here, if we turn on and off different layers, we can see that after effects has put all of these items together. So just like before I'm going to remove all the layer groups here. So we're just left with the three individual art layers. So just like before let's create a new layer. We'll name this, retouched with this layer selected. Let's select the spot healing brush again. Make sure we have sample from all layers turned on. Gonna zoom up here a little bit. And what I want to do is just come in here and clean up some of the areas of the long. So by increasing and decreasing the brush, I'm gonna come in here and just paint some different areas along the gr...
ass for the access panel. We'll just paint an area large enough to cover the entire panel and then let go hold my space bar to get the hand tool and then I'll just pan around the image and just clean up different areas. I'll remove additional leaves, I'll heal some of the dry patches and again, just keep going around and just finding little spots to fix and over on the far right. We have a little bit of a lens flare from the camera. So I'll just come in here and he'll that area as well. Next I'll pan over to the patio. You come up here a little bit. I want to fix a little bit of the mulch here. So in the tools, let's come over and select the clone stamp tool. Let's come up to our brushes. Let's pick a soft brush, increase my breast size a little bit. Now I'm going to follow the angle of the patio here so I'm gonna hold the option key or Alton Windows. I'm going to click to sample from here. I'm going to move over and I'm going to start to paint the same sort of angle over here next to the patio. Next I'll go back to the spot healing brush. Make this smaller. Let's just you have the patio a little bit pent up to the right, hit a few more spots up here and then zoom out and take a look. So now I think this looks good. And the next thing I want to do is reset the panorama so that when this loads in a viewer, the house is near the center of the stage. So to do that, let's go over to the layers panel. Let's select our retouch layer. Hold the shift key, select all of the layers. Let's right click convert all of these to a smart object. Then with this layer selected, let's come up to the filter menu, let's come down to other and let's come down and choose offset. So what we're gonna do here is make sure that we have wraparound turned on under the undefined areas For the horizontal value. We're going to set this to pixels and for vertical, we're going to set this to zero. So basically what this is doing is taking any of the pixels that are getting pushed off of the edge and wrapping them around to the other side. So now we've got the house pretty much in the center of the stage. So at this point we'll click OK? Then go to the file menu and choose save and now that we're done retouching the lawn in the patio. Next, we'll add in a new sky
Class Materials
Bonus Materials with Purchase
Ratings and Reviews
Rex Maximilian
In Lesson 8 I would highly recommend grouping the layers into a folder named "Components," then duplicate it and turn the duplicate into a smart layer. Then rename the smart layer "Composite," or something like that. Then turn off the group of layers leaving only the composite layer displayed. This way the files remains editable for future lawn/image cleaning. The way the instructor did it would delete all of the layers for potential future editing.