Putting the Elevation at a Different Scale
Lesson 18 from: Draw like an Interior DesignerJorge Paricio
Putting the Elevation at a Different Scale
Lesson 18 from: Draw like an Interior DesignerJorge Paricio
Lesson Info
18. Putting the Elevation at a Different Scale
Lessons
Introduction
01:14 2Materials and Tools to Use when Drawing
14:27 3Preliminary Furniture Plans on a Floor Plan
07:45 4Using a Scale Ruler and Templates
05:36 5Rendering Furniture on Floor Plan to give Volume and Depth
06:06 6Line Weights and Adding Texture
04:24 7Architectural Lettering
08:11 8Complete House Floor Plan
03:23Isometric Perspective
03:42 10Why 3-Point Perspective Doesn't Work
04:05 11Benefits of Two-Point Perspective
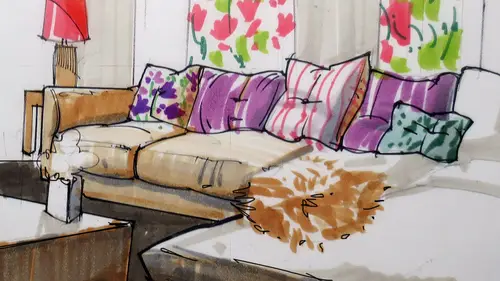
03:06 12Preliminary Sketches for a Living Room
11:29 13Using Different Textures of Materials in your Drawing
03:51 14Adding Color to the Couch to Create Shiny Leather
11:26 15Rendering Soft and Shiny Textures
09:09 16Starting Elevation for the Kitchen
07:54 17Full Rendering Elevation of the Kitchen
07:28 18Putting the Elevation at a Different Scale
10:33 19Two-Point Perspective for Kitchen
10:04 20Canson Paper with Pastels
05:35 21Transfer Line and Heights
08:27 22Finishing the Rendering Using Canson Paper
08:48 23Creating Chrome and Color Reflections
10:43Lesson Info
Putting the Elevation at a Different Scale
All right. So in these face, I am going to be, and I'm need to revert back to the package that you got, um, this one over here, your want, in your perspective, your one point perspective and your two point perspective. This is the part when I really want you to pay attention to what I would be saying so that you can follow along clearly. Now, the elevation that I have covered over here that we rendered, um, imagine that we would have used a different scale altogether a lot smaller. We would put the elevation that we have, um, at a different scale. Over here, you can always go to the copy machine photocopy machine or your you can scan it and scale it down, and you have it at a scale that you know you work with. In this case, I have one inch equals 3/16 of an inch equals one foot voted reverse over here. So 3 16 signals of foot. So you would just have to move your ruler until you find your scale 3 16 equals a foot. And that is this scale that I have years. You guys see that tiny corner o...
ver there. That is Theis Corner. Over here, Off our kitchen. This is again one point perspective. The easiest way to draw one point perspective. So now pay attention to some will get it done. The first thing that I did was to, uh, draw the same great that I have over here. Okay? Locating my station point again. I am standing somewhere here looking into the kitchen. The next thing that I would dio was I have my elevation here, and I only drew a little portion of this dis portion over here. So what? I have ISS Remember when we nor packet when we were talking about the horizon line, the ground plane, The station point where you're standing? Well, it relates to that. We have a person, the ground line, the ground plane in the horizon line. And I put a person at the same scale. If it iss 3/16 of an inch equals one foot, we know already one of the camera would be able to zoom in us much, but we have. Okay, so this is if I draw a line over here. This is my zero. I have one foot two feet 345 and 1/2. This distance here would be the height of a person, which is this height over here. Okay, It's important that we get that done correctly and then we draw much in there. We start from zero. Let's get some tracing paper. I draw first the ground plane. Just a very quick outline of a person just for reference. Right? My horizon line, which already we know would be five foot six. Remember? Is this distance here from here all the way to 56? So far, so good. The next thing that I would dio since it is one point perspective, I haven't grid You see these great over here that I have a very clearly defined I am standing right here looking there. 12345 12345 and six. I others a 61 over here. So six boxes 36 squares over here. So what'd you dio issue mark with the same? Remember the 33 16 scale? Remember this greatest two feet, So I mark two feet se marked it in pink. This is two feet to feed to feed to fit. Repeated it. Six times. All right, so, um, put it this way. So I have the 1st 2 feet and then 468 10. All right, so I just marked these dots. The next thing that I dio iss you see where I'm standing My station point over here. That means if this is my these wall over here, this line over here is this life I'm standing instead of the center of the room. I'm standing more here looking in this wall is very close to me. These Wallace, much further out. So that's why I put my So I have these two lines. Good. The next thing that I did was just marking over here. This is what I have done so far. All right, these points. Then what am I standing in this room close to this wall? Close to the other wall. Where am I Remember I'm here. I'm not in the center, not on this wall on this side. So I place my, um, myself over here. Bring a line down and then this line over here marks the distance. It's me, My eyes on the canvas, How far I am to the picture plane. The only thing that I dio is Get over here. My degree ruler. This is injury to fast, but this is 90 degrees over here. I get these two points. Okay. So far, so good. Right? Then what I do is transfer these. Um, so I have my points like that. We're living like that at this point. Then what I do? IHS, connect this points like this. And this is what you have in your packet. And that gives me the grid, the depth of the grid, the lines going like the railroad lines, right, going to the horizon in distance. But now how do I chop them horizontally To do that? I need to add. And this is when I want you guys to pay attention. All right, So what I do over here? Iss um, from what I have I put over here my ruler, this is my 45 degrees. I have split it in half. 45 degrees here and 45 degrees on the other side. Okay. And this is what I have with the other ruler. The other ruler had 45 degrees. You see, this is 45. Is this another 45 How do I add depth for my grade? This is just to get the grade done. Ok, I extend You see these points that I added Here I extend them this way, and I could also extended them. Wait, but I only used this way. So 2468 10 feet. So I draw them here and then connect them to this point which I call D or D Prime connect them to this point and extend wherever they intersect. That point. That would be my depth destroyed over here. This is D over here. I connected to the first guy over here whenever they intersect. That would be my first line of depth de clinic to the next one and then extended. That gives me my second line of depth. 3rd 1 and extended. Give me my 3rd 1 and so on. There is another step over here that I I need to mention at this point. So far, we have This is the horizon line. This is where we are. This is the ground line ground plane. And this is the person that I drew. And this is from here to there s if I had some sort of a frame. Okay? And this was my vanishing point because I was closer. I said that I was going to stand over here. I connect this point to these four points. That's what I miss to do into my previous ones. I connect these four points, connect them. So this is my VP will put a smiley face over here. That's my single VP. Connect that point to the four corners just to get a sense of depth. Okay, this distances my height of the room, which in my house is seven foot four inches. It's a short house. Is Long Island brought island, so houses are kind of small. Um So once we have that, then we get these two points. As I told you before, with the ruler 45 45 you found your d and then you mark your two feet. Great. Over here. Connect this one to that one, and extend, connect and extend, and you get your grid, which is what I have over here. All right, So once we have this grid, we can move a lot faster in getting it all done.
Class Materials
Bonus Materials with Purchase
Ratings and Reviews
user-d2a6ef
Creative LIve Why don't you re-do this class! Its a great subject.....get a new camera operator, who knows the concept of learning from watching.