Lesson Info
2. Materials and Tools to Use when Drawing
Lessons
Introduction
01:14 2Materials and Tools to Use when Drawing
14:27 3Preliminary Furniture Plans on a Floor Plan
07:45 4Using a Scale Ruler and Templates
05:36 5Rendering Furniture on Floor Plan to give Volume and Depth
06:06 6Line Weights and Adding Texture
04:24 7Architectural Lettering
08:11 8Complete House Floor Plan
03:23Isometric Perspective
03:42 10Why 3-Point Perspective Doesn't Work
04:05 11Benefits of Two-Point Perspective
03:06 12Preliminary Sketches for a Living Room
11:29 13Using Different Textures of Materials in your Drawing
03:51 14Adding Color to the Couch to Create Shiny Leather
11:26 15Rendering Soft and Shiny Textures
09:09 16Starting Elevation for the Kitchen
07:54 17Full Rendering Elevation of the Kitchen
07:28 18Putting the Elevation at a Different Scale
10:33 19Two-Point Perspective for Kitchen
10:04 20Canson Paper with Pastels
05:35 21Transfer Line and Heights
08:27 22Finishing the Rendering Using Canson Paper
08:48 23Creating Chrome and Color Reflections
10:43Lesson Info
Materials and Tools to Use when Drawing
All right. So what? We need to get covered. The beginning is first. The right materials the papers, for example. We have graphics 3 60 which is a good marker paper. It is 100% wreck translucent material. Um, and we really need to use this type of paper to dio good renderings because the markers will pick up the color a lot better. We also have tracing paper. Tracing paper is used in the profession to, um do preliminary work. Sometimes we do not get good drawings from the very beginning. We have to work in layers until we get to a good point so we can buy them in roles where we can buy them in separate sheets such as this one would just have to kind of break it like this and then put it on top of our drawings. So that's the 2nd 1 And then we have 1/3 type of paper. Who didn't you see this much? But he sold so good that it's new spring paper. These paper allows us to do very quick sketches to get us to a good point. So we can just thought very loosely to sketch her ideas this paper, what...
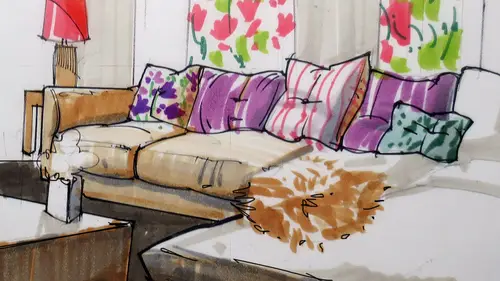
makes it greatest? That's very cheap, and you can find it anywhere. But it's not so good for working with Marker, so this would be mostly to do line work. So with these three papers, we can really do great things already. All right, so now let's look over here and look at all the different tools that we use in the profession rendering. It's a fun process. It may be a bit intimidating in the beginning because we have a lot going on, and I kind of distributed them in different sections so that we would have a sense. First. Pencils, Of course. We use pencils all the time. Um, you can collect them from different sources, better or worse, paid pencils. But it's good that you have all kinds off colors, from the basic colors to the more difficult to find colors. And you really need to have very good a very good selection off a range of colors. All right, so that's one thing. It's a bit people of mine. I always want to have them sharpened before I start my rendering so that I have everything ready. Um, I typically do not use dull pencils. I want them to have them sharp because then I can do touch up work very easily. Now let's look at the list. Look at markers. We have all kinds of different markers and with different brands. Let's just review them quickly. We have the most important ones. Will be this set over here. These are cool or warm graves. Um, we have all kinds. We have W's we have sees. What does that mean? C stands for cool grays and used to say particularly good brand. It's Coptic and we have a very thin point, and we have a thicker point thing. Points would be used mostly for touchup work for doing a texture work. Um, broader tip would be used to dio to fill out entire surfaces. And to tell you the truth, I only years the very think of the thick point because the thin one. To tell you truth, I can use very thin points using this chisel point by just rotating my pen and then finding my marker and finding just the right thickness. So just with this one, I can get three different line weights. So if I was going to get into my paper. I can dio you see, using paddle strokes I can failing. I'm un entire surface. This is my broader my broadest spot I can also use. If I rotated, what would this be? It's 90 degrees. I can get an intermediate line weight, and I can also use very thin. None of the camera picked up. Let's do it one more time with a thicker Margaret. You see, the main thing will be to use parallel strokes, whether you want to do from bottom to top or top to bottom. You want to use always parallel strokes, and no matter what type of paper years, you might blend in your color slightly. I mean, they might. You do not want to overlap, I said, blending. It's more overlaps. You don't want to do that. You want to use Palin's strokes now, depending on the paper that you're using, and this is why I am covering three different types of papers. We want to make sure that we know how the paper really reacts. So you see the color or new sprint gets a little bit richer, deeper a supposed to marker paper and then tracing paper gets even a much different type off result. Let's get a thicker point here. This is more like watercolor. Second even. You know, let's start getting messed up here. Look to clean. You see, if we don't let the pate the marker dry enough, then if we inadvertently put our fingers or hands on top, you know, we would get dirty, so we would just have to let the Markert try until we can really work on top. All right, so this takes very long time to dry. This takes of this tries very quickly. And this one instantly. Because this is like a sponge, it would just circle the ink in. So we just have to be very careful, actually, with this paper, because it will run your markers dry very quickly. So just note. All right, so those are the markers, then we have the gray markers, Of course. And then we have color markers. The same brand has two different types of markers. The same brought tape that we had seen before, But also we have This is a brush type we can really do very thick and thin line sold together. Um, this is more for touch up and for doing. For example, if you want to dio like a printed fabric type texture, we can work with this more easily. It's almost like dancing with your brush with your market on the paper. You know, you can really get more interesting textures this way. Then we have these markers over here. These are called Chart Park, and they are. They really have a lot of ink, and you can cover, um, large surfaces much faster. So we just have to be very careful, though, because sometimes they bleed a lot. Then we have these other brands. I have all kinds. Then we have pants of different line waits, black pens very important, because you wanna have a good collection of those from very thick to very thin. We covered the pencils. Then we have passed tales some interior designers don't like to use. Past tells us much because they get really dirty. You can get dirty when you work with them, so we just have to be careful. But you can really get very good results with those, and we'll practice with this in class. All right, I also have Q tips and some some cotton swabs so that we can work with these and then some extra pencils that we would be using to most interestingly would be your your pencils. This is and this is one of the most important ones. This would be your we call them China marking pencils or china markers they don't have would thes are made off paper and you can just unravel them. I don't know if the camera can take this. There's a little string over here. You would just have to pull it down and then you would just unravel it, and these would be used to gain highlights on your drawings. Then we have These are my good pencils that I do know one it makes with the other ones. So that's why I keep them separate, and then some erasers. All right, so this would be the media that we would be using papers on the main, the main tools. One more thing that I want to say. I published the book recently in perspective sketching, and this is part off. I put the introduction on the on the packet that you would get when you're signing for this class so you'll get to see a couple of my drawings there. All right, so right now, we're gonna be describing the main perspective, the main terms in a perspective. Um, before we do that, let's just review some of the drawings that you would be doing in this class noting this class. But what you would be aiming to dio this is a drawing off a exterior, you know, mixing some plans with some architecture over here using this same paper, all calling graphics 3 60 paper. You can see the parallel strokes done with markers. This is mostly markers. And on some pencil, work for us underlines and then some line weights. This is an interior, um, for the kitchen. Very large kitchen with lots of curves. Desperately would be your dream kitchen that you would want to have a mother on a child there sitting down basically an excuse to show this was a practice sheet that I did so that I could work with different pencils and markers and work with reflections. This is an interior off. They quite an elaborate living room, and we're going to be doing a living room in a much simpler scale, but still will get to practice with markers and pencils over here, all right, in this class as well, I'll be teaching how we can work with cancer in paper. Caller paper. This'd is not a let's, say, a traditional way of rendering, but there would be times when we would have to. We would have to use a color paper as a starting point. Sometimes it is easier to work with color are supposed to just having to cover an entire white paper with color before we get into details. So this very fun process, it's like working from the middle instead of starting from white, going all the way to darker colors, we start from the middle color, and we go toward darker color sandals toward lighter colors. This is just to show the class that we can also work. Put it over here. As a designer, you have to show different materials, and this is a good example of how, for example, we have to show this is Ah, stone right. When you go out in the field and start looking at different materials that you want to incorporate in your designs, you have to pay attention of the colors that you're seeing the in the material that you picked. We have lighter, darker colors mixed with some great tones as well as different nine weeds, and you try to depict it as naturally as possible. So that decline would have an idea of what they can receive. The first thing that I'd like to share with everybody would be the different resource that you can get with a different papers. So what I have over here is four different types of papers. The same. We have the same living room, four different papers, and you can see how different the results are. All right, So we have, um, tracing paper. We have tracing paper, but we have blue and we have black. Why do we use Blue Blue? It's a pencil. Sometimes I use what it's called Nun, photo blue pencil, which is this one here, Um, non photo blue. Now, in the old times, we would use more than what we use them today. Photocopy machines, right? And this non photo blue pencil would allow you to draw on the paper. And if you tried to for a copied, it would not really pick it up. So this is almost like if we translate this into a digital format, this would be your layer zero in for a shop, for example, you can do lots of lines knowing that you can be free of you do one or multiple lines, and they will not really be showing. They show to you, but you can always Once you do some lines, you can go back and work with your black pencils to define your lines more. All right, which is this next face? This is pencil, pencil line. So remember the beginning of this class? I was saying how we need to use tracing paper to kind of work. Our work with our sketch is in stages, so we work with blue, Then we're going to black pencil and we just literally put the paper on top and then we retrace our views. Then we have a typical photocopy, the one that I say we don't use so much. Well, sometimes we dio and if you don't have any other options, you can will surrender directly on your piece of photocopy paper and then you would just draw directly on top. But knowing that the markers would react differently and then this is the cancel paper that I was talking about. Remember this example here, Right where we had these blue canceled paper rendering. We work toward lighter and darker colors and anything in between. This is the beginning of it, right? So I just printed it at home, right? We printed throw. And then I added some pastel tones and then some markers. And you see, already the results can be very different off the same interior. So we have four different approaches. Um, again, this is just a good review off the different markers that we can use in the different types of papers that we can use.
Class Materials
Bonus Materials with Purchase
Ratings and Reviews
user-d2a6ef
Creative LIve Why don't you re-do this class! Its a great subject.....get a new camera operator, who knows the concept of learning from watching.