9:00 am - Creating Your Own Paper
Lesson 19 from: Digital Scrapbooking for BeginnersMichelle Stelling
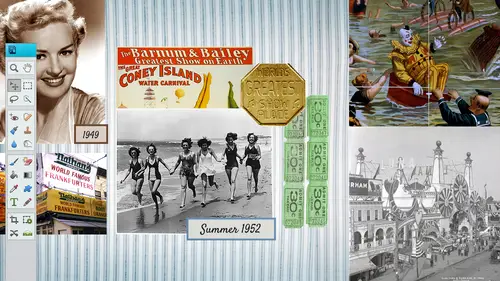
9:00 am - Creating Your Own Paper
Lesson 19 from: Digital Scrapbooking for BeginnersMichelle Stelling
Lesson Info
19. 9:00 am - Creating Your Own Paper
Lessons
Day 1
19:00 am - Intro & Michelle's History
38:59 29:45 am - Intro to PS Elements & Organization
44:46 310:50 am - Using Quick Pages
36:10 411:30 am - Second Quick Page Example
15:42 511:45 am - Useful Tools
12:08 6FreePreview: Red Eye, Feathering & Collages
34:33 71:30 pm - Creating a Simple Cluster Page
16:301:45 pm - Different Modes & Making a Bookmark
31:54 92:30 pm - Creating Cards With Digi-Kit Elements
41:29 103:15 pm - Constructing Cards Without Digi-Kits
33:30Day 2
119:15 am - Collaging: Alignment, Guides & Grids
23:50 129:45 am - Paint Bucket, Brushes, Gradients & Text Effects
45:13 1310:45 am - Cookie Cutters, and Personalized Background
22:38 1411:15 am - Frames, Filters, & Blurred Backgrounds
42:12 1512:45 pm - Photo Restoration: B&W and Color
37:22 161:30 pm - Photo Retouching
44:41 172:30 pm - How to Use a Pre-made Template
37:02 183:15 pm - Creating your Own Templates
38:31Day 3
199:00 am - Creating Your Own Paper
36:09 209:45 am - Photomerge: Panoramic & Style Match
21:18 2110:15 am - Text Clipping & Guided Modes
17:05 2210:45 am - Postcards from Digi-Kit
50:20 2311:30 am - Postcards from Scratch
17:40 2412:45 pm - Creating a 12x12 With a DigiKit
34:01 251:30 pm - Creating a 2 Page Spread
44:18 262:30 pm - Creating A Collage
48:47 273:30 pm - Second Collage Example
21:25Lesson Info
9:00 am - Creating Your Own Paper
We're going to be talking mostly about thie creating your own paper, so when you use brushes and textures and stripes and all that, we have all kinds of brushes and we talked a little bit about brushes yesterday, but I want to get more involved with brushes and just regular straightforward papers, background papers so let's, go ahead and start with a blank sheet of paper that's usually the way you start out and I'm gonna go file and new in blank file now, since I'm going to be doing a lot of textures and a lot of, um, different things to these papers, I think I'm going to go with a eight by eight and I normally do it at three hundred, but I'm going to go one fifty, but you're going to punch in three hundred there, but since it takes a little bit of time to process through some of these textures, I'd rather go with the one fifty it won't take as long, but you're definitely gonna want to put three hundred in there for your resolution, and I always go with the twelve by twelve if you're g...
onna be selling these. But whenever you're doing like an eight by eight, if you're gonna be creating eight by eight paper, then just go ahead and put eight by eight. But if you are going to be selling your papers, go ahead and do the twelve by twelve, because that is the size that most didi scrappers are going to be selling their part were cat, I'm gonna go ahead and do a blank are a solid background first, so you have to figure out what theme do you want to do? We're going to find all kinds of themes, so I'm gonna go with a since it's let's do about let's do a snowy theme for now, so I'm gonna go with a light blue. So the way I got to this screen right here is to go to your foreground color, which is the very, very bottom of your toolbar. If you hover over it, it's going to say set foreground color, it will go ahead and pick up a color picker, and it will be on the front of your screen here, and you can change the color by day just taking these sliders, inciting them up and down. If you know the exact rgb numbers, you can punch them in over here, or if you're a web user, you might want to punch in the hex a decibel number which is down at the bottom here it has a little pound sign and then you can punch in the numbers at that point if you are on ly doing web stuff you do you can check this and it will give you the safe web colors but I always un check it so that I can see every single color that is possible so again we're going to go with a light blue color someone's going to take this slider, take it to the blues and then pick like a light blue we talked about the paint bucket to a lot yesterday, so I'm just gonna go ahead and fill it with that color I am going to bring up my layers because we are going to be working on a lot of different layers here, so just go ahead and click on your layers panel and you'll notice now we have a background of that blue and I always liked to work on different layers when I'm making papers because you you can always change the layers below so I am going to go with a new layer and I am going tio go over and get my brush and I'm gonna put some snowflakes in there now most all of you who purchased photoshopped elements twelve or eleven you're going to become you're gonna get a set of default colors are brushes and so most of these that you see here you're going tohave I think almost all of them that you see here you're gonna have we worked on the eyelash brushes yesterday that's why you see eyelashes there but I just installed those yesterday so you won't see those so if you go into the assorted brushes you're going to be able to see all of these different brushes that are already pre made and inside of elements which is really nice now if you are working with photo shop I'm not sure if you have the exact same brushes but you will have a set of brushes so you should be ableto find something that is going to meet your needs so right here number twenty in the assorted brushes area is a snowflake and we're just going to come out to our page after we select the brush and I'm going to use my right bracket to make the snowflake bigger and again we are on a separate layer that's pretty important and what color do we want it to be? Because if you click one time you're not going to see it you can see it in your layers over here but because it's the same color as that background it is you're not going to see it so we have to change that color so I'm gonna go back over click on set foreground color and let's do a little bit a shade lighter and now we can start clicking and now you're going to be able to see that now one thing about this is the larger the brush, the more pixelated it might be so you just kinda have to keep that in mind it looks a little blurry but that's ok, because this is going to be a paper anyway and sometimes you want to be really, really faint and you can play around with the opacity if you even wanted to be a little bit less um parent another thing I like to do with this has changed the size of my brush and just make another layer click, click click I'm just clicking once and now I'm creating and you can go off the page so it kind of bleeds off the plane page and I'm going to create another layer and maybe do another size. So now we've got something that looks like this and we can play around with the opacity on each layer now so if you don't want to be too stark, you can go ahead and take some of those layers down in opacity or you can boost them up. So there is just one example of one paper that we created in a couple seconds with just one brush now there's many other ways we can do this as well, so what I'm going to show you all is I'm gonna start keeping these papers and I'm gonna start putting them in a nice folder so that you can start saving all of your papers that you make and then you can either use them for your own or you can selma's did you kit piece and I'm just going to show you kind of a little bit of how to organize them not a whole lot about the organizer, but we're going to kind of start putting them in folders so let's, just say we want to go ahead and merge those together. We're all good with those snowflakes. We have him in the place that we want and we have the opacity set. We're gonna go ahead and merge those seven emerge those layers together. So now we have a blank sheet of paper and we have one with snowflakes. We're gonna go ahead and call file and save as and I'm just gonna create a folder, create a new folder in here. I'm just gonna call this papers and this one here is I'm just gonna call this original papers, so I'm gonna keep all of these layers I could always go back to this original is gonna have the p g p s d on it, so it stands for photoshopped document and we could always go back in there and play around with the colors if I wanted to change the color of that background, all I need to do is go tio my drop down from my inside and my layers panel and go to hugh and saturation and this is the cool thing because you can change it to any color you want. Teo so if you want to do another sheet like this and what you wanted to be a little bit darker could go in and change the lightness, pull it over to left or pull it to the right to make a little bit lighter and then you could save it off that way. The cool thing about these adjustment layers is that you don't have tio you can go in there and change it at any time, so it's not gonna affect this bottom layer. If we turn it off and on you can, you can throw it away if you want to or you can move that layer to another paper psd now, let's, go ahead in there. I'm gonna turn this layer off and I'm gonna go ahead and bring in another layer on top of that, and then we're going to fill it with another totally different color. Let's, go with maybe peaks go get my paint bucket tool, click and let's go with another layer, go into our brushes and check out any other types of brushes that we might want to use the one that's pretty popular I think is the wet media brushes and that can get you the grungy look and this one here maybe if you wanted to go in here this is like more of dots let's just kind of play around with some of these brushes just to get your um creative see here I don't can't see it very well but I don't think it's dark enough let's go a little bit different color here go with white and I'm gonna make a little bit bigger just click click click in that copy it would be another uh paper I'm gonna take down the opacity though because you don't really want it to be too stark says to another layer turn off that layer below if you don't like it I can always try another brush I'm gonna go back into the I think there's that yeah here it is the finished brushes we talked a little bit about this yesterday so there's a plastic wrap that's pretty nice to use this one here is pretty nice to use and you can also make it as large as you want teo so if I make it the whole entire size of the paper just click one time depending on color you're using and then taking down the opacity out most always take down the opacity and I think vicky or the one that was asking or somebody was asking about putting a drop shadow not just to kind of make it little come out a little bit more you can always put drop shadows on any of these brushes it might give you a little um pop up box but that's all you got to say ok so let's go ahead and do a drop shadow for that real quick it's gonna give you the pop up box that says campus sizes smaller are equal so that's okay and there we have a little bit of a drop shadow it's not real apparent but it does give it that texture look, which is really nice another cool thing I'm just gonna go ahead and keep kind of saving some off so that you guys get the idea I'm gonna go file save ass and now I'm going to stave off a couple papers that I made some file save as choose j piper unlisted drop downs and I'm just going to start naming these like paper one paper to paper three because we may have like ten twenty papers that we create right away summit's gonna wallpaper and you would probably get more specific on what you're gonna name it paper one save save it the highest go back to my layers and then I'm going to turn off this layer and turn this one on actually don't really care for that one but I've turned this went on and maybe I say this one off go file save as and I must say this paper too and I can always click this and then just change the one to a two to make a clicker just don't override the old one save it high and now we have two papers that we've saved now let's start with another blank sheet and try some other things like some textures gonna go file knew you would go ahead and punch twelve by twelve at three hundred twelve by twelve at three hundred for sure and then I'm going to fill this with a color so I'm gonna go ahead and get more of a brown brown look or maybe a light green oaks that might work good too with textures when I fill that entire background and now we're going to start talking more about little textures and filters that we can put on this paper so the first thing that I normally d'oh let's all go in with see where my noises we're gonna add some noise I'm just gonna find my noi I think they might have changed it one adult there it is add noises at a little bit of noise here that the reason why add noises I wanna have a little bit of other colors in there because if I do a texture on a solid paper it's not going to do anything so I'm gonna add a little bit of noise which means I'm adding a little bit of texture and they're already and I can add a lot so if you notice here if I click this and move it over to the right it's going to add a lot of noise or a little noise I don't really want a whole lot so I'm gonna pull it down a little bit maybe somewhere around there and click on okay and the next second go into my filter and I could do some textures okay, so this is kind of fun this is where you can really try all different kinds of things I think what I'm gonna do before I try textures on that is I'm going to right click on this and duplicate it a couple times just so we can try out different ones and see which one we like the best some of the filter texture let's just try this first one and you'll be able to see a little bit of it before you commit to it down here in the bottom left hand corner you'll see a fifty percent I'm gonna go out one hundred percent so we can see a little bit better gives you a texture really quickly and let's just say I wanted to be a little bit spaced out mme or I'm gonna go over here and I'm gonna work with these sliders pull this down a little bit and you could make it ryder or less by just doing the brightness slider as well and sometimes when you have a twelve by twelve, three hundred resolution, it'll take a long time to process through some of these, especially if you're like impatient. You're taking these sliders and going all over the place look in the bottom left hand corner because they'll be this little process bar and that's. Why I did mine at a lower resolution when I'm doing my training, I like to do it lower resolution so that it does go faster, but years might take a little bit more time and just wanted to kind of warn you on that one because you are working with the high rez file someone click on ok and see the difference here. Here's the before here's the after there's one paper that's a little bit more texture than just a place plain basic, solid yeah, it's great. And this is actually just one set of effects, right? So, yeah, you could do anything. Saffron. Sal is hoping that maybe you get to a point. Teo, maybe show us how to make a paper look old and wrinkled. I'm not just referring, teo. The use of a c p a color. But that old warn texture and there's you did the thing is, is you can use digitals kids and go in there and use those papers and change it to whatever color you want to and I'll be talking about that to jennifer was awesome. Can you make lifter effects? I'm sure all of these things later effect oh, yeah, yeah, you condition do that there's all kinds of brushes in there that you can use to pull out there and you really I'll be showing you this, but you could just paint him on a swell grain. All right? So let's, go out and do one more texture to this one and I'll show you how to change the color as well if you need teo so let's goto filter texture and texture riser and this is kind of cool because you could do the canvas. Look, I'm gonna go one hundred percent again. I can see it a little bit more. So over here to the right you also have more drop downs. We've got the brick, so if you want a brick background or if you want a burlap that's kind of, you know popular, you could take the opacity down so it's not so stark you khun scale it, so if I want to scale it smaller, you could do that and the relief you could make a pot more or you could take it down to spy changing the sliders let's just say I want that one let's go click on ok and now I have a whole new texture look, turn those off! Go to the next one let's, go back in there and deal maybe one more filter texture through the mosaic tiles for the stained glass kind of kind of cool but a little bit over, but let's, just try it let's just keep it for sake of having something little bit different and turn this last one off. Go back in, try one more patch work and this is kind of cool because you could make it scale it up to coming to scale it up a lot just so we can see it a little bit more and then I'll scale it up in here too, so you can see that little dot little blocks and gives a little texture. So now we've got four different paper textures that we can create a couple seconds if we want to keep these off as their own, just turn off the ones you don't want to save, so I'm just saving this top one now go file and save as I'm gonna go that dropped down to get my j peg, this will be paper three and then we'll just turn off the other ones and then say that one off, do this one save this one off his paper for and so on so forth so you could make papers I'm expecting everybody to have like twenty papers done next next day for sure everybody says, well, I can't make my own papers, but it is really easy once you know that there's only a few tools that you really need to use you can create hundreds of papers really quickly in the cool thing is is if you do, by the way did you kids you can use those papers to manipulate as well? File save as drop down and get the j peg now we've got the fifth paper and so on and so forth I'm not going to save all of them, but I do want to go into other areas of how to create them. So you get the idea if you wanted to say this is a psd and use it later you can otherwise you already have those j pegs that you can use pull from your library, you khun dio hundred papers have your own library that you can pull from and if you're working with a girl or a boy let's, just say, well, I've got this paper that I really like the same maybe it's this one, I like this paper, but I want it to be blue okay, all you have to do is go into the human saturation change that to blue and then you have that blue color for the boy because a lot of these did you kids are gender specific so if you see something and you going, oh gosh, but I have a girl and this is all blue stuff I really like this kit you can just buy the kid anyway and go in there and change it to whatever color you wanted to be a lot of people don't really think about that um and it's so much easier to do it that way than to try and search for the perfect kid when you've already found it but you just need to change the color how's the internet doing any questions from the internet? I think that's the way you can tell when they're really engrossed in following along because everything's so because slightly quiet they're making their papers I think that's a really good point to make that you to reiterate that, you know, just because the pack itself did you pat doesn't look exactly what you're looking for you then have so many options toe adapt it right once you're working with them exactly and I was going to be showing you some digit kits here, but this is probably a good place to kind of bring one up and show you how to do that if someone is interested in doesn't really quite follow along, we're going to go into one of the see here how about well let's say for instance tw probably the one that we're working on today I would say would be a good one the moab did you get from snickerdoodle designs by karen basically there's all kinds of papers and their their awesome but if you like one of the papers the one that um crinkly paper folded up paper right here think they were talking about we can go in there right click on it a couple times duplicate and now we can make a different color out of that different color again and you have you been going through it but having requests for that and then it was that old wrinkled warren look yeah maybe you can mention what the paper would be teo that process well this one here is kind of looks like it's all wrinkled and everything but if you want it to be a different color than that like a ah a lighter colors that you can use it for you could use this for any frames you could do the frames out of this so let's just say we wanted to change the color so we go up into our create new adjustment phil we go teo hugh saturation click on color eyes now we've got kind of a green color but if we wanted to take it down we can take it down or this is more of the brown old look we can take all the color out if we we just wanted to be a black and white or we can kind of shoot it up a little bit to give it a little bit more depth. So there's one color let's try another color I'm gonna have to pry pull these down below so pulling below here if I could move those that's okay, we'll keep those together I'm gonna come in here go with the human saturation changed the color you have to click on color, eyes and the reason it's not showing through is because I have those other layers on top which is fine we'll just turn them off. So now we've got a totally different color. So basically it's that hugh saturation adjustment layer that's going to help you change the color of that paper. What do you recommend saving that file as, uh, putting the color in the file name if you have a particular color, it depends on what you want to do with it because a lot of people they'll just put them like colors in one folder that's the thing that was brought up yesterday how do you organize all of these? Did you kids so some people they'll take all their buttons, put it in a folder and call it buttons but then whenever you start pulling buttons out of all of your different digit kids then you can't remember where the certain subject is, so I keep my digits all together like it's a holiday, did you can't I just keep it in one package, so I know all the embellishments and all those things are in one folder, whereas some people will pull out all the buttons and it's kind of like, I don't know it's a question that is always comes up. How do you organize? And almost everybody has a different answer for that one. Yeah, well, one of the suggestions that kris says, you know, maybe it would be better to save the files and in neutral and then change the color when you're ready to use it, it totally yeah, when I get back exactly that's a great idea, because it's, easy to change the color, you don't really have to say these over and over just have one paper, and if you'd like that paper, you can change the color whenever the time is appropriate. So you don't want to, you know, put so many papers on your hard drive that you have, you know, no space, but you also want teo be able to be a very versatile in that as well, so great great questions in there, all right, so what if we wanted to start throwing in some more? Brushes over the top of this and then we'll probably move on from the papers, except we're going to be doing some strike papers and try that because I know you were talking about that. That was one of the hall. Momo as for you, well, so we'll talk about those as well, but I'm gonna go back into my brushes and you'll see we have brushed settings over here, so let's, go in there and get something a little bit more obvious like a what do we want to use? Let's? Just try this one here in the circles over here to the right we have brush settings and you can use I know this was in photo shop, the dhobi photo shop a few I've always been in there, I think, but I think this is somewhat new. Two photos of elements, maybe inversion ten is when it came about, but you can dio like a brush, hot jitter and scatter and spacing notice how this is changing down here while I'm pushing it to the right so you can go in there and you could do a different angle of the brushes, but when I go out on to my paper now and I do it it's a new layer, I can click go up they're here see if I'm doing this right let's get a white but I can click and drag to see how it's scattering all over the place and and it's changing kind of the color so this is this you have to kind of play around with but if you click and hold and drag it around your screen it'll go ahead and do that spatter look someone was talking about, um sparkles or whatever this might be something that helped them get a sparkly paper so just know that there is a different setting for those brushes you don't have to just go in there and click click click you know you can click and drag and it will fill up that whole area too with whatever brush you want to use yes, it looks like as you're dragging it looks like it's changing colors that right it is you know what it's doing is seat doesn't do the colors look familiar to you? They're picking the colors that are in my foreground and background color so it's kind of blending them together so if I were to do another layer and turn this one off and do different colors here let's just pick something that's kind of crazy so it's obvious yellows and maybe oranges now let's do pinks so now it should if I remember correctly we should be so now it's doing the yellows and pinks so pay attention to what foreground and background and that's a great question glad you brought it up side it's automatically know that wasn't going to mention it but yeah it's taking those colors there so you can go ahead and pull those and it's kind of like blending them together the audience and home I know we are having drilling issues here in san francisco student I do know it's coming across the feed michelle thing of superstars not throwing her so please don't let it throw you two were working around in the police stick with us and two you can go ahead and do the capacity down and take the opacity down if you need teo um I was I was gonna do one other thing to do you see here we look here on dh oh I know what I was going teo so we did talk about taking old are not older because but your own did you kits now here's a good one for this is an old looking paper too for the one who was talking about it on the internet this one is an old crinkly paper that came it's called scenic route and it is from uh snickerdoodle designs by karen's kit so if you do if that person does purchase the class they will get that so it's already made for them so they can go in there and change it whatever whatever color they want teo now the cool thing about this is they can use this as a frame if I were to come in here and I'm just going to make a copy of it just because it's easier to make a copy and I'm gonna cut a little piece out of that and hit the delete key notice here, you can still see through it. If I turned off this paper background paper, I can see through that, so this would allow me to bring in a photo to use, so just because you have a paper doesn't mean you have to use it in the paper, you could use it as a, uh, background frame so and you can use them as little slices of paper as well. Yes, I noticed that that particular paper has a lot of different kind of colors and textures in it. If you would have changed the colors, say you wanted it different color wouldn't keep that same look of or would it just be solid? No let's, change it, let's do it. It'll it'll take some of that and pulled through. So if I wanted teo change, what color do you want to be? Green. Okay, so what we're gonna do is we're gonna go ahead and do the adjustment layer, so I went over to my layers panel, and I went to that little circle that's, half black and half white. Click on that go to hugh saturation you wanted to be green so we're gonna go ahead and make sure it's colorized and then I'm gonna take the green and pull it to the green area and or wherever you want it to be you know cool that's a that's a really cool it's really a question about brushes diane says if you later changed the huer the saturation on the base layer what will happen to the brush color you're going to use brushes um okay one more time can you see it? Let me read it how it is let's see here their questions are related to brushes and wants to know if you later change the hugh saturation on the bass player what will happen to the brush color and then her other question was to the foreground and the background colors and packed the colors of the brushes it depends so if you have a brush on top of the hue saturation it's not going to affect it so if I have a brush layer on top of this huge saturation so I'm gonna get my brushes and I'm going to go with something different than this this time let's try these guys these guys are kind of cool little sparkles so I'm gonna put the's sparkles and I'm going to make them a brighter color so let's make it obvious ah a little bit bigger than that let's go bigger okay, so I'm making all these little sparkles here on the paper I hope you can see the african see that just fine. So it is underneath that adjustment layer right now I mean above the adjustment layer so it's not gonna affect that so it really depends. The dust layer is right here, so anything below that is going to be affected if you have those brushes above it it's not gonna affect that you could always turn on and off that adjustment layer of you what didn't want that green color and there you could just turn it on and off. All right? I think that is it for the brushes and backgrounds. There is one other thing I want to show you before we move on to the next segment because we have all kinds of cool backgrounds that are already inside a photo shop elements. So go to graphics. Go, teo the drop down and go to backgrounds and it's going to bring up a bunch of different backgrounds that you can use and some of them are really cheesy and some of them are really awesome. So you can go ahead and go through all these different backgrounds. This is another way you can make your own papers as well. Changing the color on these is easy as pie, so let's just bring out one of these papers um, see here actually I'm gonna bring out one that doesn't have to go with this one right here. Actually, this is a fun one now those that have the little blue in the upper right hand corner, you had to be careful of if you're not connected to the internet, they won't come out. But it's not a big deal if if you're not connected to the internet. But if you do want those blue ones, just make sure you're connected, and then you'll be able to use it. So this one here is a brown paper, but I don't really care for the brown look, but it's already inside a photo shop elements, you have this paper it's already there. I'm gonna go back to layers and let's say, I want to do a purple look instead, I'm gonna go to hugh saturation color, eyes let's get to be purple or blue or whatever color you want it to be. And there you have another paper. I mean, you guys could probably make about fifty of them within ten minutes now. All right, ron, tell a south has creating your papers is so exciting. I know what I'm going to be doing during the break a great, great, great awesome, all right, so let's, go ahead and think and do the stripes real quick because I really wanted to do that and that'll take a couple seconds and we'll move on to the next one so I'm gonna do the same thing you'll do a twelve by twelve, three hundred resolution and I'm going tio let's just pretend it's like easter time or whatever we're going to do some pastel papers I'm going to go ahead and get my pay packet tool and I'm gonna start pulling in all these pastel colors so I'm creating a lot of layers with a lot of different pastel colors and it's just I'm just filling them with the paint bucket tool not a problem. We cover this on day one, so if you haven't seen howto phil go back today one upset the same colors let's go with something more purple, so now we've got let's do a blue just picking out different pastel colors here. All right, now these papers might not look beautiful or anything, but you're going to get the idea all right, so if you cut from the top layer it's going to show to the bottom layer or to the next layer that you see, so I'm going to start taking my rectangle marquis tool and I'm just going to start slicing out little pieces it's just by clicking to the top all the way to the bottom hit the delete key and notice how it now shows me that purple that's down below and I'm just gonna go randomly start deleting now if I want to see this green below the purple I need to go in there and I'm going to go click and hit the delete key and then go to the next layer and hit the delete key if I wanted to see the pink, I just hit the delete key again when I'm on this layer okay, so hopefully it can kind of see what's going on here I go to the top layer into the lake, he go to the next layer and now all of those air showing through so it's really easy to create your own stripe papers and then you can start turning layers on and off if you just like certain certain pieces and certain colors you khun dio horizontal you, khun do vertical! You could make your own patterns by just having different layers any questions you like that one? I d'oh alright and then you just go ahead and save it off, just as you normally would. So now we're on paper number see where'd I put those in probably paper number eight or whatever papers, papers six so now you have a little library of papers and you're good to go with creating some of your pages
Class Materials
bonus material with purchase
bonus material with enrollment
Ratings and Reviews
PJ
I really enjoyed Michelle's teaching style. I'm new to digital scrapbooking and am on my way to becoming an die-hard convert. Thank you so much for explaining everything so clearly. I'm so glad I bought the course and all the extras you gave me were wonderful - a quick way to get started. Hope to see you again on CreativeLive soon!