Basics Panel: Texture, Clarity, and Dehaze
Lesson 4 from: Developing and Global Adjustments in Adobe Lightroom ClassicJared Platt
Basics Panel: Texture, Clarity, and Dehaze
Lesson 4 from: Developing and Global Adjustments in Adobe Lightroom ClassicJared Platt
Lesson Info
4. Basics Panel: Texture, Clarity, and Dehaze
Lessons
Class Introduction: Develop Module Overview
10:15 2Profiles
11:34 3Basic Adjustments
11:45 4Basics Panel: Texture, Clarity, and Dehaze
05:31 5Basics Panel: Saturation and Vibrance
02:40 6Tone Curve
09:26 7HSL
04:48 8Split Tone
08:19Lesson Info
Basics Panel: Texture, Clarity, and Dehaze
So that is all of your basic adjustments, and then you get into texture, clarity and d hazing. Now texture is all about the skin. Um, it usedto be that they just had clarity. And D. Hayes and Clarity was. Clarity is basically contrast in your mid tones. And so that's where, like wrinkles are. So if you have a lot of contrast in the mid tones than the shadow over, wrinkle is really deep in the highlight of the wrinkle is really bright, and so you get a pretty severe wrinkle, and if you go the opposite direction and limit the contrast, then the shadow gets brighter, the highlight gets darker and you no longer have a wrinkle. Texture is the same thing on a much more more minute lead level, and so it is actually really great for taking down skin texture. So if I grab on the texture and bring it down, you can see here, look at her forehead. You can see that there's a texture to her skin, and if I grab it and bring it down, it softens up that skin. Now you'll notice that it's all off, so sof...
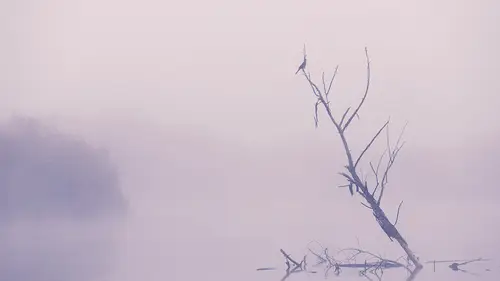
tening up her hair just a little bit. So here's the thing. Texture is really awesome for skin, but it's also not great for hair. So we will use that in our retouching process later, as we are able to apply texture to our negative texture to skin specifically with our brush, which is right up here. So when we talk about retouching, that's when we would want to work on texture. It's not a good idea to just apply negative texture across an entire image. You really need to apply in a brush or integrating or in a radio filter something like that, because you need targeted specifically, Um, but that being said, if we look at texture as a landscape tool, it is absolutely fantastic, Um, for foliage and mountainsides and things like that. Go go nuts with the texture. Take the texture up all day long because it's beautiful in a landscape photo or ah, in a architectural photo. Something like that. It's fantastic tool. So, uh, clarity also is useful. A lot of the times I will add a little bit of clarity to a photograph because clarity will just kind of help toe bring out this like her eyebrows and kind of sharpen up her eyelashes and things like that, especially if you have an image that's just slightly soft, that the clarity tool will help to just kind of separate things out and get rid of some of that just soft focus. You look, um, so just take the clarity up. Don't go too far with it because it gets a little bit heavy handed and then later I'll come in and bring texture out of her skin and and we'll get a really nice soft skin but nice, crisp eyes and things like that. So clarity is really useful for that. Now. D. Hayes is a completely different tool. So when we go into D hazing, that's four. When you have glare on a window or when you have fog that you need to look through. So let me quickly go. Um, let me go to an image that oh, here. Ah, here we go. So I've got some fog here. Um, and maybe we'll just go to this one here so clarity would help us to see this pull a little bit. So if I grabbed the pole and see how it's darkening up the pole, little bit so that I can see it through that fog just a bit and texture is really great for, you know, like dirt and and leaves and stuff like that. So had take texture. You can see how the rocks and the dirt and stuff are really starting toe to sharpen up, so it's really beautiful in that way. But if I want to see through the fog, watch what we get when I go for D. Hes. So if I increase the D. Hayes, it's like I just removed the fog. I pushed the fog back like I took a big fan and blew it back so that I can see all of this information here. But notice what else it does like. It really darkens up the so if there's a natural vignette to my lens, I'm going to start seeing it because I'm It's really taking the contrast and really tweaking the contrast so that I can see those things so d hes can be really useful, but it can also be very, very damaging to a photograph is well, so just be careful what you do with it. It's fair. It's fairly useful in times where you want to see something a little bit better, but one place I like it is in adding fog. So if you have fog and you wish it were foggier, then just go negative De Hayes, and you'll get a lot of extra fog. It'll just amplify all fog, or it'll add fog where no fog existed. So it's a really great way to get rid of fog, but it's also a great way to add fog to a photograph.
Class Materials
Bonus Materials with Purchase