Lessons
Lesson Info
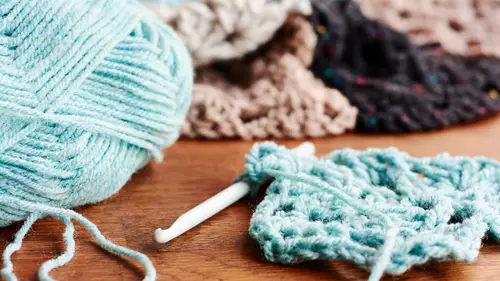
How to Basic Cable Stitch
Alright, one of the projects that we have for you is bonus material, is this really great infinity scarf. It is, an infinity scarf is just one that is seamed or worked so it's one big circle and so that later you can stack it or let it hang, but either way, it just kind of hangs around you. For this one, I've also included a cable down the center and that is the point of this lesson. We are going to learn how to do basic cables with crochet. But the cool thing is I'm gonna walk you through, sort of, all the main rows you'll need to make this particular scarf. So, really you could start it as a swatch or you could just keep on keeping on and go all the way for as long as the pattern calls for and you'd have your scarf. For this, you're just gonna need kind of a worsted weight yarn or maybe a chunky worsted weight. I'm working with, I have a tweed version of this Homestead by Plymouth Yarn, but really, for scarves I'm not overly concerned about gauge. So, you should just a yarn that you ...
love and go with it. I'm gonna show you really quickly, here's the watch version of it and you can see how it looks a little bit more mellower when you do it in a neutral color and with a tweed. The cool thing about cables with crochet, if you're familiar with knitting at all, there's an additional tool that you need to create cables. It's called a cable needle. It's cool, it's easy or whatever, but not at easy as with crochet cause you don't have to introduce anything new it's just the way that you work the stitches. So, we're gonna start based on the pattern that is in your bonus materials for the scarf and I'm just gonna work the first several rows to get you through that cable part so, that you can absolutely be successful making your own scarf. Alright, so, you have your foundation chain. I've already worked mine, for this particular project, it is 23 that you need to chain and for that first row you're gonna double crochet in the fourth chain from the hook. So, that's one, two, three, four. So, you yarn over, I've already lost it. One, two, three, four, you insert the hook, pull through, and you work that double crochet. Alright, then it says that you're gonna work double crochet in every chain all the way to the end. So, this is establishing you, this is giving you a little bit of fabric before you start embarking on your cabling journey. So, we're just gonna, we're gonna awe, we're sitting here, we're crocheting together, just chilling. This is a little bit finer weight of yarn that I've been working with for most of the course and little bit smaller of a hook, but I just wanted you to see me working with multiple tools. Although, the hooks are the same brands. I really like these Clover Amour hooks because they have oops that was a half double crochet, because they've got this great, sort of, ergonomic grip handle and so it's super easy to work with. Alright, so, we are double crocheting our little hearts out. Ah, my piece. And you can just, you know, listen to some music, watch a show, talk amongst yourselves while I finish this row, cause we're getting close. Alright, we're almost there. Three, two, one and we're done with that first row. Alright, so that's really just setting you up. So, we're gonna turn that around and for the second row, we're going to chain three. And this will count as a double crochet. Just as a refresher, you're chaining three so that you're getting up to the height that you need to be for the height of a double crochet. So, we're going to double crochet in the next six stitches or the next six double crochets from the row below. So, that's one, two, three, four, five, six. So, that creates the first of the two book ends that are going to cuddle your little cable down the center. So, the next, what we're gonna do, is we are going to skip three double crochet. So, one, two, three, and then we're going to do a front post triple crochet in the next three stitches. So, to do that, we talked about it in another lesson. We talked about front post double crochets, or I'm sorry front post half double crochets. This is the same concept, but it is a much taller stitch. You need the taller stitch because you want to have enough fabric to do the wrap around that a cable would. So, we're skipping those first three and then we're going, for a treble or a triple, they're interchangeable crochet you need to wrap our yarn over twice and then we're gonna go around the front of that next, of the post of that next stitch. Pull that through, yarn over, pull through two loops once, twice, three times and then the pattern says that you need to do that twice more so a total of three. So, I'm going around the front of that post, and now we've created, you can already see how it slanting. See how that's slanting over to the right? Because you've gone around the post and you've skipped stitches, so there's no way that it can stand tall because it's trying to accommodate being attached to the other portion. So, this is when we have to go back and scoop around and work those stitches that we've just skipped. So, this time we're gonna do front post triple crochets again but we're gonna do them in the stitches before the last three that we just worked. So, yarn over twice, so we're gonna go back, that would be the first one right here. You're gonna go under or around that front post and work your treble crochet and you can already see that it's forming. Yarn over twice again, go around that post, create that triple crochet, it looks like we've got one more to do. Going around that front post, anchoring it in, working that front post triple crochet. What you have just done, my friends, is you have cross streams, you have cabled your first crochet cable. Very well done. So, from here we want to just move on and we want to book end. We know that we did a bunch of double crochets to nestle on one side, now we wanna nestle on the other. So, you would just continue, you're not gonna go back and work the stitches that you skipped and then went back and then went back, you're gonna now start on the next stitches that come after the cable. So, and those are just double crochet. So, we're gonna go ahead and just work those, to the end and this again, this swatch that I'm working on right now is the exact stitch count of the infinity scarf that is bonus materials, so if you're enjoying making this crocheting along with me, you can literally just keep going and make this scarf. You'd probably have to go get more yarn but you wouldn't have to pull it out and start again with a different stitch amount. Okay, so that is the end of row two. So, for row three, we're gonna chain two and then we're gonna work half double crochets, for awhile. We're gonna do that in the next six stitches. Those are on this wrong side row instead of double crochets, we're having half double crochets be our little book ends. So, just as a refresher, yarn over, insert the hook, yarn over, pull it through, yarn over again, pull through all three loops. So, one, two, three, four, five, six. Right now, you're now on the backside of that cable that you created, and it looks a little like mangled on the back side, so you have to kind of eye it just a bit but it's pretty clear that you need to go in this next stitch. Actually, one, two, three, four, five, six, seven. Yep, the chain two counted as a half double crochet. So we are good there, so then from here we're gonna do a back post double crochet in those next six stitches. So, in those, in those cable stitches you're gonna work through the back post. So, that means that we need to yarn over, and instead of going around the front, we're coming around the back and doing a double crochet. So, that's one, you gotta go around the back and you're probably going to have to flip the piece a little because they're crossing, you may have to search for it a little bit. Let me try that again, that just fell off the hook. Okay, there's two, and just flip it over so you can see what I'm doing. Around the back post of that third one. Here's the fourth one, you can see it's a little fussy right there. But, because it's such a tall stitch, you're working around the post of that treble, of that triple stitch below, there's plenty of room for you to work. Alright, we've got two more to do. One, two, three, okay one, two, three, four, five... Okay, perfect, alright so we've worked all of those and that is just gonna build up fabric for the back of your cable stitch and then we're gonna go ahead and work the half double crochets to the end of that row. Alright, we've finished that, and now you can see a fully formed cable and all you're gonna do is continue in that manner. Working those front post triple crochets and those back post double crochets to create that little cross on the bed of double crochets and half double crochets and you're gonna create this really cool, cabled piece. If you go ahead and download the bonus material infinity scarf and you work on it and then you make it and then you wrap it around yourself and you take a picture, I would love that, I would super duper love that. So, please make sure that you tag @vickiehowell and @creativelive, we love seeing pictures of students works in progress and finished stuff. So, I feel super confident that you are ready to go on your cabling way.
Class Materials
Bonus Materials with Purchase
Ratings and Reviews
Leposava Trickovic
Student Work
Related Classes
Crochet