Lessons
Mobile Photography Overview Part 1
28:23 2Mobile Photography Overview Part 2
33:07 3FreePreview: Gear and Accessories
26:21 4Shooting Basics: Apps and Settings
22:58 5Advanced Shooting: Panos and Exposure Bracketing
42:34 6Shooting Q and A
08:24 7Shooting: Samsung Galaxy 2
15:20 8Mobile Workflow: Retouching and Syncing
30:42Lesson Info
Advanced Enhancing with More Apps
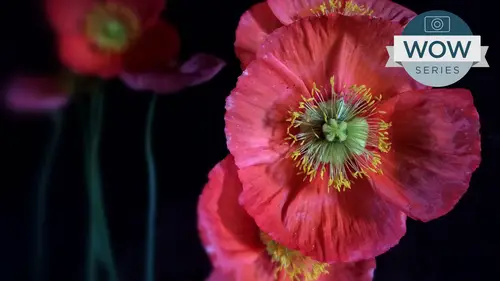
But wait, there's more. If you click the sphere again, it's not gonna do anything. But if you come over here and there's a little FX down on the bottom, FX has a bunch of presets in here, kind like filters on top of the tone mapping. So I have Orton Normal Black and white infrared. Um, I've got vignette by Go over at the top. There's little buttons that so I can click on that button. There's three little ones now in here. If I go to the 2nd 1 there are overcooked HDR. It's like they know me. Overcook HDR. No more HDR. Whatever you want, Realistic Sky will try a realistic sky, and what that's done is it's giving me my preset here. I can still click on that little switch and do my little kind of fine tuning of the map. Click on the switch again, and now, rather than mapping the tone based upon this sphere, I'm now reworking the color based upon this sphere so I can change how the tone is mapping in this case, even darkening the sky while leaving the cliff face bright. And here's my befor...
e after before, after dynamic light if you're my kind of person. And again, if you click on it again, you're back to the overall slider so you can make this a settlers extreme. You don't have to do the psychotic acid LSD. Burn my eyeballs out thing. You have all sorts of controls, but it's called dynamic Light. Its excellence been around for a long time, and you click it and save the resulting image. Okay, and let's. Actually, since you can't blow up in that one, let's go to our photos and go into our recently added just so you can see this image. And that is really a pretty significant adjustment, considering that that image is this one right here. And this is a J peg. Remember, all this is being done not too raw files, but to J. Pegs that shows you where image processing has come. If you're like me that have been doing image processing since the seventies computer processing, um, we never in a 1,000,000 years, even in the eighties, could you have thought you could pull that out of a black J peg file? But the's programmers these days are amazing. That is dynamic light questions about snap CEO or dynamic light. There is one from Kathy with the snap See defects such as drama. Can you reduce the amount of fact? Yes, that there is a slider in there on for the intensity of the overall effects? Absolutely. All of those pretty much all of those. Whether it's structure or drama or other ones. They all have that slider in the center, which is gonna be the overall intensity for that particular effect. Awesome. I just bought dynamic light, too, by the way. Yeah, as well you should. It's I mean, when I was in the Grand Canyon, Yeah, as you could see. I mean, you're in Jet black shadow off the canyon. You've got this glorious she kinda glory of the the cliff face being lit. If there's anything, that's it. We're going to be doing some with HDR tomorrow. We'll show bracketed shots and what you can do there. But it was a place where it just kind of called for. Speaking of, I was shooting with this. We'll do this tomorrow. So in HDR, this has that drama. As matter of fact, I'll bet dollars to donuts. Dynamic light is built into this camera. I bet Olympus bought that technology and put it in here. It's called drama dramatic. And the neat thing is, you know that little sphere how you can move it around. This uses the built in gyroscope with drama. You move it through the scene, you shape the dynamic light that you want, press down your shutter halfway it locks it recompose, presses it and it's in camera. That kind of drama is built into this one as well. Did I mention I like this camera? And of course, that filter is also built into which I don't have out here. All the Olympus cameras, including their mirror, less cameras there. Raw shooting. Um uh, replaceable lens cameras have all the filters built into it. So very, very fun. Yes. Version there is a selective. You can actually do several at one time. Yes. Was there that in snap? See? Yes, that selective and snap seed has You could add thats why that little plus symbol where I clicked and dragged. I just did one just did one. Okay, that's what I wanted to clarify. Do I think a dozen or so with that, as opposed to that center focus one that was one little bug in there. But this selective adjust as a number of those that you could put in there and you can continue to change each parameter for each one. Actually, let's do thank you one more back in there because it's actually is a pertinent question. If you do a selective adjust, you can come over here and we can say, you know what? This this area here, I actually want a dark in this Increase the contrast. So let's, you know, dark in that and contrast Mawr. You can click on it, copy click paste and not have to recreate the wheel. So if you do one I little teeny tiny adjustment do your little bit of bright ning a little bit of this click copy. Go here, paste. Move it right in the right position. When you move these around, you'll notice you get a magnifying glass so you can see exactly where you're putting it, So yeah, you can use it little vignette ing If I want to come down here, spread this this little corner. I want to darken it a little bit. Okay, so I, you know, dark. That corner over here. Um, add another one over this point. I really want to. I want to shape this, which is what I'd really would do because I really want to keep the eye in the centre. Come over here. Copy paste. Okay. Down here. So I'm really centering it. Maybe one last here in the center to really kind of bring the I into this. You know, center portion of the image completely changed the file with targeted dodge and burn. It is kind of it's trying to find a hard edge. So that's why I like having that, you know, center focus in the in my little trick. A little bag of tricks. Yes, John, are those bugs like, are they additive? If you've saved an image and you bring back that same image and see when ADM. Or saturation to it, yes, they are maximizing one. You say it's additive or each one is destructive. Basically, you are tweaking the pixels. You come back and ADM or you can do this 20,000 times. But you could say additive. But remember, anytime you change pixels, since you're not really creating new information, you're actually taking away information So at some point, if you get, you know, so greedy. If I've increased contrast and then say it now, I bring back brightness. Well, I reduced the dynamic range by increasing the contrast. The dark's got dark, the lights got lighter and the middle tone values, you know. So just be cautious. Any program that is in this case, pixel based, not nondestructive, as opposed to If you did in light room and you have the same little adjustment brush the radio tool, the graduated filter. You can do those all day long, and you can add contrast in one area and overlap it and reduce contrast in the other way. They will cancel each other out. They will not degrade the quality of the image, and they're wonderful. Those that that's the difference between a procedural processor and a pixel pusher, which basically snaps it is which brings us to save that, um, foot, a shop express. His photo shop, expressed like light room is also well, you're in The APP is a procedural processor. It's the engine built into a CR light room. So I'm gonna say open from here. Let's find another little um, Can you image just cause I can and ah, see, we'll do it this way. We probably use a big one, but that's fine. It starts off with looks these different, you know, colored looks just like the filters that are built into the camera. I'm not a big fan of the looks, but I'm coming over here to our little area of sliders and in the bottom. Guess what we have. Clarity, sharpen, reduced noise. D fog. Like I said, that's a brand new feature from Adobe. That's Onley here. It's not even in a CR light room yet, but it will be coming. I can come up here and I'm gonna do overall exposure just to show you how much I can pull out of this file. So there's my overall exposure. Let's go straight into shadows. Pullout Mawr Shadow detail Now that I can see what I'm working with, I'll go down to clarity. Add some edge popping to this file Like it. You can see where I'm going with this. By the way, you can blow up the image inside of Put a Shop Express Photo Shop Express is great, and it also has a before and after this little button in the upper right hand almost operating corner is a before and after. So in terms of being able to pull out information, you can see it's loading in the information as I scroll, so it's not keeping the entire image. But, um, that's doing a great job. Let's go down to the image. We both have vibrance, and we have vibrance in here, so we'll increase vibrance and maybe temperature intent. I kind of like that. Ah, wish they had a really good been yet in here too dark in some of the edges. There's no selective adjust. There's no decent been yet. They have a dark and kind of frame thing, but it's a framing effect that doesn't give you much control. But it is again looking at the image. It's able to pull out a huge amount of information, and I could do any of these adjustments in any order and not lose it. So if I add contrast and then I pull out shadow detail again, I would never do that add contrast, and then do shadow in an app that was sequential. It's excellent. I can go into, uh, highlights pullin, maybe a little bit more detail here. I think I can get away with a little bit more vibrance just because that's the kind of guy I am. And they have one other thing. You have to pay for it in this app, but you'll notice they've got sharpening One thing. Very nice sharpening. And since they are actually blowing up the file, you can actually see what you're working on. The sharp actually looks quite sharp for this Pano done with the IPhone but reduced noise. I think it's a buck 99 toe by reduce noise was really fun of the photo shop Guys nap. If you guys remember the the National Association of Photoshopped Professionals, now known as Kelby one. They did a really funny parody on what a mobile photo shop would look like they did five years ago before he's even thought of. And it was great. But you had you would go in there and you'd had to unlock every single feature for another cents. Oh, you'd like to sharpen. There would be cents. Oh, you'd like to select help United minutes. And so you'd like to scratch your nose. That'll be 90 minutes. In this case, they have it here. But this is the, you know, adobes noise reduction algorithm, and it's actually is excellent. So if you, um, and noise on these files, especially when you're pulling out a ridiculous amount of detail. Hello? Talk about being greedy. Um, noise reduction is an issue, and it is an option here within Photoshopped Express. And they did an excellent job of implementing that. So again, over here saved a camera roll. You'll also, um uh this app, which has been around for a long time in different incarnations, isn't as integrated into the current mobile Adobe Mobile workflow as other ones. But it is excellent. So that is, um, foot a Shop express. Excellent. Quick, easy. Not quite the number of controls that I haven't snap seed. Um, but it's excellent quality. And because it's nonlinear and non destructive, I can work in all those different areas. It also has the color effects. It does also do nice black and white conversion. It's not battle. Yes, OK, we've mentioned photo shop and we know how it is on a desktop where it just eats up lots of lots of ram How is that in respect to liken Eiffel? Is there such a thing as Ram on an IPhone? There is a ram these air set up with one megabyte of Ram. Everything is being done within one megabyte of RAM, whereas other mobile phones have gone up to as much as four megabytes of RAM. The problem What? What Apple has done is the Mawr ram. You have the more elbow room, something can work in, Um takes up a lot of battery. So they purposely said, Look, rather than letting people get sloppy, will call it with their programming code where they know they can take advantage of all this RAM. We're gonna force them to be elegant with their code and that will allow us to have battery better battery life and also in the sense work faster because any time you send information into RAM to do work, you have to take it back out of RAM. It's an in and out scenario. So by having a smaller ram footprint, they've actually picked up some speed and they've picked up some battery life is my understanding of why they've kept it. A one megabyte of ran at some point that will have to go up just because programs we need it, what they're doing in one megabyte of RAM. This is a Mac plus for the Mac, plus the Mac, the Mac, the Mac plus, Yeah, it was the 1 28 k was my first Mac in May of before you guys were born, Um, and then the Mac Plus was the business computer because they had one make of RAM. This is one Meg of RAM. It's amazing what they're doing with that. But that said, that's why things like Snap seed doesn't let you zoom up. That's why you'll notice. When I was zooming around inside of Push Up Express, it was having to kind of re draws. I moved around. That is one of those reasons why you may want to continue to upgrade your phone, because again, this a chip that was probably again, at least over 20 megabyte follows working on. I was working on it in real time and one megabyte of RAM, and that's because this has got a chip on it. I was doing the same thing on a IPhone four. It would have been dramatically slower to do it, and it may have even forced it into a lower resolution. So very good question. But that's also why I do get the latest because it's example that IPhone five s was twice as fast as in five. This is twice as fast as the five s. So even if you just had an IPhone five, this is already 400% faster and that at for all this stuff that we're doing with video and processing. So anyway, very, very good question. Yes, shut down in the APP background because you actually can. They don't They're not actually using the current Ram. There's a there's a little bit of them. It's it's stored in a different portion of RAM. It's not the same elbow room, but I absolutely would do. Exactly that is, as you know, if you double click on the home button, you can come up here an example and just flick out, and now it's no longer using. Those are keeping the settings is basically what it's doing. Okay, so very, very good question. Let's do a few more. I still want to do sinking. I had mentioned that for video work filmic pro. For those of you who do video work, film Akpro is excellent. And I think I've got a beta. I do work with the gang over there. And so you have over here both the setting of your exposure and your focus. You've got two separate things that you can do here. You also we're just gonna go right down into settings. And its claim to fame is its ability to absolutely control every parameter of a video recording process. And when you're shooting on something that basically is originally meant not to do any sort of professional videography the fact that you can change it from a 24 25 or 30 frame per second sink um you can take your frame rate up to 60 frame per second. If you're doing 7 20 you can do accelerated motion effects within here. You could do slow motion effects. You can actually save eight different presets for whatever different affect your doing. And you can Kraemer change the parameters of all these in terms of how it's doing its processing and what it's using it for. Here's an overall informations. Zoom stabilization, um, are geo tagging event mode. There is your overlays where you can do have your audio meter so you can check your audio levels where you're doing it. You're framing guide for video safe chroma key. You can change all these different parameters, including compression modes inside of, um ah, filmic pro. And this is why it's been I'm showcased and all the apple ads Bentley in their car. Add The current Bentley car ad was shot completely with filmic pro. I don't know any professional people who are using the IPhone, which is a great camera that aren't using, um, filmic Pro just because its ability toe have the best possible compression, at least amount of artifacts. So you can continue to edit it when you get to another location. And, of course, you can change your white balance. Um, you can, you know, again change all your different parameters inside the filmic pro, including having all those presets. So for video, that's excellent. If you want to do video editing, I mentioned that Premier Now Adobe has premiered as a free little device. Another one that I use is one called ah, in my video area. Spice splices an excellent 14 doing video editing. Very simple. I love it. Um, we won't go into Why should show action Movie bed. Robot. You know, J. J. Abrams? I'm company is just awesome. And basically, it allows you to dio a huge number of effects. And basically, I just It's just too fun. I shouldn't have even gotten into this because it's just too great. Uh, let's do you know, um, car smash. So basically, you recorded and see that car coming at you. You come over here and you're gonna set this, and you're going to start your recording. And, um, film were you want the effects to go and that is your ground plane. Okay, so there's my ground plane right there, and I'll say record And what you should do is you should have somebody run through the scene. But we'll say that somebody is running through the scene right there and you say okay. And we stop it and we say, Okay, there's our time. Will say okay. And you'll notice, um, hair is gonna come car into our studio. Well, well, well, ok. Perfectly seemed if you guys play with that video people is totally awesome because you. Actually, you have someone run through the scene and they ducked right before the car hits and the car will go in front of them. So this is and that's free you comes, comes with 1/ a dozen one. If you want to unlock the phaser banks and robots and everything else, you know, it's just Anyway, you get the idea. It's it's awesome. And, um so anyway, there yeah, it's just, you know, this one. You have your uh huh. That's a mother in law. But I like my mother in law, so it just drops down so I could do it for you guys right there. It's not gonna be very nice. So actually you can. That's exactly what you should do. Is that you should look up okay and do that, and OK, great. We're getting this. We needed some fun, and you can change where the effect is gonna be. See this right here So I can come up here and I can put the effect so it comes in right when you guys look up so you can come up here and process it. This is an awful thing to do to your wonderful students, so I probably should have gotten the film. You know, that film playing? You'll notice it wasn't at your feet, but, um, anyway, really. And it's completely professional quality. The what are known as the mass the Alfa channels already built into it. I di aggress. Okay, we have We want to do some things. Um, I'll just mention, um, touch retouch again. This is built into Adobe has some maps, but this has been around for a long time. If we have, um, are let's go back here to Recently added Will just use this here for fun. Touch retouch. We won't do full resolution, but it does do full resolution. We want to come up here and take out our lovely victim were Come out here. The net. Who's gonna kill me for doing this? Hit the play button. There is your removal of your friends how to get rid of friends and influence people. Okay, so you have a brush or you have the last. So okay, hit the plus. It does an amazing job of cleaning up a scene. Okay, Touch retouch. It's great. It's free, has a stamp. It has a lasso. It has a brush you can add retouched to it. It's awesome. Let's touch retouch other ones that do. Portrait's beauty booth is really cool. We don't need no, I don't need Let me come back toe Portrait wins, but both beauty Booth and this one here called Visits Lab in the upper left hand corner. Both are very nice. They have an auto intelligence defined faces to find eyes to soften skin tone without doing eyes. The Visage lab is, you know, almost creepy in terms off Um what it how it's able to find a face we should get you got. But your eyes were closed and looking down, and we won't get me because so that's why you have a daughter. So you know it's doing skin eye teeth whitening, shine removal, wrinkle. All these different enhancement. This is the automated one, that 1st 1 is actually going to go in and allow you after the fact to go in and find Tune. Just the eyes, just the skin just wrinkles, just blemishes. This one is kind of an all global situation here that it's doing on this. It's not a straight on view of of my daughter So it's taking a bit longer to do calculation questions out in video land or you guys hearing in studio. Do you have a favorite app for an infrared look somebody Kathy has been waiting months. Probably that snap seed snap seed is excellent or the one that's built into the camera roll, Remember? And as I drag that through a huge range of my black white conversion, there's nothing that, um here here is that that face. So there's after here's before you see that the subtleties that it's doing and it's actually adding a little blush as well, keeping the eyes sharp, balancing out the skin tone. Overall, it's pretty darn cool. But to answer question infrared is based upon the chemical structure of your subject matter, the reflectivity of things like chlorophyll. So when you're imitating an infrared, the closest you can get is darken up the blues in the sky en lighten up the greens of foliage, and you can do that by having access to the different color channels that make up an image. And that's basically the filters that you put over a file so that will give you dramatic black and whites. But Just remember, that's really not infrared. Infrared is a very different how something is is defined. You actually get your shadows conglomerate in a true infrared because the chemical structure of what's in the shadows if something is a dark black shadow. No matter what you do in terms of post processing, it'll be a dark shadow. You can't make it. You know bright green. That's a dark green tree in color. No matter what you do, it will stay a dark color in your black white conversion and infrared that could be a glowing white tree because of the chemical structure, but a very good and I would probably say, the built in camera app or for black and white in general. Let's not do infrared because I wanted to do exactly this for black and White conversion. This one here at the bottom called mono view is that one that I said, that does really nice antique ing color effects. So let's go ahead and open a file. We've got all our photos. Not all our files recently added, is the easiest way to go here is our, um we've got a nice antique here. We've got an antique great antique car That's just out in front here and I'm gonna come over here. I'm going to start on the far right hand side, but they are beautiful, monochromatic transformations of the file and taking Some of them have dust and scratches. CP atoning. You can't control say, Well, I like the scratch, but I don't like the tone or elective in yet, but I don't like that. So they've basically said this is imitating this one particular technique. This is a scion, a type. This is, you know, 10 type. This is whatever, but they're actually beautiful renditions of the file. And it has all the subtleties of reduced contrast or the wet plate edges or little, you know, they're just beautiful black and white conversions with every basic kind of range that you can think of in terms of the file. So, um, absolutely, um, love it. And it's called mono view. They have a color view of it. The prop. The problem with color view is it's geared toward instagram. So it crops everything toe a square has a nice, really nice effects, but it doesn't let you not keep square. And the problem with me is, You know I do. Yeah, I just That doesn't. So, um So anyway, so that is my interview. When you save it, you actually really quickly. You can just go through one, save it, save it. All of those air saved to the camera roll. When you come over here, it actually saves all those versions as well. So it's very, very quick. It gives you a lot of range. Here's the color view version of it, which is excellent. So that's my interview. So for black and white conversion if you need it, um, the effect is great. Let's go into another one that I have here after focus and after Focus Select is really neat. Let's see if we keep doing that. Going to recently added, Let's do Do we have one of these? Let's try the flowers. Let's let's try a flower one. I'm feeling frisky. Um, we'll do Sure, why not after focus and there's our little tutorial, but I'm gonna do that here. Basically, you drag over what you want in focus, you dragged over the background of what you want out of focus, and it automatically creates a mask for you. A really elaborate mask and you can pinch and continue toe, you know, say I don't want these in the focus. I did want that. So you jump back and forth and add little portions of the file to it. This is background. If you want a middle value, you can come over here and click on middle. But if it's a hard edge selection that you want, um, we'll just say that that's good enough right now and will say next, please. Yes, thank you very much. And there is our, um, our image where And you can click on the foreground or if you did the reverse mask, you can say the background. You can even make a movie at the top where it will make it change the focus in real time between the foreground background. You come over here and set the amount of blur. Make it whether it's a motion blur that you're imitating, which is awfully nice lens blur the amount, whether you're using edge focusing on here or this background, because this image right here is not realistic, because there's no way that the base of this vase can be in focus. But what it's resting on out of focus, right? Doesn't make sense. Fade background manual. Be really neat. If I could come over here and say that is in focus, that red plane is in focus and it's gonna instantly fade off. So now you'll notice the bottom. The base is completely in focus, and as it goes back here, it goes out of focus with the nice graduated that you have chosen. So that is really cool. And that is the one thing that's missing with these little point and shoots is when you have such a small lens and such a small sensor, your ability to do a shallow depth of field is really, really compromised. I'd go back to this blurring, you know, do a little not get so greedy because you can get a very natural looking effect as long as you don't get too carried away with you know this extreme, but you can see you can also change the you can add a, uh, okay to it. If there's a lot of speculative highlights, it will actually give you the size or the shape of your These are the blades in your iris that make it up. That's making up the okay, Okay. And again, once you're all done, you can continue to add, you know, little effects if you want, cause everybody, I guess, likes effects. Nearly as trendies may think I am. Okay, So effects and effects to you can add a little. Here's a little bit getting to it and save it out. Save it to your file. Or if you wanted to, you could even make that little movie which we won't good get into. So that is, um after focus. Another one that's real fun is called finger Focus. And that also does some nice work to it. Other ones that I have here, that role world in the upper left that does the tiny planets is another one called Tiny Planet. But Roll World actually gives you more control. That's my kind of favorite one for doing these sorts of scenes. Since we do have roll your own world, we'll pick a photo from the photo library and just fun since recently added, Since we have some Panorama is here, we'll do one that has a sky, okay. And so basically you can do that rabbit hole or looking out you can, you know. Fine. Tune it. You can set the amount of distortion within their You can do the softness of the transition between one edge and another. You can, you know, rotate the final image. So it gives you a huge amount of control. That's called Roll World. Yes. Do any of the app that you have have a good kaleidoscope? Yes, there are some that have kaleidoscope. I don't have it in. Ah, this app there in my shooting and optimizing one of my favorite ones is symmetry. And, um, it is Mawr. One or two planes, you can come up here and you can, um, basically do, We'll do this here. So you set up and it's for this, um, symmetry. So we can come up here and do a nice little temple where there's my waterfall in there, whatever I want. Or you can come over here and shift the plane, you can do a random axes, and now this is going to I'm shift the axes and you could come and continue to do this and then add another random. So now we've got multiple axes. So your kaleidoscope, this is how you do it. Okay, so good question mentioned these other ones. And here, back on this one, uh, we covered those king cameras. Great. That also lets you save presets, which we like. I mentioned hyper lapse image. Blender is a great one for combining multiple images with a soft edge mask. You now have Photoshopped mix in there, which I think is a better app. But that one is an excellent one. We did dynamic light. We did see this. Ventures, Ventures lab. There's another North. There's finger focus, which is similar to that after focus your slow shutter. I'll just mention this Here is that slow shutter. This is where you can come into your parameters and say that I want it to be a motion blur with 1/2 a second exposure maximum out of blur light trails or low light situation. And you come up here and you basically do will do this. I'm rotating. Well, I'm OK. And that's giving me my motion blur and average cam and other ones like that are also, um great. Okay, So wonderful to be able to do the soul shatter effects. Okay, so let's do Ah, little sinking. We already talked a little bit about printing that I'm going to do that in photo shop. But for now, um, couple abs, this 11 that I have on my desktop called Photo Sync photos ING gives you access to all your photos. You can tap on whatever you want, and I mentioned that this has a desktop app that's associated with it, and you can load it onto many devices you want. And when you hit sync, it's going to say, Do you want all your new photographs since your last sink, all the photographs that are currently in this album or just the ones you selected? So I'll say Select it and I'll say now it's asking me where do I want to send those computer A tablet. Dropbox Flicker, Google plus Google Drive. You know, a 1,000,000 different places. So if I say as an example, my computer, if it was on the same network and there's a there's a firewall in the WiFi here, so it won't find that. But on your home system WiFi it would find it, and it would instantly transfer it over, actually could turn on Bluetooth, and even without WiFi, I could share it from my IPhone to my IPad, um, wirelessly back and forth all day long. So photo sync I love for that ability I also have on my laptop If we can jump over to my laptop, Another way of sinking files that I love to do is I can come over here and we'll use this phone view and for a second I'm gonna plug in, get rid of the video on the phone, plug in my phone, and it's gonna find my phone. And this is great for everything on your phone, all your videos or your phones, your phone messages, your voicemail, your APS. But you go in your photos, and here is every single thing on my photo with all the different albums that I have, and I literally can just select what I've just recently shot and drag it into anywhere that I want and back him up, which is great. That's phone view lets you back up every single thing that's on your phone. But let's say that I've got something on my desktop, something like a shot here, and I want to bring it into my phone. I can't go back using phone view. Even things like image capture gonna keep on going because we're so close. Um, one thing that is really need is without needing to sink, which I sink through the cloud, my important data automatically. So my calendars and all those things were using the cloud. But there's this really cool thing here under ITunes that even without sinking your phone when you plug it in tow ITunes you'll find your phone, you'll find your APS. And if you go down here, you're gonna find at file sharing. And file sharing is great, because any app that supports file sharing is going to show up here so you can go both ways to in from the apse using the ITunes, both Mac and PC so I can come over here is an example. One of my favorite APS for organizing this photo Manager pro lets you have folders put in movies, photographs, whatever you'd like. I'll show you in a second on the IPhone, but even without using the sinking feature, if I want to come over here and say, move a file that was taken yesterday by the lake in here and I could do 100 I could do a feature length movie. I could do whatever I want. And now I'm going to, um, go to and let's see if we can put this in here so I'm gonna have to turn off you. It's seeing because this doesn't isn't going to see it. I come over here to, um, my photo manager pro, and I'll go into the canyon. That's why I was putting. These photographs have been taking not just the canyon and I do import. It's gonna find from ITunes that shot that I was just looking at, which could be again feature length movies, photographs, whatever and import. And I have that lake. Did I just say import select all and helps to select select an import? And here is the lake shot from where is the lecture? Here is the lake shot that we just had on the computer. So whether it's feature length movies or something like this, this allows you to organize it and again, Photo manager pro. If you look at it, you can have as many folders you're gonna have folders within folders. It allows you to instantly take a 1,000,000 images from your computer, put it onto your IPhone. Once they're here, you can come over here and then export them so I can select these different ones here and then export back out to the camera roll. So now I can work on those. So that little Pano that I was just working on, I come to my camera roll and recently added, There is that Pano, which I can now tweak. So that is the app sharing that's built into ITunes. And any of those absent supported actually, like this one allow you to move back and forth also with an app sharing. There are APS like documents that let you do that with P. D EFs. Um, word files. You know, it's built into pages numbers, all these built in apple APS that imitate things like Excel or even in design. Those automatically will allow you to share files that case those ones that it from Apple. We use the Apple's own cloud storage to synchronize those files back and forth. But it's really good to know about ITunes and those capabilities there
Class Materials
bonus material with purchase
bonus material with enrollment
Ratings and Reviews
SFinSC
Along with showing a large number of beautiful photographs, Jack Davis provides a useful in-depth review of gadgets to add to or use with your smart phone. He also provides a valuable survey of the most useful smart phone apps. Of necessity, Apple's iPhone 6 is the primary smart phone discussed. Trying to decide whether to buy an iPhone 6 or 6 plus, the video of Jack Davis utilizing the latest apps for photo tone mapping has pushed me to favor the Apple 6 plus.
a Creativelive Student
A very useful, inspiring class! I was prepared to leave after a few hours, but I couldn't because there was so much more that I wanted to learn. Jack Davis' depth of experience makes this a "must" course if you want to learn more about taking stunning photos with your mobile device.
a Creativelive Student
Enjoyed the course. Tons of new apps that will allow my creativity show. The iCloud sharing; where we can have a url is another new feature i learned that i will be using. Filmic pro was mentioned; but would have loved to see Jack demonstrate it. Great course I definitely would recommend it.
Student Work
Related Classes
Mobile Photography