Lessons
Lesson Info
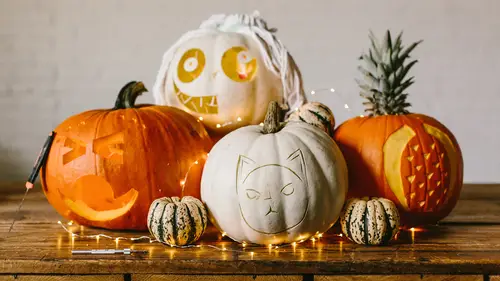
Tools Overview
We're gonna show you all the different tools that you can use to carve pumpkins with. We're gonna start off with a basic set of tools here that you can buy online, and this is a quick little set, works really well, and this was fairly inexpensive. And we've got our pumpkin scraper, we have a permanent marker, and then we have a couple pumpkin saws. And one of the things that I have to stress is you never want to carve a pumpkin with a kitchen knife and I've seen things online where people are like, "Get a really sharp kitchen knife," and that's not what you wanna do. You definitely want some type of pumpkin saw where you can go and actually cut away at the pumpkin and you can see the nice little serrated edges here. These aren't super sharp cause a pumpkin's fairly soft, so you'd be able to go in and use this saw and actually cut away the material so that you don't wedge the knife in when you're trying to jam it into the pumpkin there. So never use a kitchen knife on a pumpkin when you...
're carving there, always use a saw. So we have two different size saws here, one for finer detail, another one for larger, like to go ahead and open the hole up so you can scrape it out. And then we also have our pumpkin scraper, which gives you the big teeth to go ahead and get all the guts inside, and then the smaller scraper right here. It's a pretty sturdy handle cause you're gonna need to get your hand down in there, as well. And these are a little bit flexible, so if you get a little bit ambitious with it, you gotta be careful. So one of the other tools that I use to scrape is a ice cream scoop and I like this one in particular cause you'll see that it's got kind of a sharper edge on it right here. It's super sturdy so you can get in there and not only do we use this to scoop out all the material inside, but one thing I like about this edge is that you can actually go and you can take away more material out from inside the pumpkin, cause if you ever do surface carving, one of the things you wanna do is let the light show through the pumpkin, so this not only allows you to get in there and scrape it out, but you can also begin to thin the walls out by using this and scraping and it's got a nice sturdy handle. You can buy all this stuff online and it also includes just a permanent marker, I use a Sharpie here, cause going in and drawing on any pumpkin, you gotta have something that's going to work on the surface. If you've ever tried a pen, doesn't work, but a permanent marker's gonna work great cause you can draw on the pumpkin or the gourd to lay out your template. Well, you can draw right on the pumpkin if you want to, but you're also going to have to use a template if you want to go ahead and get some intricate carvings. So when you get a template, it's hard to just kind of look at the template and then trace it on the pumpkin, so we've got this other tool that also comes with the set here, and this is, in the world that I've come from, it's called a pounce wheel, and it's actually just a little wheel with little spikes on it and how this works is you put your template on the pumpkin and you run over the template, and it's gonna poke little holes in the pumpkin's surface, which is going to give you your outline for your template so you know where to go and cut and it's absolutely great. It's not super sharp, just put a little bit of pressure on there, pokes holes in the pumpkins, and it works really nicely. So those are the basic tools that you're going to have. This is an inexpensive set right here. They sell other sets online that have wood handles. They have blades that are interchangeable, they have several different style blades that you can just unscrew, and this set was like seven bucks. The professional set with the wood handles is about $20. Same thing, works really well, goes in and cuts everything you need to cut out. So a couple other sets of tools that we're going to use, this is great for carving the pumpkin, but we can also work on surface carving. So we go through and just take out surface amounts so that we let a little bit of light show through and play off the surfaces. So I have a set here of, this is linoleum or wood block cutters, and they've got all different tips here that are gonna be curved, some are gonna be flat, and some are going to be a small V shape right here. This is absolutely wonderful for going in and doing any type of surface carving. If you want to do hair, you want to do detail, and we're gonna show you how these work, as well. If you just wanna take portions of the surface off, these are fairly sharp, cause they're used for wood cuts or linoleum. This is a professional set, as well and works beautiful for surface carving. Now, if you know anything about pottery, you know that the pottery tools can also work really well. So this is a nice set of pottery tools, but this is also going to work really well for pumpkin carving, too. Little things like you've got this little scoop here with sharper edges that allow you to go in and just kind of scrape the surface, you've got your little loop, which is wonderful for going in and taking out deeper areas. Right there, it's a little bit sharp on the edges, works really nice to go through. Little scoops that you can get in and dig out certain areas and a nice little sphere. Same with this. This is a little teeny drill that you can go in and put little holes in if you want to. This one also has the nice little V shape on it, too. And this one's got a couple little V shapes, as well, and a nice little diamond, as well as kind of like an X-Acto style blade that you can go in and do some carving on flat surfaces. This set, all wood handles here, so easy clean-up, and this is just a standard pottery set that you can use and do surface carving with, so that's quite nice. Then, we get over to the fun stuff here and the fun stuff is going to be the power tools. So what I have is I have a whole set of hole saws here that you can use to very quickly go in and just put holes in your pumpkin. And one of the things I've seen currently for trends is just take a pumpkin and do different-size holes. Well, this is great, these are just standard hole saws. I can hook them up to my drill, put them right on my arbor here, put them on my drill, and be able to go through and put holes in the pumpkins. This is also really handy for starting off your pumpkin and putting a hole in it so that you can clean out all the material and then do carving from there. So standard set of these along with the drill. And then you can also use any type of drill bits, as well. So if you want to do smaller holes and do a nice little design, like around the creases of the pumpkin there, just do a bunch of holes so that the light will shine out. You've got your set of drill bits here. We're gonna be using the bigger ones and these are just standard drill bits. I like the ones that have a little point in the middle, simply because it's easier to just land where you want it to go. Simple, easy clean-up on that. But don't forget that there's also other fun things that you can use, too and one of the things that I've used before are cookie cutters, gotta use the metal ones. And cookie cutters are wonderful. All you have to do is just apply a little bit of surface pressure right on the pumpkin there to create a little outline or poke into the skin a bit and you've got a great set of shapes that you can use, you don't have to use a template, this is the template. But use the cookie cutters, lots of fun things that you can do. I just rifled through a whole bunch of mine and found out the cool ones, and just have fun with that. So that's just a quick overview of the tools that we're gonna use today and then we're gonna go in-depth into each and every one, so stay tuned.
Class Materials
Bonus Materials with Free Purchase
Ratings and Reviews
Fran
Glad that I saw this, now! I love pumpkins!! Looking forward to the season You show a lot of great, and super creative techniques that I can't wait to try. Thank-you!
Claudia Ortega-Lukas
This video had some really good and cool ideas/techniques, however, you should do a zoom into the tools when you show them. I'd like to see close up the shape of each tool you demonstrated. Otherwise, it was fun!
Rhonda Chapin
I learned some great hacks and tricks. Going to carve my pumpkin this year with more enthusiasm! BTW something I thought might be helpful is to push pins to hold stencil designs on pumpkin since tape doesn't work.
Student Work
Related Classes
Holiday & Party Crafts