Using Keyframes and Special Effects in Photoshop
Lesson 3 from: Creating Cinemagraphs with Photoshop and After EffectsChris Converse
Using Keyframes and Special Effects in Photoshop
Lesson 3 from: Creating Cinemagraphs with Photoshop and After EffectsChris Converse
Lesson Info
3. Using Keyframes and Special Effects in Photoshop
Lessons
Lesson Info
Using Keyframes and Special Effects in Photoshop
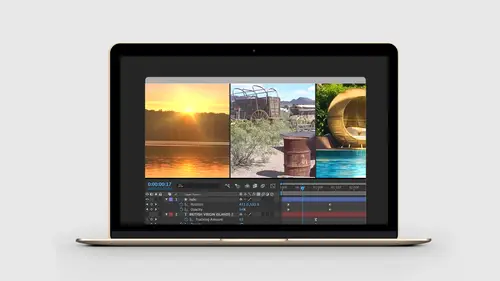
Okay, so I wanna do one more example in Photoshop. And in this case, we need to do a different technique for looping the video. In the last one, we had a video that played really quickly, so we could do a quick jump cut. It'll all look great, no one knows any difference. But sometimes we have a lot of things moving. So we're gonna be working with a lake image here. So if I go into the assets folder, I'm in folder two. Take a look at the video. This is actually the lake Catherine and Dave were sitting on. Facing the other way. So we just took this video. There's no sunset in here. We're actually going to take a sunset we created in our other course, After Effects for graphic design. So we'll add that in as our static photo and we just wanna make the water look like it's actually looping. So, like I said, with the fan blade moving we could do six or seven frames on a gif, you couldn't tell the difference. But there's a lot of stuff moving here. A lot of water, a lot of reflections. If we...
did any kind of a hard jump cut you're gonna see it right away. So we're gonna need to create sort of a nice blend in the video to blend back to the beginning. So I'll show you that workflow. In addition to it, we'll add a few other effects into here as well. So to begin, let's go into our Photoshop composition. So I have part of this started already. Zoom out here a little bit. And what I have here is a vignette shape, on this layer here. I have just a border here with a stroke on a white layer with a fill of zero. We have our type layer, and we have our background that we're gonna be covering up. Also, just like before, I already have the timeline set. We're gonna come over here, click on the plus sign on the right-hand side of the timeline panel. We're go into our Arbutus Lake folder, into assets, we're gonna grab the video, then we're gonna click Open. I get a video group; command, shift, "G" or ungroup under the layer menu to ungroup that. And now instead of dragging this, there are some little tools on the right-hand flyout menu of the timeline panel. With this layer selected, and my timeline playhead at the zero mark, I can select this flyout menu, go to Move & Trim, and say move this to the start of the playhead. That'll just quickly jump that over. As I click and drag, we can see the video showing up here inside of Photoshop. Gonna select the layer; command or control, left bracket, gonna arrow this down so that it's behind the vignette. So it's gonna show up down there. Now let's go back out to our exercise files and in the assets folder we have two static frames. So as I mentioned before, we added the sunset using After Effects in our other class for After Effects and Photoshop for graphic design. And what I wanna do now is take this still frame and use this over top of the video inside of Photoshop. So we're actually using some artwork we've modified with After Effects to bring this in. The other sort of difference that I did from the other course is where we have the reflection, the light rays that we put onto the lake, I put this on a separate solid in After Effects so I could bring this in separately because I need to have that reflection over top of moving water. So I have these two pieces separated out. So these are two different files. I'm going to grab the lake sunset Photoshop file and I'm gonna drag it right into the other Photoshop file. That will automatically create a linked smart object to that original file. If I modify that file, it'll get modified in this Photoshop file. So this is great. That's a feature just like InDesign. Where you can put InDesign inside of another InDesign. We could do the same thing here. So I'll press return. So now this is acting as my static photo and this is a little different than what we did before, where we picked a frame and right-clicked and said rasterize this frame. We're using, again, separate artwork. So with this selected, let's come over here and add a layer mask. I'm gonna hit the "D" key and then the "X" key to put black on the top, white on the bottom. I'm gonna hit the "G" key for my gradient tool. I have the mask selected and I'm gonna create just a nice gradient between these two pieces here. So just to see what's going on, if I were to come up here, I can see the bottom and not the top. Now, the bottom's gonna be moving video. So what I wanna do is focus on this sort of area here, right on the horizon. And I don't wanna make it a hard edge cause you'll notice that. So I just want it to be a little bit here. I don't wanna knock out too much of the sun rays that are gonna shine onto the lake, however, I don't wanna see too much of the other pieces as well. The nice thing is it's a layer mask so we can always go back and change it and sort of modify it. Alright, let's go back to the project files. Let's come down and choose the lake, sunset reflection. Let's click and drag and drop this in. It's gonna create a smart object, I press return. And now what we wanna do here is, I wanna have this just showing the orange here. But when we did this in After Effects, we applied it to a black solid so we have this artwork sort of flattened into that solid. So what we're gonna do is come over and choose a blending mode. So let's come down here and we're gonna choose linear dodge add. This is one of the few times you use one of these things that I don't really know what this does, but go through the different blending modes and when I picked this one it did exactly what I wanted it to do. I wanted to see the sunset here. Also, there's a lot of extra orange as it has a gradient out to the black and we can see that actually affecting the rest of the video. It even highlights the sunset and does all this great stuff. Now, again, what's so cool about this is if I click and drag, we see the water moving underneath that reflection. So that just looks great. It looks awesome. Alright, so let's bring the playhead back to zero, let's move these to make sure these are both starting at zero. If I wanted this to be stronger, I could select this layer, hit command or control "J" to duplicate this. That makes it twice as strong. Let's go back to the opacity and let's bring this down to maybe 17 or 18%. So it just makes it a little bit stronger. Just so that we can see that going against the water. Alright. Now what we need to do is create our looping point. So I wanna give myself a little bit more room in the timeline panel here and talk about how we're gonna make this effect work. So in the layers panel, let's come down here temporarily and let's just turn off all these layers so we can see the video. So what I mentioned before was if we pick any point along the video, so if I leave the timeline here and then I come over here and I just click the beginning, you can see all that water jumping. If I were to create a quick jump like we did before, you would always see that sort of moving around. So what I wanna do here is I want to basically forget the first 10 or 15 frames of the video on one layer and reintroduce those same 10 or 15 frames at the end of the video so we can create that loop. So we get like a nice blend. So the first thing we need to do is come down to the video layer. I'm gonna hit command, "J." I'm gonna duplicate that video layer. So now I have two video layers. Let's zoom up here a little bit on the timeline panel so I can see a frame by frame. And now what I'm gonna do, is I'm gonna come in here and I'm gonna move about 10 frames in. So I'm gonna get to this 10 frame mark, I'm gonna grab the work area, and I'm gonna drag this over to 10 frames. So on both of these videos now we're not gonna see the first 10 frames. Now I'm gonna grab the duplicated video, I'm gonna drag this to the right. Let's zoom out. A lot of zooming in and out when you have a small monitor. Let's come out to about six seconds. Zoom out a little bit more. Our video's seven, so that's fine we can bring this out to about... We'll do seven seconds, that's fine. Extend all of our layers. Then what we're gonna do is, once I have extended all the layers, set the work area back to seven. We're gonna take the top video and we're gonna move this all the way over. And we're going to have the first 10 frames go 10 frames into this final video. So we're at seven frames here. I'm sorry, seven seconds. Let's come in our 10 frames. That would be to 20, since we're doing 30 frames a second. Now I'm gonna grab the video layer, the duplicated one. Let's drag this over. Keep going 'til we get to the beginning. So this is the very first frame. Again, this is the first 10 frames that we're skipping from the beginning. Now we'll toggle open the properties in the timeline panel. We're gonna come down to opacity and we're gonna activate the animation for that property. So the stopwatches actually came from After Effects so this works exactly the same way. When I come down here and turn on the stopwatch for opacity, I get a key frame showing up here. The opacity is tied to the properties in the layers panel. So I'll come up here, grab the opacity, bring this down to zero. Let's come back in to the timeline panel, let's come up to seven frames. Then let's come over to the opacity and just simply making this change here will give us a second key frame. So now I have a blend from the bottom video, which is playing all the way up to six frames and... I'm sorry, six seconds and 20 frames. The last 10 frames, which we cut off the beginning are now being faded in from the same video, just a different instance, moved to the end. And then once this loops around we're gonna get this nice, seamless loop. The nice thing is, once we have this in place, if I want this to be 15 frames, I can simply grab this and just move it in and out. So we're basically just adding these two pieces together. Let's zoom out in the timeline so we can see this entire workflow here. So we start here, we end here. At the end, we are blending this up and creating that seamless loop. Alright. Good so far? Excellent. Okay, I wanna do a few other things. I wanna add some blurring effects to sort of match with the vignette. Now I have two videos in my timeline panel. So there's another great feature in Photoshop that is supported by the smart objects and that is animations. Animation states and properties are saved in smart objects just like anything else in Photoshop. So what I'm gonna do is come over to the layers panel, click on the top video, hold the shift key, click on the second one, and then we're gonna right-click and choose create smart object. So once I convert this to a smart object, all of those properties are now wrapped up into this single smart object here. And I have one item showing up here on my timeline. If I double click this smart object to edit it, we're now back in the timeline panel and we can see all of the properties that we set for just that one animation. So basically, creating that smart object took all of those properties out of the main timeline, wrapped them into another timeline, and put that into the smart object; re-referencing the videos from the original videos we brought into the first timeline, which is super cool. So this gives us such an incredible workflow advantage for making modifications to our cinemagraph. That looks great, so I'm going to close and not save that. I don't need to save anything inside of there. So with this in place, I'm gonna save my main Photoshop file. And now with this smart object, let's come in here and select this. I wanna move my timeline panel down a little bit. Let's turn on all of our layers so we can see the composite. Now with this selected, let's come up to the filter menu. Let's come down to the blur gallery, and let's come down and choose iris blur. So what iris blur lets us do is sort of simulate different aperture settings for our scene here. And what I wanna do is just sort of blur this on the edges. So by default we get a pretty strong blur here. The center dial controls how much of the image we're blurring. If I dial this up a lot, we can see that's blurring a lot of the image. The outer ring here controls the difference between the center point which is in focus and the most out of focus area. And then the dots in between give us our gradient between the amount of area that's focused and the amount of area that's not focused. So I'm gonna move these out. If I hold the option key or alt in Windows, I can move these individually. So I might pull the right and left in a little bit. Move this one up a little bit so we can see the type. And this blurring is just way too much. We actually only need maybe 4 or 5%. So I can come in here and just move this. We just want a little bit of blurring, just to sorta sell the effect out here on the outer edges. But again, we don't wanna make it look too fake. So maybe I'll pick something about right here. Press return. Back to our main Photoshop file. That's going to apply that blurring effect. We can turn it on and off to see it. Let's move my timeline panel here. And we're ready to render this. So let me just close this up a little bit, I'm running out of space here. So with that in place, we'll hit save. File menu, same thing as before, export, render video. Select folder, I'll choose the desktop again. Hit choose and then simply hit render. So this will take a few extra seconds from the other one. There's a lot more to render. As it's going through, the difference or the linear difference we put on the reflection is being applied to every frame of the video that's being brought in underneath as well. The blur gallery is being assigned to the video as well. So every one of those frames is getting that blurring effect. But we're getting all of the advantages of all of the design tools we have inside of Photoshop to export this out. And during this rendering, we're skipping the first 10 frames of the first instance of the video, fading that into the last 10 frames of the second instance of the video, looping it at that seven second mark, and then creating this back and forth. So once this renders out, we'll load this up and play it. And so by combining some of the things we did in our other class with cinemagraphs here, we are able to take a video that wasn't, maybe wasn't all that interesting and just make something that's much more fun and interesting to look at. And, uh... Promote... Whatever. Visitor center... Hey, maybe that's a good idea. Maybe we show the visitor center of Michigan. Alright. So that's two workflows in Photoshop. Especially some of the things here, adding in a lot of those extra effects. All of the photography based effects that we're using in Photoshop can all be animated and applied to cinemagraphs and applied to elements in your canvas to just create all kinds of great effects. Okay, anyone have any questions on Photoshop? That's two workflows, lots of features there, lots of techniques... I do have a couple of questions. One from Texas Beauty. When you were doing the gif, and you were exporting the gif, how many colors did you send through? I did 128. They were asking about 256 if that's possible. Absolutely. Okay. 256 is possible. You're actually getting 216 plus some of the colors for special effects. The file size will be significantly larger, so the goal with an animated gif is to use as few colors as possible. The fewer the colors, the smaller the file size will be. Perfect.
Class Materials
Bonus Materials with Purchase
Ratings and Reviews
Jeff S
Fascinating course for anyone who wants to know how to make a cinemagraph. I thought Chris went a little fast for me but I could replay those parts over and over until I got it. This is not a general knowledge course but more of a niche course for obtaining specific know-how on making a cinemagraph. Overall very good!
Teresa Piccioni
Chris is really a great teacher: the after effects tricks explained in this class are very interesting indeed!
Randy Spears
For anyone having to create a poster or a book cover or anything creative with Photoshop, this is a great course. I refer back to it again and again when I start some of my projects.