Lessons
Session 1
1Introduction to Craft Photography Fundamentals
04:59 2What Your Visuals Say About Your Brand
04:56 3How to Become a Photographic Author
10:44 4How to Use Natural Light for Your Product Photography
10:00 5Setting Up Your Photo: The Basic Rules
09:07 6Becoming the Viewer to Take Better Photos
10:30 7Shooting 3 Setups: Creating the Backstory with Images
34:32Shooting from Top Down with an iPhone
19:49 9Shooting Paper Products with an iPhone
10:54 10Shooting Jewelry with an iPhone
19:01 11Editing on your iPhone
15:28 12Finding Your Brand's Aesthetic
18:39 13Find Your Product and Customer Target: Exercises
11:12 14Figuring Out Your Audience
08:46 15Interview with Gilit Cooper of The Bannerie
08:45 16Branding Beyond Instagram
19:47 17Looking for Natural Light in Your Home
19:36 18Building a Styling Prop Collection
08:22 19Creative Backdrops
13:52 20The Essential Product Photography Props
11:18 21DSLR Basics
02:39 22Understanding Shutter Priority And When To Use It
26:29 23Understanding Aperture Priority And When to Use It
37:16 24The Basics of White Balance
12:52 25Photographing Jewelry
37:27 26Setting Up a Bedroom Set and Photographing Pillows
19:59 27Photographing Greeting Cards
06:53 28Shooting Products on a White Background
17:24 29Top Down Photography on a White Background
13:06 30Shooting Products on a Black Background
07:23 31Shooting Reflective Items
12:20 32Shooting with Backlight
04:01 33Top Down Photography: Shine & Reflection
24:50 34Basic Editing in Lightroom
31:37 35Batch Editing in Lightroom
06:00 36Editing Jewelry in Lightroom
10:01 37Editing White on White in Lightroom
06:54 38Editing Shine and Reflection in Lightroom
17:03Session 2
Lesson Info
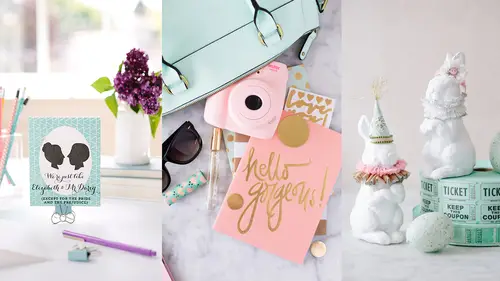
Photographing Greeting Cards
So, next we're gonna do the cards and we're just gonna stick with white because this is Paper Bandit and we use high key for them and, in general, with cards, I'm just always trying to find a unique way to keep them standing up. So, in this, for this particular card, I really hope I'm not offending someone with this card, but it makes me laugh, so we're photographing it. It says, "I wish I could take away your pain "and give it to Bieber." (audience laughing) And so, I picked out the tickets because I felt like they sort of applied, Oh. to like buying a concert ticket, right, and going to his concert and so I, and they're red, the card is red and so I just want to accent that. And, I might, I actually didn't bring any with me today, but a lot of times when I'm shooting stationary, I like to just maybe add something little like paperclips or confetti or things that relate to the card and are just gonna add like a little bit of detail on the white so it's not so plain, but they don't...
distract. But, for now, we're just gonna stick with this. I am making Kate work hard today. I know (laughing). So, super simple, (clips clattering) and I'm gonna get back down and lower on this one to be level with the card. I think perspective is something that a lot of people don't think about. They just stand above things and they take photos and, in general, with product, you always need to be a little bit lower than you think, at least from what I have found. So, here's a time where the frogs don't work. Yeah. When you don't have enough depth in the base to hide them, then you have to just drop it right on the table and I'm gonna make Kate hold it some more. So, this actually would be a case, like if I had a bigger table, sometimes I will use clips, just like those big clips that we showed in an earlier lesson, you can clip them on each edge and they act like an easel and will hold up the stand as well. And then, yeah, let's just push it as tight to the white as we can. There we go. Yep, just like that. (tripod rattling) And, I still need to be lower. (clip clicking) (tripod rattling) And, I, in this case, (camera beeping) want to be directly facing the card because I want it to look the correct shape, (shutter clicking) so I don't, oop, that was really dark. (camera beeping) Let's fix that. (camera beeping) (shutter clicking) I don't want to come in at an angle 'cause then it's not gonna give it that straight perspective, so I want to shoot it from straight on, in this case, and I actually, I really like that. I think it's looking really good, but I want to center it on the tickets. It's bugging me that it's just slightly off-center. And then, we're gonna grab the other board, again, Sure, I've got it. And, just fill it in on this other side. You might have to stand over there (laughs). Hey, Ben. Now, we're bringing in multiple people, (audience and Kate laughing) but, again, using the clamps, using frogs, using things like that and you can really, like, do it on your own. (camera beeping) And, this already looks better. I can already tell, (shutter clicking) way better. Right? Okay, I still want the white to be like a little but whiter, so I'm gonna brighten it up again using exposure compensation and now I'm going all the way up towards the plus three. (shutter clicking) And, let's see that. Okay, it needs to be somewhere in-between, 'cause now I'm losing the edge of the card and when you're photographing white on white, which we're gonna talk about, you have to be super-careful about that, so I'm going to (camera beeping) turn that down just a little bit, somewhere in-between, and I, also, I'm gonna close my aperture more because it's bugging me. I don't like how blurry the tickets are, 'cause I can still see what they say, but they're blurry, so it's kind of bothering my eyes, so I'm going to really like stop that down, (camera beeping) (shutter clicking) and we'll see what that looks like. And, generally, I'm making these decisions just looking at the back of my camera and deciding. So, I do like the way the tickets look a lot better in that than in the last one. We can toggle back and forth, okay, but I don't know, but I do like the brightness a little bit better, so I think that this would be really close. I'm might stop down even just a little bit more to see (shutter clicking) if I wanna do that. (camera beeping) And then, I would do one, maybe even like a little bit more open, just to see, so I have options when I open them up on my computer. (camera beeping) (shutter clicking) And, that's the thing, I mean, just slight little adjustments on your aperture and on your exposure compensation (shutter clicking) and then you know that, somewhere in there, you have something you can play with. Okay, I think we got that card. I think it looks nice. And, we're gonna go in later, so you can see, I was darkening it, I was lightening it, as these, like, load in. We're gonna go in later and talk about how to then edit them. So, in another lesson, we'll go over how I would do that.
Class Materials
Bonus Materials with Purchase
Ratings and Reviews
a Creativelive Student
This class taught by Candice was amazing. She teaches in such a step-by-step, easy to understand pace. She shares so much of her own tips and tricks she uses to create beautiful images without spending a fortune or having all kinds of expensive equipment. Having the DSLR lessons included was really great for anyone who wants to do more than the camera phones are capable of. Learning the basics of how to use a DSLR is confusing for most people, but Candice broke it down in the simplest way possible. Social media is all about imagery, so if you want to put out the most beautiful eye-catching photos, then you want to learn how to use more than the camera phone. I don't have a business where I need to take photos of things I sell and I still enjoyed her class so much. As a photographer, I am going to use her ideas and insight when I photograph things for fun. There is so much to gain from this class. I would highly recommend taking her class. She is a wealth of great ideas and information and has that friendly personality of someone you'd want to sit and have coffee with.
yomichaela
A wonderful class to get you going with craft/product photography. Candice provides (and shows) fantastic examples and it's really fun to watch her work through a shoot, moving items, etc. to create the final image. She also covers some basic photography tips which is very helpful. Great class! I definitely recommend to others!
Melinda Malamoco
I loved this class! Candice is so personable, clear and relatable. I would want to hang out with her and be creative! I have been taking pictures for YEARS, and for my Etsy store for over two years, and I still learned a lot in her class. The lessons are set up in a way that you can follow, take what you want and don't worry about what you don't need. I will say that I got a TON of ideas for how to better display my brand, what my personal style is and how to be consistent with it. I so recommend this class for anyone who has small business or just wants to be able to take better pictures of their products. Okay, off to build a prop kit!