Brush Settings and Masking your Image by Hand
Lesson 3 from: Composite Photography BasicsPratik Naik
Brush Settings and Masking your Image by Hand
Lesson 3 from: Composite Photography BasicsPratik Naik
Lesson Info
3. Brush Settings and Masking your Image by Hand
Lessons
Lesson Info
Brush Settings and Masking your Image by Hand
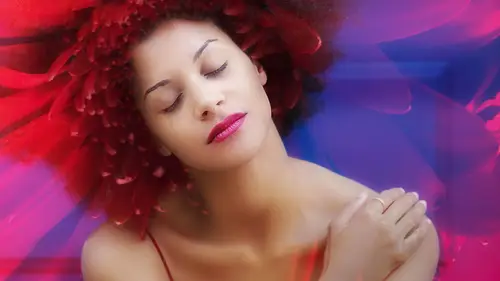
Now that you know how to set a mask and use it let's talk about brush settings before we actually begin masking. Personal preference. If you're using a Wacom tablet and I mentioned this before but I use a small tablet just because it's easier for me to work with as you're doing brushstrokes. I like to change my pressure and I like to turn the pressure off so that every stroke is consistent. Let me give you an example. Let's say I'm gonna set a new canvas really quick to illustrate what I'm talking about. If I have a new canvas here, Command + N, and I'm just gonna say 5000, 5000. Okay, I have a blank canvas and I have my brush tool. What happens is by default, the tablet itself comes with pen pressure. What happens is when you're brushing it's gonna change pressure sensitivity quite often. But what I like to do is with the brush selected here I'm going to go under Window and Brush. This looks scary, don't worry. It's a lot simpler than you think it is. All I'm going to do is uncheck sh...
ape dynamics, okay? Just uncheck it. What that'll allow me to do is every brushstroke that I make is consistent. You see how from start to finish it has the same stroke. If I have brush pressure on it's gonna change constantly and I'll show you. If I go to brush, I turn that on and over here where it says control under Shape Dynamics there's also Pen Pressure. And you see how it shows you how it would look if you had pressure enabled. This can make masking sometimes really difficult because as you're going around a corner and edge it's gonna constantly jitter in shape and that can make masking really hard. So, I think of masking like a very surgical thing, I don't think of it like an artistic thing in the respect that I wanna make sure my strokes are accurate, right? So that's why I have it unchecked. Again, personal preference but everyone's gonna have a different opinion. The other thing that I like to do is I like to change my brush size quite often so that based on what I'm masking I'm able to refine the area. So if I'm masking, it's really close to a corner. I'll change it so my brush size is quite small. And with the bracket key you're able to change the actual brush size. You can get really fine, refined edges or whatever it is you're working on which is great. So, aside from being able to change your brush size you also have what is known as your hardness. I will typically start with a 0% hardness and work my way from there because if I have 100% hardness what happens is that the edges sometimes can become really sharp. And it's not always favorable especially if you're building up on an image. It can become not as nice and it also depends on the portrait because sometimes a portrait, whatever you're masking can have a really soft edge, that's not hard because not completely focused. So that's fine to keep it soft as well. You have to kind of play it by ear and this will change based on what we're working on. The next important tool is going to be opacity and flow. Now opacity and flow works quite interestingly. Everything we've done so far has been 100% opacity, 100% flow. Opacity is simply how opaque it is. If I put my opacity to say, you know, something low. Right, it just means it builds on each other. And eventually you'll get to if you keep brushing. And the same thing goes for having a different hardness. It's just gonna change the edges of the brush. This is nice except for the problem that you have to keep repeating your brushstroke again and again and again. You have to lift up, put it down and start brushing. Now, the problem is that I don't wanna do that. I wanna consistently brush back and forth and then let it build up. So what I'll do is my opacity will be and then my flow will be the determining factor. If I have a flow let's say under 10, what happens is it builds up somewhat really gently, right? When you're trying to mask something very gently because you're not 100% sure of your strokes, you can do with a little flow. If you're kind of sure but wanna build it in a little bit quicker, I can bring my flow up to something like 20 to 30, right? There's no exact figures, it's just about understanding the concept. Higher flow is much faster usually. And so, at 20 to 30 it takes me about three or four strokes to make it 100%. And so that's how I control it, okay? Without these tools, masking by hand can become very difficult to do and sometimes not really that fun. And aside from that, we are going to talk about rotating because rotation allows you to go around edges a lot quicker as well. Let's say that we have the rotate function and that's gonna be here, the rotate view tool. What happens is I can actually go and rotate the canvas. So if there's an angle which is really hard to mask out it allows me to rotate to that angle specifically. Now when I go back to my brush tool, I wanna work on certain angles it's easy to do. And so, I activate it by the keyboard shortcut which is already set or by default it's R. I rotate it, use my brush keyboard shortcut which is normally B. And you can go back to your tool. But usually what happens is when you hit the rotate function it snaps back to the brush when you're done rotating. And so, when we actually apply this principle when we're actually masking you'll be able to see how that function operates together. That's it, you're done. (laughs) Okay. So now that we have that set the last thing I wanna mention is this airbrush functionality. The airbrush functionality is really interesting because it allows you to build the flow without moving. Because normally what happens is without this if I move then it builds up. If I just click on the canvas itself and don't move it just stays at that flow. If I have the airbrush function on what happens is if I click on it it builds up without moving. This is huge because if you're in a corner or in an area you don't wanna move too much but you wanna make sure you get that really clean mask, you're able to just stay there like a low flow and just gently build up with what you're doing. So, I leave that on by default because it does nothing to harm me, it just helps me as I'm working. So, that's the only setting that I wanna mention. The other great part is with this airbrush function on you're able to use your keyboard shortcuts. So let's say hit the number four on my keyboard, I can set the flow to 40. If I hit two, it sets the flow to 20. I can change flow values if I have the airbrush functionality on. If I wanna set a single digit I say 03 or and then it sets it to 2%, 3% and so forth, okay? That's a little quick tip. Now I mentioned all these because not to bore you but it's because it's useful when actually you're gonna masking next, okay? Let's jump in and actually begin talking about this particular image. Now I'm gonna hit escape here. Now, we've already mentioned that we have a masked set. The way this works is that this mask can, like I showed you earlier, punch out anything. But it can also do the same effect to different adjustment layers. Let's say we are trying to brighten up certain areas and we use adjustment layers. And what adjustment layers are basically if you're not familiar, they adjust certain properties of an image that have masks included with them. Let's say that I have a curve, right? Like I have a curve here. And the curve by default will increase exposure or decrease exposure, right? What happens is if I say increase exposure but only wanna increase it to certain parts of the hair and effectively mask that area, I'm just gonna hit Command + I on the mask and it starts completely black. When a mask is completely black nothing happens to that layer. So, any changes that I do here right now is not affected in the image. Now, if I wanna mask just this portion of the hair for example, I come over to my brush and because you guys already know the settings. I have 0% hardness, 2% flow and then I'm able to quickly mask in certain areas with a little bit more exposure. What happens is sometimes clients are like, "Well, you know, the hair's too dark, et cetera. "Can you please blend that in." And it's easy to do so because you have a mask you can refine exact areas you wanna build on. So, what if you have areas that are completely a, blown out or too dark? Well, if you have the raw file what you can do is increase the exposure or decrease the exposure on the raw file. Extract the detail. Export that out. And then when you place it on top of this image use the same masking function to bring back detail in certain areas. You're able to composite detail on top. If I take an area like let's say this area here that's really dark. If I had the raw file and if I bring it up in Camera Raw or Capture One or whatever you use, bring it into Photoshop and put it directly on top of the image. It's gonna look really bright. The whole image will be brighter because you're overexposing everything. You simply add a black mask and then you brush in the areas that you wanna bring up in detail. And the same concept works for like landscapes, same concept works for portrait or if you're shooting out doors or, let's say you have a flash scene and the ground's too dark, and you just can't rescue that in Photoshop. Well, just exporting it out of Camera Raw, put it on top and then kind of mask it in, and it makes life a lot easier, right? So that's another way to kind of composite different exposures or white balances or whatever you wanna do which is really cool. Now let's go back to using the mask itself on layer. The way this works is that with hand masking it's relatively straightforward after this. I'm going to simply go in and hit the Z key and start zooming in right here. Let's say we wanna mask the edge of her lip and the chin just by hand masking. Since the mask is white to begin with which it usually will be, right? You're not trying to make it black because if you made it black nothing's visible. You want to make sure that everything's visible first and only take other things you don't want. That's kind of the goal here, not the opposite way. You wanna be starting blank and then trying to bring her back, okay? Black basically conceals, white reveals and that's how you wanna look at it. If you don't know, just turn it on and off. You'll see exactly what's happening, not that difficult. Regular brush, set to black, right? And what I'll do next is I'm gonna go in here and I'll start with a flow that's quite decent, so about 30% or so. And I'll be utilizing my rotate function quite a bit because I think by nature if you're not really good at drawing like a circle you'll find exactly the angles that are your weakest, right? If you try and draw a circle. Oh god, I'm gonna be drawing a circle, it's gonna look hideous. And so, what happens is, you see this angle of mine, it's an eggplant. (audience laughs) It's not really that nice and what happens is when you're masking usually you're going a lot slower than doing a quick circle. And so, you will identify the areas that are your weakest when it comes to drawing things. There you can identify which angles are preferable for you. For me, as you've noticed I like angles that start from the top left and kind of work my way down. I rotate accordingly and make my life easier because otherwise it's just really, really difficult to do so, right? So, I'm gonna do that. I'm gonna go in and put my opacity 100, flow to and when I start brushing what happens is I can go around and make sure that the angles that I'm using are much more pleasing. And with keyboard shortcuts like if you have your bracket keys or if you changed it to anything else, I don't know if I mentioned this but if you are trying to change your keyboard shortcuts, just go into Edit, Keyboard Shortcuts. And under Tools it says Shortcuts For Tools. And if you scroll all the way to the bottom you'll see it says increase and decrease brush size. You can quickly nudge the brush size in a few pixels with one tap of the button. I've changed it to Q and W because I actually change my brush size quite a bit in small increments really quickly and allows me to quickly get through the whole workflow. Now it allows me to actually go in and mask away. This is why also using a tablet's really handy because it allows you to do this in relative ease. If you try to do this with let's say like a mouse or a track pad, it's really difficult. I'm sure a lot of you have tried doing that. It's really not that fun. The issue with hand masking is that there's pros and cons. The first pro is that it's easy to kind of highlight what you're trying to get rid of. Because all you need to do is identify what you want to mask out and simply go at it. It's as straightforward as you can imagine. As long as you have your settings correct then it's pretty straightforward. And what happens is you just go around and then I like to make sure that everything I'm doing is highlighted first in regards to the edge of the person, whatever you're trying to remove. And then once that's done I'm going to bring my flow up to and kind of just fill in everything else. And so, what happens is let's say you theoretically went around and mask her out, what happens is that you can then put something in the background, move her to other backdrops, different colors, et cetera. If you wanna see if your mask is accurate or not there's a quick way to do that. Number one, you can hit option and click on the mask and you see, you can see your faults. This is really critical if you're building multiple things. If you have a lot of elements in a photo and you're just sloppily masking everywhere, it's gonna show up later and you're like how would I get rid of that spec, that thing and which layer is that in? That happens all the time whether it's adjustment layers or layers that you're compositing together. It's very problematic. And to circumvent that you can look at your mask independently. Another option is that you can't actually see your image at the same time you're in that view. Another option is I'm gonna be using what is known as a solid color layer. It's basically a solid color layer, there's nothing magical about this. It's a solid layer. And it's another adjustment layer set to any color that you want. Let's say red, something really vibrant and obnoxious. See, if I take that color fill layer that was on top and drag it below, it allows you put a light behind everything you're doing. It really shows you where you've messed up or where you haven't messed up which is really handy. This alone saves you a lot of stress as you're doing really clean composites. And if you're doing commercial work this is really critical to ensure that you're doing a good job. And so, what happens is now that you have that there you can simply go back to the mask itself and then go on and continue. And so, you're able to really refine what you're trying to do and adjust accordingly. The other great thing about flow is that even though you don't do a perfect job around edges and you wanna just tweak it a little bit, I'm gonna be reducing my flow just a little bit and then fine tuning the edges of the mask. Let's say about 10%. And so then I can get really close and fine tune some of the edges. So makes it really versatile to identify both what you've done as well as customize how soft or how the edges look. The other thing is I always recommend brushing a little bit inside the skin. And the reason is when you have light that's wrapping around the skin, sometimes it contaminates the colors right on the edges of the skin like the blue background. That's why sometimes hair is really hard to mask because the background will wrap around the follicles of the hair and it makes it really hard to do that. And so, the same thing happens with the skin. If I have anything that doesn't look visually correct I'll let that be my determining factor in how it looks. If I decide, you know what, I don't like the edge being kind of blue and really harsh so I'll set a low flow and kind of work my way in just a little bit like that. And then you'd continue accordingly. Then I'll go up to 100% and kind of fill in the rest. This is really wonderful because if you like being painterly, this is the best way to go. I know a lot of people who still hand mask everything and I like to do that too. It's because I can get a perfect edge in that respect. The other great tool is the fact that you can make lines with your paintbrush as you go along. What happens is, let's see if I can do this. If I hold, let's say I click on a point, like that point right there. And I wanna make another, like a straight line with my brush, I then hold the shift key and click on another point. And what happens is it starts making like points along the image so I can do like a general rough outline. And then if certain areas don't look perfect I can go back and quickly just fine tune whatever I'm masking which makes the process a lot quicker as well. Now when it comes to hand masking there are some cons. Like I mentioned one of the cons is that it's much harder to do really refined areas like hair, right? Because you're effectively cutting out things. When you're cutting out things sometimes hair doesn't look realistic. One method I wanna show you about hair is how to cut out hair but still add it later so you're not struggling to select hair by itself. That's a really useful tool. Whenever we do movie posters or things like that and it's impossible to extract hair there's a workaround for that, okay? Let's say you have this area here, right, where let's say it's impossible to hand mask this because you'll just take forever. Or let's say another feature we're gonna talk about next doesn't work properly. What do you do? It happens a lot. You have complex backdrops, you have things that you just can't mask out perfectly. The first step is probably the simplest step ever. We are simply going to mask out a hard edge around the hair. Now it's counterintuitive but I'll explain in a minute so don't freak out, bear with me. I think the funniest thing about Photoshop is that everyone wants one step techniques but this is two steps so it's close enough, okay? So bear with me here. How many of you actually do compositing work? Yeah. Good, good. And hopefully after this everyone will do compositing work. For sure. For sure, yeah. So let's say that I go around here. And while you're doing that I'll throw a question your way. Okay. If you don't mind, Pratik. Yup. All right, so here's the question from the internet. Do you ever use color selections followed by clean up when you're doing masking? I do. Actually that's perfect and that's gonna be a segue to our next question. Yes. Yeah. Oh, next segment. Next lesson, yeah. Well yeah, lesson. The reason I mention that and the reason I actually stacked it this way is because once you have this down to a science then you can apply other tools to assist you. And then the hand masking can be just to tweak and adjust your mask. So, great question. Let's say that and again this is in theory, I only know this was not gonna work because I've tried it beforehand by doing other methods. It just didn't extract properly so I'm gonna show you how to get around this. Let's say that we have this mask here. And let's say that we wanna add more realism to the ends of the hair. I wanna show you how to draw hair. Drawing hair is really helpful because you can draw hair, you can draw fur. You can draw, I don't know, spiky things, you know? You can do a whole bunch of things with the hair technique. The hair technique is also really useful because it gets away from you needing to extract things 100% perfectly. Okay, so the way this works is pretty interesting. I am gonna make sure my brush is selected and the way this works is as you know, the brush will just make a point that goes on forever. But we can refine that point to automatically tapers off like a strand of hair, okay? The place we're gonna do this is back under Window and Brush. Now under Window and Brush there's Shape Dynamics but instead of saying pen pressure I'm gonna say fade, okay? This is where the experimentation begins. When I use fade what's gonna happen is let's say I put a number like 100. It creates a hair. You can see the beginning of the hair it's the thickest part and then it tapers off into the thinnest part, and that's what a hair is. That's why I didn't use pen pressure because pen pressure will start thin, get big and go small again. So that's why you use fade over pen pressure. I'm gonna start with 100. That doesn't mean that's what setting is for everything, it just means that's what our starting point is, okay? I'm gonna minimize that. I'm gonna collapse this like this so it stays like a nice little icon here. And I will select a new blank layer because I'm gonna be drawing hairs on another layer. So I'll have another blank layer. So when I zoom in here, have my brush tool. Now, I am simply gonna be sampling a point of hair color because aside from the size is gonna be the color of the hair. I'll do that. And then I'll start with a 30% flow. The reason why I mentioned that hair is see through when it comes to backdrops is because it has a little bit of an opacity. When they're single by themselves it sounds really weird to say but they're kind of opaque, digital terms. So we wanna replicate that. Everything I draw will have a little bit of opaqueness to it. I'll have 30% flow. It works almost like opacity. And I'm gonna start by brushing. And let's actually zoom in here for a minute and let me put 100% for a moment so I can see what's happening, okay. So you see how it draws like ends of hair. I simply just sample the actual color and I just keep changing the sample point. And what happens is with each stroke that you do it allows you to kind of make different ends. And if you notice it went from having a really cut out area to being perfect, and that's kind of the goal. And you see how at 100% it looks really thick, and you can adjust this to whatever you want to match. The other thing to note is if the strand is not long enough, right, if the strand is not long enough just come back under here and change it to like 200. And then what happens is you can get a really long strand of hair, right? If I sample like that bright color you'll see it. You don't want that unless you want like really long eyelashes just like. (swooshes) This is also how you add eyelashes, yeah. Just really short thicker strands for eyelashes, yeah. You never have to download a eyelash brush again, right? Just hand do it all, yeah. The other thing is that you can my size at only three pixels. If I did one pixel like really fine strands of hair, you would adjust, where'd it go. Pen pressure, no. Fade. You would adjust this accordingly. You just have to experiment to see what length you like but those are the only two parameters. That's how I get rid of or that's how I overcome extracting around hair. I kind of just chop it all the way and then refine it really nicely. Because then you can put them in any backdrop, right? You can put them in gray, in green, in blue and whatever. The best for me, I like it when people will shoot in like a neutral kind of gray backdrop or like somewhere between completely white to neutral because then it's easy to extract or place into other things. That's kind of how I hand mask, you know? And the best thing about masking is that it's all temporary because the mask is still there and if you wanna adjust it you can. There's no problem. If you wanna delete the mask you simply right click and delete the layer mask, okay? But I recommend just keeping it there. However, some people want to keep the layer mask but they don't want to delete it but they don't want to turn off temporarily. All you have to do is hold the shift and click on the mask and it disables the mask temporarily. And you'll see it because it has an X on it and so that means you can kind of take it away, okay? And the same thing goes for if I was gonna do the eyebrows, whatever. But from this distance you have to pick your battles because from this distance really no one's gonna know the difference, right? You have to really look at this on top of what you're putting it on or whatever backdrop or color and then decide accordingly. Don't overwork. And the same thing with portrait retouching you wanna overdo things at like a million percent but then you realize that it didn't matter in the long run. It's one of those things, okay? So, that's kind of how I use hand masking.
Class Materials
Bonus Materials with Purchase
Ratings and Reviews
Madelaine Enochs
This was an excellent course. I learned a lot. I am going to rewatch it and do some work along with Pratik's guidance. He is an excellent teacher. If there is more to learn, I hope he creates some more classes like this. Very informative and precise. Thank-you Pratik!