Civil Twilight Image Prep And Test Shots
Lesson 4 from: Capturing and Processing Night PhotographyTim Cooper
Civil Twilight Image Prep And Test Shots
Lesson 4 from: Capturing and Processing Night PhotographyTim Cooper
Lesson Info
4. Civil Twilight Image Prep And Test Shots
Lessons
Class Introduction
01:47 2Safety And Scouting
01:28 3Photo Pills App
03:45 4Civil Twilight Image Prep And Test Shots
12:40 5Setting Intervalometer And Capturing Cityscape
04:04 6Light Painting: Equipment Overview
03:20 7Light Painting: Composing The Scene
03:14 8Light Painting: Setting Sky Exposure Ambient Light
08:06Light Painting: Color And White Balance
05:12 10Light Painting: Mixing Warm And Cool Light
14:58 11Review Cityscape Library
02:01 12Opening Images In Lightroom And Moving In Photoshop
19:29 13Cityscape Image: Layers Theory
07:56 14Cityscape Image: Selections And Mask Theory
05:48 15Cityscape Image: Selection Using Color Range
08:27 16Cityscape Image: Altering Masks
05:36 17Review Light Painting Library
03:01 18Light Painting: Opening As Layers In Photoshop
11:00 19Light Painting: Layer Masks
12:05 20Light Painting: Edit Review
07:59Lesson Info
Civil Twilight Image Prep And Test Shots
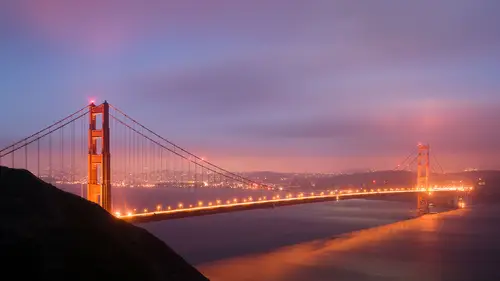
All right, everybody, there is so much I want to get to tonight, and cover with you all, but right now what I want to talk about is the time of day. So, looking out over the bridge, into downtown San Francisco, you're able to see everything. Notice how the sky is kind of blue still, and the lights are, they look natural. This is a time of day civil twilight. It usually occurs right about, anywhere between 25 and 40 minutes after the sun goes down. Now, this is a key time, at least for me, to be out and photograph. There's a couple of reasons for that. Number one, it's still bright enough that you can compose well. Now, of course, here we are next to the city. It's not going to be a problem gaining focus. It's not going to be a problem with compositions. But if you all are out under dark skies, it's great to be out a little bit earlier, when you can still see to walk around, right? We want to be safe. To find our compositions, to gain focus. This is all really important in coming up wit...
h that final image. So, we're out here, we came out right about a little bit before sunset, and now what we're able to do is watch the light change. I was able to set my camera up, get a rough composition for what I want. Now we can just watch the magic unfold as it keeps getting darker and darker and darker. How, what's going to happen is our exposures are going to get longer and longer and longer. That's going the make our cars trail across the bridge, hopefully, make the clouds trailing across the sky these really milky lines of beauty up there. So, the bottom line is that we want to get out a little bit early, set up our shots, get ready, be prepared, and we're ready to go. So, what I've done here now is I've got my basic set-up. Now, this basic set-up is really not that different from what we'd be using for night photography. There's several considerations that we have to think of, primarily the exposure triangle, right? And every photographer knows about that exposure triangle, how our f-stops, our shutter speeds, and our ISO all work together. Now, if we were doing something like straight-up star points, trying to capture the, let's say, the Milky Way, we might need a very, very high ISO, because it's so dim, so we would be somewhere around ISO 6400. But, as you all know, with 6400, you get a little bit of grain, and it's not your best image quality, but that's what we need to shoot the Milky Way. But here, with all of this city light, we can bring our ISO way down, and that's going to do a couple of things for us. It's going to, number one, give us better image quality, and number two, it's going to allow us to have much longer exposures. Then we can start playing with time. As I said, watching the clouds move, and watching the cars move. So, right now, I'm set at ISO 100. Now, my aperture is going to be dependent at this point on what I want to get in focus, as it is, of course, for any type of photography. But I may be playing somewhere around f-8, and my main consideration here is going to be the time, because I'm using a slightly wider-angle lens, I'm at about 16 or 18 mm, I'll have to double-check that, everything is going to be in focus, even if I was just super wide open. But I'm not going to leave it wide open, because stopping down to 5.6, or f-8 is sort of the sweet spot of that lens, and I want to use that whenever I can. So, let's see what our exposure looks like, and we'll check out how long our time is. All right, so what I'm going to do here is I'm going to go into live view, and that's the other great thing about photographing at this time of night is that using live view allows you to really compose, and even focus, and so it's a little easier than sometimes looking through your viewfinder. So, I'm to going down to 30 seconds, and let's open it up a little more to 5.6, and I would call that a good histogram. This is what we're looking for when we're surrounded by darker skies and city lights. If we were just shooting a pure, dark sky, and looking for star trails, or looking for Milky Way, the histogram probably wouldn't be quite this far over, but for what we're shooting here, this is what I'm going to like to see. So, in addition to the ISO and aperture and our shutter speed, there's another important thing to think about, and that is our long exposure noise reduction. Now, long exposure noise reduction is great if you have long exposures, which for most camera means two minutes, three minutes, maybe even four or five minutes. Right now, we're shooting at 30 seconds or a minute, so I don't need it, so I want to shut it off. So, let's take a look at our menu in here. I have a little quick menu set on my Nikon that allows me to access the controls that I use very, very often. Self-timer, I use that quite a bit. Virtual horizon, I've already actually set that up to use it, so I've got a nice level shot here. Monitor brightness, what we can do is go in there and turn that down, which I almost always do when I am shooting at night, and that allows my eyes to look at the scene itself and better judge it. Now, what else do we have in here? We've got our picture control. Long exposure noise reduction is now off. So, we're set on that. Everything else looks pretty good here, so I think we're ready to take one of our test shots. So, again, what I'm going to do is look at our live view, and set it via our histogram. All right, and every camera's going to be a little bit different. On this particular Nikon, when I tap my info button, I toggle through the different screens, and there's my virtual horizon that I use to set it up level, and it keeps cycling through, and I'm actually not seeing my histogram. So I'm going to move up to the OK button, and now, as I toggle through, that same info button, I am seeing my histogram, and it appears I'm quite bright here. So, let's set that somewhere back to around 30 seconds at 5.6. Now, I think this is going to be a pretty good test exposure, so what I'm going to do is I'm going to use my cable release here, and let's fire off a test shot. If you've never done night photography before, you think 30 seconds is an eternity, and after doing night photography for a long time, 30 seconds seems like 1/125th of a second. That 30 second exposure's minuscule. All right, so, this is pretty cool. I'm really liking what happening here. What we've got is a pretty nice cloud formation rising up over that bridge, a little fog. We've got car trails going across the bridge, but the most important thing to think about is (laughs) whether it is in focus, so I'm going to look at that first. I'm going to zoom in, and the bridge looks nice and sharp, the city line behind it looks nice and sharp. That's all looking really good. All right, so I'm happy with the exposure, but let's just double-check it by looking at our histogram. And that's looking pretty good to me. I'm happy with that for a night-time exposure. Now, if I wanted to, I could add a little bit more time in here to get some more movement in the cars or to get some more movement in the sky, and I certainly may do that. Maybe I even want it a little brighter, and it can withstand that. So, once again, if we go back here, and we look at the histogram, we could see, it could move a little over to the right, and we'd still be okay. So, let's review our settings. I'm 30 seconds, that's my shutter speed, at 5.6, that's a middle-sized aperture hole, and ISO 100. So, which ways can I move? Well, I could go from 30 seconds to a minute. That would give me a little bit more light. I could go from 5.6 for f-4. That would give me some more light. Or, I could go ISO 100 to 200, and that would give me some more light. So, I'm in a really flexible place here. I can move a lot of different controls to achieve what I want. At this point, I think what I'll do is I'm going to raise my iSO up to 200, just to get a little bit more light in here. And that histogram looks a little bright to me, but let's give it a shot and see how it turns out. All right, let's take a peek now. It looks like the histogram that appeared on our live view was pretty accurate. It seems to be tracking with the histogram that we're seeing on our final image, and this is always your final, where you should make your decision. So, now let's look, and indeed, there is a little bit of red coming in here, so, I'm just a touch wide. I'm either going to swing my camera to the right, or I'm going to zoom in with my lens. So, let's take care of that right now. Let's see what happens when we zoom in to the right just, or spin to the right just a little bit. Hopefully that will, yeah I think that's going to be okay. Now, I can already see some problems that are going to occur. The more I move this to the right, the more I get this bridge starting to converge inwards. So, it may have to take this into Photoshop, and fix that convergence a little bit. But, we did get rid of the red light, which I'm happy for. Now, the other thing is, let's go back to our review. It looks as if my exposure for my sky is pretty nice, my exposure for my ground is pretty nice, but the bridge is a little, the cars on the bridge are a little bit blown out, and it looks like the bridges are a little bit blown out. So, what I'm going to do in a situation like this, is take several different exposures, and I'll be able to blend them later in Photoshop, or HDR within Lightroom or something. We'll figure that out when we get there. So, at this point, what I'm going to do is I'm going to stop down to f-8. Now my exposure is ISO 200, f-8, 30 seconds, and I'm going to take one more shot. Our goal here is we're probably going to be taking two or three different exposures. One is going to be for the city lights, and the other one is going to be for the sky and, I would even say, the water, out in the bay, and maybe even the foreground. We'll see how that turns out. All right, so this one definitely is a little bit darker. Now in this case, what I'm really looking for is I want to see how those highlights are looking on the bridge. We all know that they're lights, and they're going to be bright, but I don't want them losing too much definition. That's not too bad, but I think what I'll try to do is stop down just a little bit more. We're getting some, I see we're going to need to do some touch-up. We've got some planes in the sky up there. All right, so I'm going to stop down a little bit more. So, instead of f-8, I'm going to go down to about two-thirds of a stop from there, to f-10. I'm still in that sweet spot of that lens, so I'm happy about that. This is going to be our final exposure for the highlights. So, we're still at 30 seconds, ISO 200, and we'll fire off this shot. All right, now let's zoom ahead again, and in our lights, and that's looking good to me. We're getting some definition here on the bridge, the bridge stanchions, or the towers themselves look really nice, so, without moving my camera, and I'm not going to change anything, 'cause I want this all to be identical, I'm now going to take a couple of other shots. So, this is the darkest one. I'm going to go one stop lighter, and then one stop lighter again. So, in this case, I don't necessarily want to change my ISO, although I could. I'm going to change 30 seconds to a minute on my shutter speed. Now, most cameras stop at 30 seconds. There are some that go further, but if I need to go further than 30 seconds, I'm going to actually need to go to bulb, and you'll see once I go to bulb, our live view cuts out 'cause it doesn't have any idea how much light is going to come in. What I'm going to do next is I'm going to set my intervalometer.
Ratings and Reviews
Phillip Ziegler
This course, along with the others by Tim Cooper, are outstanding. His demonstrations and explanations are so clear and easy to follow. I've been out doing long exposure night photography using what i learned from Tim and and delighted by the results.