Lessons
Class Overview
13:34 2Photo Basics
05:55 3Top Deck: Mode Dial (Auto Modes)
17:57 4Top Deck: Mode Dial (Manual Modes)
15:17 5Top Deck: Auto Focus
05:46 6Top Deck: ISO & Movie Mode
12:32 7Top Deck: Flash
04:39 8Back Side: Viewfinder Display
10:57Back Side: Live View
05:32 10Quick Menu
18:10 11Back Side: Buttons Overview & Playback
09:31 12Left & Right Side of Camera
06:18 13Bottom & Front of Camera
04:00 14Lenses
09:37 15Menu Overview
03:48 16Shooting Menu Page 1
05:44 17Shooting Menu Page 2
11:13 18Shooting Menu Page 3
07:53 19Shooting Menu Page 4-5
09:27 20Movie Shooting Menu Page 1-3
07:42 21Movie Shooting Menu Page 4-5
05:34 22Playback Menu Page 1-3
08:37 23Set Up Menu Page 1 (Wi-Fi)
15:16 24Set Up Menu Page 2-3
05:41 25Set Up Menu Page 4 (Custom Functions)
15:21 26Display & My Menu
06:46 27Camera Operation
16:16Lesson Info
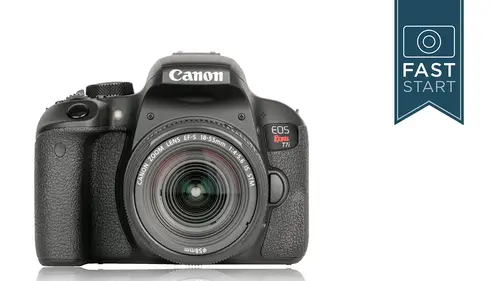
Top Deck: ISO & Movie Mode
Next up is the ISO. And so the three important exposure factors are shutter speed, aperture, and ISO. ISO is controlling the sensitively of the sensor and the way it's reading and recording the light. And boosting the brightness of it if you will. And so, I always like to test the camera at the different ISO settings. The native sensitivity of this camera is ISO 100. That is where the sensor is gonna give you the best color and detail information. It's where I would ideally like to be shooting all my photos. I will use a higher ISO when I need a faster shutter speed. And so, this camera will do a very good job 100 to 1600. And as we get above that, we're gonna start to see more noise and grain and color splotches. Definitely up at 51, we are not getting very clean results because not very much light is coming into the sensor and the sensor is boosting that signal and it's amplifying it. Trying to bring out an image that is bright enough that looks like a normal image. And so, in genera...
l you're probably gonna wanna try to limit yourself to ISO 6,400. Maybe 3,200 if you have higher standards. Maybe 12,800 if that works for your needs. And so this is a very important setting. This is kind of taking the place of the old days where we had film settings. And so if you are unable to get to 51,200, that's quite normal. The camera normally does not allow you to go there. And you would have to go in to set up menu number four and turn off, or turn on the ISO expansion so that it allows you to do that. And we're gonna see these boxes as we go throughout the class. And these are little short cut menus so if you do want to get in to a particular feature and make that change, you can go ahead and do it right now right away. And so let me give you a quick little demo if you did wanna turn that feature on, how you would do it. So, we need to go into setup menu number four. Custom functions number two. So I'm gonna hit the menu. And, we're gonna go into the menu. And there are two different types of menus. And you're menu may look a little bit different than mine. So we're gonna go into custom functions. And I think we are on custom function number two. It says number two up here. I'm gonna hit set. And I'm gonna turn this on. And so now my ISO expansion is on. I'll press my shutter release to just knock me out of here. And now when I press the ISO I'll be able to get up to that 51,200. And so, I like, I don't like the quality of images that you get here. But I don't like the camera restricting me from getting that set at any time. So I like to turn off those restrictions. All right, next up is a display button. On the back of the camera is our LCD display. And you can turn that on and off by simply hitting that display button. That can be really handy when you're on a tripod and you wanna see what's going on. What you're shutter speeds and apertures are set at. And so if you don't want it just simply press that button back and forth. And it cycles through turning that on and off. Now as I mentioned at the beginning when you turn the camera on it's in the stills photography mode. But if you wanna shoot movies you push it all the way forward to go into the movie mode. And the camera is gonna act very differently when it gets into the movie mode. And so let's go ahead and take a look at the movie mode in depth. All right, so when you put it into the movie mode you're gonna see on the back of the camera what the camera sees through the lens. If you wanna focus, you can press halfway down to focus. And if you wanna start shooting, there is a red dot by the button in the back of the camera that is known as the live view button. Which we'll get into in the next section. Very similar to shooting movies but for shooting stills. But we're gonna use that button to start and stop our recording. So it's one press to start. You don't need to leave your finger on the button. And then another press to stop. The info button is a good button on the camera. You can always press that. Never hurts anything. And this is gonna cycle through different groups of information. And if you don't like what you see just hit the info button again. And as I say, you'll be able to cycle through whether you wanna see lots of information. Or no information at all. The quick menu. Once again, we can dive into the quick menu to make a few easy adjustments that you might want to adjust when you're shooting movies. Now we're gonna talk more about all of these as we go through the class. And, the one that I wanna talk about right here and right now is the AF method. Because the camera focuses very differently when it's in live view or movie shooting compared to standard shooting looking through the view finder. So those 45 points that we were talking about in the previous section, they no longer apply when we're in this movie mode. So let's talk about the three different options that we have for focusing here. First up, we have face tracking where it looks for faces and it looks to track subjects in this case. And it's gonna try to prioritize faces over anything else. And so it's very good for when shooting people photography. There is a smooth zone AF, which is just kind of a large area. You'll be able to move this around in the frame. And it's a nice simple basic area where you can direct where you want the camera to focus. If you wanna be more exact you can use the live 1-point AF, which is a smaller area where you can be more exacting in where you focus. And so let's go ahead and take a look at how some of this works. I'm gonna throw my camera into the movie mode. Turn it on. We're gonna get a live view of what we're pointed at here. And I'm gonna hit the q button here. And let's go ahead and jump into these different focusing options at the q mode. And so, in a single point mode right here, I'm gonna be able to move this around, moving left and right, and I can choose what I want to focus on. And, you know what, I think I need a little bit of a prop. And you know what, I'm gonna move the camera back here a little bit. I'm just gonna use my glass of water as a prop here in the foreground. And so we've got, we've got something in the foreground. And let's see if it focuses on this clear glass of water over here. So we can move this focusing point over. Press halfway down. And I might be a little too close to the water. This lens is a little bit limited on how close it can focus. Now I can move the focus point over and then it will focus on the background. Now this camera also has a touch screen. And we're gonna talk more about the touch screen. And it will be able to focus simply by touch. And so that's the one point area. Let's look at the smooth zone. And so this is just gonna be a larger area. And, if it's kind of overlapping, let's get it overlapping. It's gonna choose whatever is closest in that zone. Now for the face and tracking mode we're gonna enlist a little bit of help from Lacy here. And so let's get this set up. So if you, Lacy, come on in. Stand up here by the prop table. And so what we're gonna do, is we're gonna switch this over to the face and tracking mode. And look at that. It instantly goes on the face. Maybe if you could take three steps forward. And, move a little bit from side to side. And then go back. And, now do a slow 360, and let's see if it follows your face at all. So just kinda turn around. It's lost the face but it's still tracking the head. And as you turn around, it tracks back on the face. And go ahead and just walk off screen. And follows you off. And then when it doesn't have anything to track it just kind of looks at whatever is there. Thank you very much Lacy for that. So you can see it does a very good job tracking. And so if you do have a subject in there that you wanna have in focus it does a really good job tracking it back and forth. Now it might get a little bit confused if you have a lot of people in there. And so it tends to work better with one person that's very clear and identifiable in there. But I'm amazed at how well it does. 'Cause this is one of the best cameras as far as being in a movie mode being able to track and identify subjects in that manner. All right. So that was the auto focus mode. Very important 'cause it's different than the standard focusing mode. And let me give you a little background information on that. So normally in the camera when you just hold it up to shoot a still photograph the main mirror in your camera, that little reflex portion, is a partially silvered mirror. Light goes through the middle of that mirror to a secondary mirror and down to the phase detection auto focus sensor. And that is how your camera focuses so quickly and knows what you are focusing at. But when you put it in the movie mode, or the live view focusing, the mirror needs to get up and out of the way. And that phase detection sensor no longer is working. And so it's working off of the information it's receiving on the sensor. And the way most cameras deal with this is they just look at the contrast of the image. If there's contrast that means it's in focus. If it's not in contrast, then it needs to be adjusted. And the lenses are a little bit slow in their focusing sometimes. So Canon uses a unique and proprietary system that nobody else is using right now. Which is a big piece of technological advantage to their favor. The pixels aren't just normal pixels in this camera. They are special dual pixels. Which is why this is known as a dual pixel CMOS AF sensor in here. And each pixel is reading light from different sides. And it's able to judge distance. And it does this, and it's much more effective than just the contrast detection of most sensors. Now the other great thing about this is that reads this area over a much larger area than the normal 45 focusing points. And it can do this down to EV minus two. So it does it under very, very low light. And so this camera has a very good focusing system on it. This was introduced oh, I'm trying to think, it was about two years ago. And they've slowly been making and migrating its way to other cameras in the Canon lineup. And it's finally hit the Rebel lineup for the first time. And so, anytime tracking faces or tracking subjects in movie or live view mode, this is a really, really good camera for doing that. Now you can also zoom in and zoom out if you wanted to check focus manually. And so this can be really handy if you wanna be very, very precise about shooting something and having it very, very perfect in focus. And so let me give you a little demo on this. So let me go ahead and put it in the movie mode. And what I'm gonna do is I'm gonna switch over to manual focus on the lens. So it's in manual focus. I'm gonna zoom in really close on this. And, let's see, what do we wanna focus on. Okay. Oops. I hit a button on the back of the camera. Not supposed to do that. And so now I can zoom in. And I wanna get on this camera over here to the right. That doesn't look like it's in focus does it? No. And so I can turn the focusing ring and I am zoomed in five times okay. So this is a fly by wire system so I gotta be a little bit, it's not quite manual. So now I can zoom in 10 times. And now I can really see little out of focus. Little out of focus. And right there. I know that that is perfectly in focus. And then I can hit this again. And it cycles through this one times, five times, 10 times magnification. I think we can also we just go forward through this. And just now I am 100% certain that that camera over on the right hand side is in focus. And so if you wanted to manually focus you can do that by just throwing the switch into manual focus and then zooming in. And so, a great way of assuring that you have absolutely perfect focus. Works best if you're on a tripod shooting a stationary subject. Now there's a lot more that we're gonna talk about as far as the movie goes. There's a whole movie menu on this camera. It's king of a secret menu. You gotta get to it in the right manner. And so there's a lot of controls for the resolution and the frame rate. And things like that. We'll continue to talk about that as we get into the movie section of the camera. But this is enough to get you started shooting some good movies that are in focus.
Class Materials
Bonus Materials with Purchase
Ratings and Reviews
Jeff Sun
sunilkumar Khatri
Sebastien Jobin
Student Work
Related Classes
Camera Guides