Lessons
Class Introduction
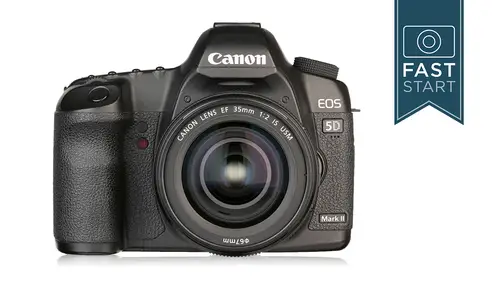
06:50 2Product Overview
13:14 3Photography Basics
09:15 4Button Layout: Top Deck
44:43 5Button Layout: Back Side
20:37 6Button Layout: Other Sides
10:47 7Lenses
07:42 8General Q&A
09:31Lesson Info
Camera Operation
All right, so this last little section is camera operation, so I'm gonna encourage those of you here in the audience as well as those of you at home to kind of follow along. If you want to use your camera's a good time to practice setting your camera first off, let's just kind of talk about setting up your camera. We already talked at the beginning of the day charging the battery, attaching the land's all those sort of basic things before you go out on a big shoot, you're gonna want to form at the memory card. Get set for the new job that you're going to be on. Make sure the time and date is set properly for the location that you are at. Make sure that dr knob is adjusted properly for your eye. So you have a nice, clear view through the viewfinder you have come to peace with j peg versus raw you know what? You're going to shoot, and you have fully set the features in your camera that played back to set up. Everything is set up the way you want in your camera, and then what I often do b...
efore something really important is I'm gonna go shoot a test photo to see if there's dust on the sensor. Because I want to take care of that ahead of time, I don't want to head off on an important assignment and have dust throughout the entire shoot if something happens while I'm out there, there's not too much I can do about it, but I'm not going to start with a problem. So this is your final test on the cannon five demark, too, and think about these controls because I've narrowed it down to what I think are the ten most important controls on your camera. And where are these on your camera? So the exposure mode your shutter speeds and, of course, your apertures have a little helpful hint of the dials and knobs that you have on your camera for this. How do you change your s o? And what about the exposure compensation? Big old dial on the back? They're metering white balance, you're focusing system gonna be those combinations of buttons and dials going to start memorizing these things as you get to know this camera better and better focussing points going to be changing with that foam button and the front dial and then finally, the drive mode and so everything that you need to change on this camera is pretty quick and easy, inaccessible so that you can change it it's just a matter of you remembering where all these buttons are. So if you had to set this camera up in a really super simple mode here's how I would recommend setting up the camera uh, I hate to say this, but the program just good old simple program the camera's gonna pick a good general shutter speed in a general aperture for you. And while I don't like to recommend auto eso is you're gonna hand the camera to somebody who wasn't a photographer it's probably safer to leave it here than any place else if they're going to shoot in a variety of situations, make sure that the exposure compensation is said it zero so that's the dial on the back of the camera and if somebody else is going to be using that you might take and this is kind of little bonus here that switch on the back of the camera and switch it on rather than the on above thee on so that way you can't switch it into you actually get into that switch to want to change the exposure. Compensation for metering recommended it before, but I would stick with evaluative misery and for white balance I would leave that at auto for general purpose stop for focusing one shot this is where the camera will focus on something and then stop tracking it it just wants to find it once and get it accurate and then for focusing points for just really general photography you could just use all points because then there's a lot of little areas for the camera to grab onto for focus and for the drive mode I would just leave it in single shots so you're taking one picture at a time now I don't know that I've ever had my camera actually set up like this, but if I had to hand my camera to somebody to quickly take pictures this is how I might do it or if somebody who just got this camera just wanted to go out and take basic pictures and not fuss with photography this is how I would set it up all right let's take somebody that used to shoot film old manual cameras and they're going to do it the old school retro style how would you set your camera? Well, you're probably gonna want to start controlling things manually so you turn that off mlle odile to the manual now you're going to need to set shutter speeds and apertures and that's going to totally depend on the light that you have but just for practice purposes let's go ahead and dial in one hundred twenty fifth of a second because that's a good hand held shutter speed and then we'll change our aperture and if we have our dia walked in the back, we're gonna have to unlock the dial in the back with that little off on switch and let's set an aperture of f ate why f ate because the old saying and photography is f ate and be there. So you take a good picture. Now perhaps you're going to be taking pictures under lower light so you could bump your eyes so upto s o four hundred. We won't be worried about exposure compensation here because we're in the manual mode for metering old school photographers kind of like center waited me eatery and cannon has kind of an awkward symbol for metering, and the centre waited is where there's nothing in there, their spot there's a circle there's one where you see both of them together. Center wait, it is the one where you don't see anything in the lcd for the centre waited white balance let's. Just go ahead and keep it simple and leave that at auto for focusing. Uh, old school dogs like to focus manually so you'd go over on the lens. You'd flip that over onto the manual setting and then you just manually focus as need be. You don't need to worry about focus points if you're manually focusing, and perhaps he might want to have the drive mode at continuous, so that's the button on the top and the dial in the back. Three point nine frames a second they can't call it for because it is three point nine and people get really mad when cannon claims it's four frames a second, but it's really three point nine so you want to see a heated internet forum, go in and check that out? That happened on a previous canon cameras, so they were very precise about how many frames per second. All right? And so just to testi out in here, let's, see if you can make these settings as fast as I can go through it. All right, let's set a time value mode mode to time value, and I want you to set a shutter speed of one half of a second. What kind of an awkward one to get to? Because the numbers look a little bit funny, and its zero quotation five is what a half second looks like in your camera, and so if you're not sure where to go for a half second, what I do is I go down to one second, and then I come back of three clicks because we're working in third stop increments. All right, next up, let's change our s o to sixty four hundred. I'm going to make you make your fingers get a workout here, let's do exposure compensation at plus to try to do my cameras well, make sure and then we're going to do a spot metering, so you have to press the meeting button and you turn the front dial into you see the little dot so there's a there's, a dot there's a circle, there's a circle and a dot and then there's nothing and this is the dot let's change our white balance to the lightning bolt for flash, so we're not actually turning the flash on. We're just setting the white balance toe flash for focusing mode that's the a f system, we're going to set that two a I servo now this is not working on your camera like it's not working on mine it's because you need to go back to the lands and put it back in the auto focus, which is a little bit of a trick that sometimes you forget about because it's in a different position on the camera single point focus and so change the single point and let's make this extra hard single point on the right so you press the button in the back and then you turn the dial to that one in the right hand side, lights up and then for our drive mode, let's set that to the two second self timer, make sure I'm gonna get mine in the two seconds time self timer and everybody in the classical head take a picture with this horrible setting and I guarantee you that's a terrible picture and that a wonderful trick, I could tell you how to self the camera to get a horrible picture. Okay, so how would I set this camera up for something real? Let's? Get let's, get real folks landscape photography, and when I'm thinking landscape photography, you might have something in the foreground, you might have something in the background, and you want everything in focus, and hopefully you're working from a tripod, so things here that are important is your depth of field and where you focus the camera, I would probably be in manual exposure that way, I could do some test shots, make some adjustments with the shutter speeds and apertures the shutter speed, an aperture that you choose will totally depend on the light that you're dealing with, but for practice purpose in this class, let's, go ahead and set a shutter speed of a quarter of a second, and so a quarter of a second is going to be simply number four will set an aperture of f sixteen because we're going to want more depth of field now we could set an aperture of f twenty two or thirty two, it depends on the lens and the exact situation that we were shooting, but in general we want more depth of field. Our s o is something that we're definitely gonna want to keep as low as possible especially if we're on a tripod so most likely s o one hundred we don't need to worry about exposure compensation because we're in the manual mode from eatery I'm going to leave that in evaluative mitri and as I said there is kind of funny symbols and so what you want is you want the little dot with a circle around it that is evaluated me eatery white balance I would leave that at auto so that's just the a w b focusing I would have at one shot that way you could focus on one tree or two up and have that is the specific spot that you were focusing the lens and this is where you're gonna probably want to have a single point and I would probably choose the single point in the middle because it's the one that has the cross hair censor on it so it's sensitive both vertical and horizontal lines and it's the best performing bracket of all of them and then for the drive mode got a couple options here you could either do single shot if you have a cable release or you could do the two second self timer if you don't have the cable release and that way you get your hands off the camera and there's nothing touching or vibrating the camera while it's actually shooting all right, let's try portrait photography we've got a lot of portrait photographers in the audience today, so here is my recommended settings for this I would definitely recommend manual uh if you're gonna ask a person to shoot and you're going to shoot a siri's of shots that allows you to really dial in the exact settings you want so we're gonna be in manual exposure and when you're shooting portrait's you're concerned about their movement and they're blur and your movement from moving the camera and blur so you're probably going to be choosing a shutter speed of one hundred twenty fifth of a second or faster depends on the light and a number of other issues after that depends on the style of shots but a lot of portrait photographers like shooting with shallow depth of field and it depends on the lens that you have on your camera but if I have a lens that goes down to one point for I might be shooting at one point for two point oh two point eight and this is why when you get into portrait photography it's really nice to have a lens that goes down to two point eight so you can get pretty shallow depth of field I'm definitely gonna want to leave my s o as low as possible depends a little bit on the light that you're working in, but I would generally want to keep it as low as possible the meeting system I'm fine with the value motive metering and implying with auto white balance for most of the settings on my camera so those aren't going to change too much focussing is critical I'm going to want to focus one shot so long as the subject is not moving towards or away from me and I'm not moving so I'm going to focus on the subjects I and stop and because I want to focus on the I I'm not going to use all points I'm going to use a single point fact I'm going to use the single point in the middle and I'm going to focus on the eye if you were to use all points you might have one of the points hitting their nose and if you have very shallow depth of field in the noses in focus and the eyes are out of focus that doesn't look good and then for the drive mode I would probably keep the cameron continuous because they might be leaning back and forth changing their weight slightly changing their posture or gesture and you could grab a group of shots very quickly with the camera that makes sense for all of our portrait shooters in here I'm getting nods which is a good thing all right let's try something completely different action photography so in this case we're shooting subjects that are moving towards us away from us or moving around in some way or another I'm going to stick with manual exposure here, I think manual is a great system to be able to lock in with the shutter speeds and apertures that we want in this case, you have to be really concerned about your subjects movement, and you're probably going to need a shutter speed of five hundredth of a second or faster, and if you're choosing a really fast shutter speed, you're probably going to need a pretty wide aperture, like two point eight remember how we talked about the focusing points there, certain focusing points that worked better at two point eight? And so if you have a telephoto lens that goes to two point eight and they're kind of expensive, you get like a seventy two, two hundred two point eight it's around two thousand dollars, they focus very well for sporting events, and this is likely the first place that you're gonna have to start bumping up that sl I try to keep it at one hundred, but it's quite possible. You gonna have to go up to four hundred. As I've said before, with this camera, I can shoot it. I s o eight hundred and I think it looks absolutely fantastic six hundred is pretty good, but I'm starting to notice grain there. Not going to worry about exposure compensation because we're in the manual mode we're going to go ahead and leave the meeting and the white balance right where they've kind of been it those standard evaluative and auto settings but then our focus mode this is where something changes we're gonna go to a servo this is the mode where the camera will adjust focus as our subject is moving forward and backwards and you know, I don't I don't think I mentioned this earlier but this is really important is that when you're doing that you have to leave your finger halfway down on the shutter release button in order to track that you can't just the camera just doesn't track it on its own you have to tell it to track it by leaving your finger on that button halfway down and then it will continually track no matter where you move the camera and as long as your finger is on that button so it's another good reason to be very careful about the way you press down on the camera and then focusing points I would generally recommend all points you could use the center point but if we use all points we get nine points of focus and actually we have those extra six so we actually have fifteen points of focus that are working to track that subject and then the dr modi would of course leave that at continuous so that you could get in lots of shots. All right, just a couple more of these. This one is maximum sharpness. This is when you want to get thes sharpest possible picture out of your camera and you're trying to do everything to take sharp pictures. I would be in manual exposure and I would be on a tripod and it's the shutter speeds and apertures air totally going to depend on the light levels at least the shutter speeds going totally depend and just for fun if you want to follow along, set your camera to two seconds you will definitely need a tripod for that for that sort of work there now the aperture is a little bit more particular for the sharpest aperture on your lands. It depends on the lens but generally it's going to be the middle of your settings. So if you have a lens that goes from se f ford f thirty two it's gonna be round f eleven if I had to give you one number that's pretty sharp all the time f eleven it varies from linz toe lends though some lenses it'll be f eight or five six the sow is definitely going to be down at s o one hundred for the sharpest possible with the least possible noise metering at evaluative is fine white balance that auto is going to be fine, focusing one shot so this is where the camera focuses on one subject and stops, and then I would probably be using that center point for focusing as well. For the drive mode very much like the landscape mode I would use either single or the two second self timer, and if you like bonus points, who likes bonus points for bonus points, you do mere lock up, all right? So you could either have that programmed into may be the custom my menu, or maybe you would use live you so that we the mere is not bouncing up right before the picture is taken. All right, so we got to the last one, and this is the one I want you to follow, because if you've been messing with your camera, you might have left it someplace very, very awkward. And so this is what I would call basic photography, which I think is a really good way just to have the cameras set up in the bag when you don't know what the next picture is going to be. And here is I'm actually using one of the automated modes on the camera aperture value it's a good kind of quick general mode, we're not going to worry specifically about setting a shutter speed. But I would set an aperture that is mostly wide open, and so it depends on the app pictures that you have available, but if you choose a faster aperture like this, you're going to get a faster shutter speed, which is probably going to be more of an immediate need very rarely do you pull the camera out of the bag and rushed to take a picture with lots of depth of field. More likely you're going to need a fast shutter speed to stop something that's moving really quickly. I would probably leave the esso at one hundred just a good base place to leave the iso setting on your camera. Be very careful here, go check and see where your exposure compensation is because I think we were playing around with it last time and so that's the dial on the on the back of the camera leave that at zero to start with. You may need to adjust it from picture to picture, but zero is a good place to kind of have is your home base on that one metering at evaluative metering, which is the dot with the circle around it white balance at auto is going to be fine if you're shooting raw, you could leave it there pretty much all the time. If you shoot j peg, you will need to keep a closer eye on white balance according to the light that you are in the focusing system, one shot is a good standard system. So it's focusing on one thing, and then stopping it's for still subjects and choosing the single point. I prefer using the mohr, exacting standard of a single focusing point, especially the one in the middle. That's, the one I used most of the time in my five day march to and then the drive mode. I would generally leave that single. So if you have somehow stayed awake and tuned in to the entire class, I can say, congratulations. You're a candid five d mark to expert now.
Class Materials
bonus material with purchase
Ratings and Reviews
Mike Swartz
Having used an XTi I was familiar with the basic Canon layout, but when I bought my 5D MKii used from my wedding photographer who updated to the MKiii, I knew there would be a ton of features I'd never really understood. This video series is fantastic. I've learned so much about my camera, many tips on best practices when planning shots and I've seen an increase in the quality of all my photos as a whole vs. just taking a ton of pics to try and capture one or two that turn out nice. I'm excited to try out so many new things I learned from watching these videos. I'd recommend these videos be the required guide to anyone who owns a 5D MKii.
Mia Linguia
Amazing class, I walk away feeling like I've made this machine my own. Like getting a new car and adjusting all the seating and mirrors and radio stations to your comfort, then giving it a name because its officially yours. My camera now feels more comfortable to use and I can't wait to use it again with these new found tweaks. Thanks John, always a great class!
Nelson
Excellent instruction. The instructor is very knowledgeable and a very effective communicator. Great photo examples and "SLIDES for that". Creative Live and John should both be commended for providing in depth and pertinent information. The Canon 5D MkII is a great camera however without a body of knowledge to fully utilize it you might as well have a low end point and shoot. I would recommend this class to anyone who has a 5D MkII, no matter your skill level. Great job!
Student Work
Related Classes
Camera Guides