Lessons
Class Introduction
07:10 2Upgrading Pros & Cons
07:04 3Top 10 Camera Purchasing Mistakes
13:44 4What Are Your Camera Needs?
09:33 5Camera Types
15:21 6Sensor Size
17:50 7Pixels
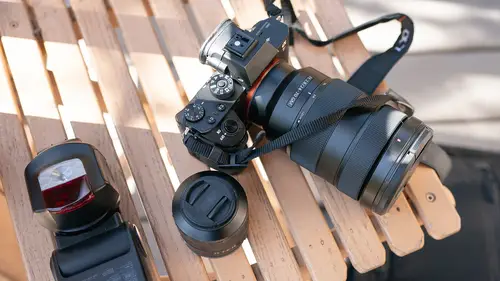
06:02 8The Lens
18:54Lesson Info
Exposure
Alright, capturing the right exposure is very important, and so exposure is something you're gonna find on all the cameras that you have a lot of control over and there's a lot of options to choose from. Most cameras are using some sort of mode dial on the top of the camera, and this is gonna have a variety of automatic as well as manual options for you to use. A lot of times, there is a green box or camera, and this is the fully-automated mode, where the camera takes care of literally everything, in some cases, a little too much in my opinion. There's a lot of what I call child safety locks on the features of the cameras, and so I think this is more appropriate when you are handing the camera to your cousin for them to take photographs, where you don't want them to mess your camera up and just take simple, basic photos, it'll work just fine. A lot of the cameras have these scene modes, which tweak the various features of the camera for these types of scenarios. They tend to do a bette...
r job than somebody who doesn't know what they're doing, but once you know what you're doing, you can out-perform, and you can do anything that is in the scene mode yourself, and so once again, it's just a matter of education. How much do you know about what you're trying to do? The program mode is a good, simple mode where the camera is setting shutter speeds and apertures for you, you'll often have some adjustments that you can make with a control dial for varying the exact settings. The S, or TV mode is known as shutter priority, allows you to set the shutter speed if you know what shutter speed you want, and the camera will figure out the rest of the equation with the aperture. In aperture priority, it's kinda just the reverse, you get control of the aperture, which means you get control of depth-of-field. This is a favorite technique for a lot of photographers for general photography, for travel photography, anything where you don't know what's comin' up next. When you do wanna be more precise about capturing a exposure, you wanna get into manual exposure, and so this is where you get to be very precise about the shutter speeds and apertures you choose. You'll use the light meter, and you can get very exacting results. Exposure compensation is a way for you to have a little bit more manual control over aperture and shutter priority in the program mode, and it will allow you to make your pictures a little bit brighter, and a little bit darker. So once again, your three critical controls. Your aperture, controlled in the lens, will be controlled basically by what lens you have on the camera. The shutter speeds are controlled by the camera body and your ISO is your sensor, essentially, in there, and so between these three, we are capturing our exposure, and so each one of these has a few different points you might wanna think about. So when it comes to the shutter speed range, some cameras go beyond 4000th of a second, it's usually not a big deal for most people. 30 seconds to 1/4000th is a very common range. As I say, the faster shutter speeds are not a big deal for most people. Be careful with those lower shutter speeds, because you might get camera shake and end up getting blur in there. There are many cameras that now have electronic silent shutters that are completely silent. That can be very beneficial if you are in let's say a studio environment where you're on a TV set, you don't wanna make any noise, or you're in the ballet, or a play, or a recital, something where you don't wanna make any noise, there are some caveats to using that, so investigate using silent shutter, but it is becoming a more common option, especially on the mirrorless cameras. The lens will determine the aperture range, this isn't determined by your camera, so be aware that you can change this when you change out your lens. It's nice to be able to let in more light with a lens that goes down to 1.4, or 1.8, for instance, allow you to shoot with shallower depth-of-field under lower light conditions. The smaller apertures, which are available on pretty much all lenses will allow you to shoot with greater depth-of-field, and I think it's really fast to have at least one lens that gets down to f/2 or faster. The ISO range is gonna be determined by what type of sensor you have in that camera, and it's generally, truly you want to have as wide a range as possible, you wanna go as low as possible and as high as possible. A lot of cameras will have a lowest ISO setting of 100, and that is typically the best setting. There are some cases where cameras will go down to 50. 50 is not as good as 100, it's used in special cases that we're not gonna get into right now. Generally speaking, large sensors are gonna do better at those higher ISOs, and generally, cameras with fewer pixels will do better at high ISOs as well. The top two ISO settings on most sensors are pretty low in quality. You might be wondering, well why are they there if they're low in quality? Well, sometimes quality isn't most important, just capturing something is more important than quality, and so they're there for scientific reasons potentially, or just identification reasons. The cameras will also have an auto ISO setting, where the camera will choose the ISO for you, and this can simplify certain picture-taking situations. It's something I try to do more manually, because it's one of the key components that's gonna contribute to quality in a particular photograph, but in some cases it's handy to have the auto ISO take care of that part of it while you're concentrating on shutter speeds and apertures. So looking at some of our exposure modes, the auto modes are simple, but they are gonna have those child safety locks, which do limit some of the other options when you try to access them on the camera. Program is, I think, the simplest mode for most people who are into photography, it's gonna allow you to quickly set the camera up to capture the correct amount of light, but still allows you in to play with all the other settings on the camera. Shutter priority is gonna be good for people who are very specific about the shutter speeds that they wanna capture, as well as aperture priority, good for people who know what depth-of-field that they would like to shoot with. And then, manual is best when you want a little bit more control over everything, and you have a little bit more setup time to make sure that you're getting things set right, and remember that no matter what the camera can do, you can do it better so long as you educate yourself.
Class Materials
Free Bonus Material
Ratings and Reviews
Denise Watson
Another outstanding class by John Greengo, my favorite Creative Live instructor. John's delivery is entertaining and his info clear and very easy to understand. If you need more explanation, well, don't worry - he's got a slide or PDF for that! I'm a working photographer and I learn something new with each of John's classes. Don't hesitate to buy any of his classes - you won't regret it.
David Reichel
Yes - there is such a thing as a free lunch - this class is it! I enjoy landscape, seascape, architecture, portrait and travel photography. I've been a Canon user for decades (film and then digital full frame with the 5D Mark II then 5D Mark IV). Recently I got a Fujifilm mirrorless medium format GFX 50R and discovered some Fujifilm features (e.g., film simulation, menu system) that resonate with me. I now have over-kill on full frame format and because I like the Fujifilm so much, I've been thinking about moving from my Canon 5D Mark IV to a Fujifilm X-T3 as my walk-around camera. This class helped me better understand the trade-offs and alleviated my concerns about a crop format sensor in the X-T3. On top of that, this is a great refresher course on camera fundamentals.
Sherry Throughmyeyes Prater
There a thousands of reviews/guides/ floating around the internet, but this one is by far the best by far. I usually watch a portion and then move on because I simply lose interest, but I watched every single lesson. John gives a very unbiased explanation of cameras, functions for every type of shooter. Not only would I recommend it, but I am going to recommend. I am a member of multiple photography groups on FB and one of the most asked questions is camera buying advice. This is excellent!