Lesson Info
22. Tips for Capturing Drone Video
Lessons
Class Introduction
05:31 2How Dirk Got Started With Drones
19:43 3What is a Drone?
21:50 4Registering Your Drone
08:53 5Drone Terminology
05:03 6DJI Go App
04:22 7FAA Drone Rules
07:40 8Apps for Flying Drones
03:02Pre-flight: Drone Flight Checklist
07:05 10How to Fly Overview: Take off, Hover & Land
14:36 11Straight Line & The Simple Box
04:34 12The 180 & The Box With Yaw
05:17 13Drawing Shapes
12:50 14Q&A
11:40 15DJI Intelligent Flight Modes
15:32 16DJI Go App: Photo Settings
29:02 17Tips for Capturing Drone Photos
28:40 18Creating Panoramas
09:58 19Post Processing for Drone Photography
29:10 20DJI Go App: Video Settings
13:41 21Accessories
19:10 22Tips for Capturing Drone Video
06:01 23Camera Moves
10:23 24Post Processing For Videography
07:02 25Simple Color Correction For Footage
07:48 26Adding Music & SFX
09:48Lesson Info
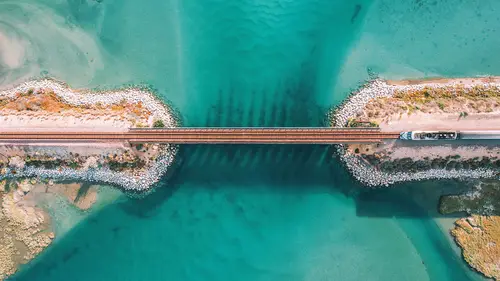
Tips for Capturing Drone Video
Video tips, guys, video tips, here's my tips, so, just like the photo tips I gave you, the first one, find the light first, and then find your subject. It's very important that especially with a drone, that you're finding a subject, what is your subject? Is it a tree, is it a hill, is it a person? And then you frame around that, right, so find the light, then find your subject. I wanna encourage you to think in 3D, especially with video, this is really important, because now when you think about the foreground, you think about the middle ground, and you think about the background, with video, you can move through those spaces, so you're thinking in terms of zdepth, right. So if you start to point out like what's my foreground, okay, it's this tree right here, what's my middle ground, oh, it's that lake, and then what's my background, oh, it's the mountain ridge, you could fly past this tree, right now, I just created depth, fly over the lake, and then head over to the mountain, right. ...
I just took you through three planes. Things can get really interesting, that's dynamic, it's interesting, it pulls the viewer in. Next, I wanna try and encourage you guys to try multiple moves. I'm gonna share with you guys some moves, that you guys can practice, but I really wanna encourage you just like the photos, you saw with a peer, I was like low, over here, profile, high, oh, straight down, oh, over the middle, right, I'm just trying things. I'm getting a variety of shots. I'm not a one-and-done. I don't think there's anything wrong with that, but I love to explore, hopefully, you could see I'm kind of open to the process of creativity. Sometimes I may think I'm totally getting into the jone shot this way, but then I'll come over here and like, oh, man, I should totally try this, so I'm open, I fly around, right. I told you that before I get to a location, I'm walking around the location, I'm checking out what's here, what's there, what are my obstacles. Fly around with your drone, you may see something over the tree ridge, and it's like a cabin all alone, like oh my gosh, right. Explore your scene before you commit to it, right. Fly over there, see if there's any distracting elements, very important. Next, really helpful tip is to figure out your starting point, and then your ending point. That makes things really easy because now you know where to start and where you're gonna end, and you kind of just have to get to that ending, right, so you're like I'm gonna be here, I wanna go over that monitor, so I'm gonna be here, I'm gonna go over the monitor, I'm gonna tilt the camera down, now you have a goal, you have a plan, instead of just like flying and figuring out as you go, and it's jerky, and it's wobbly, right. Your controls aren't so smooth, and then I wanna encourage you guys to follow through on your shots. So think of it just like a golfer, right, they go for the windup, they hit the ball, they don't just stop, though, like bink, stop, right, it's like follow through the shot, right. Do that same thing with your drone. You have your starting point, you have your ending point, start heading to that ending point, you hit that ending point, and then I say keep going, let that motion ease out. That's the big key, I think, for you guys to think about, is the easing of things. If you're already gonna start off with an ease, 'cause you're just hovering, you're gonna kick it forward, you've eased into that foreword move, eased out of your ending move. And then next I wanna encourage you guys to record extra footage. This is a biggie that I take from the video world, when I used to shoot short films, is I always record at least five seconds before I wanna actually hit that action, and I record at least five seconds after, and it saves me so much. You can increase it to 10 to be safe. It saves me so much for doing a transition, or it lets me kind of exit the shot a little, a little later, and I can do that fade, right, so something to think about. These are all good tips to practice. So, before I show you some camera moves, I wanna talk to you about prop wash, and here you're gonna see in this shot, can you guys see this flickering over here? This is because my props are going, and the sun is higher, it's a little higher, and that light coming through my lens, is getting interrupted, right, so I get a flickering. Now, there's a couple ways to fix this. I can either completely change my angle, and be like well, I'm not flying towards the light, I'll just fly this way, easy, or what you could try doing is let's say we wanted to do a push towards the water, so we wanna push past this object, get some depth going, I'll push past the object, I'm heading towards the water, that's the shot we want, but we have flickering. I say start over here, and go backwards, so your props are facing the other way, then reverse it in Premiere or Final Cut or something. That's the hot tip, right, reversing the footage. It obviously won't work if there's a car going by, right, you reverse, it's like going backwards, but in this case, like there's no object, that they would ever know that, right, so that's a really handy tip. The other thing that I'd like to say about that, is when you're flying forward, and your camera's looking out, your props can be in the shot. If you shoot 4K and you have a smaller composition in Final Cut like 1080, it doesn't really matter if the props are on the top of the shot, 'cause you just slide the clip up, 'cause you have a way bigger clip, than what your sequence is in Premiere or Final Cut. Does that make sense to you guys? So, oftentimes, what I will do, is instead of pushing towards the, it'd be more like this, pushing towards the shot, I will go backwards, and reverse it, and see, there's no props anywhere near the camera, so it's a great tip for you guys, if you have some issues with the props getting in your footage.
Ratings and Reviews
MARGARET NICOSIA
Dirk really did a nice job taking new students thru exercises to gain confidence. The work in Lightroom and Photoshop was helpful, but I wish more time could have been focused on flying or tips. Dirk has presets that he offers. It would have been helpful to see the results using those presets. Looking forward to the free which Drone to buy class and the advanced class
JBPhotoDesign
I definitely recommend this course if you are thinking about getting into drone photography looking for the fundamentals. I now feel pretty confident I can get started and that my learning curve will be greatly shortened thanks to the technology available today and a great roadmap of getting started. If you are already started... follow up with his advanced topics... I know I will.
MikeD
Super class. As a beginner I had little idea what to expect and never got started because of all the talk of people crashing drones right and left and losing a fortune. Dallas made it seem simple. So I bought a Tello beginners drone (great starter by the way), got hooked and am now flying a DJI Mavic Pro 2 and studying for a commercial license. Not sure, this is a great class to start with.