Lesson Info
10. How to Fly Overview: Take off, Hover & Land
Lessons
Class Introduction
05:31 2How Dirk Got Started With Drones
19:43 3What is a Drone?
21:50 4Registering Your Drone
08:53 5Drone Terminology
05:03 6DJI Go App
04:22 7FAA Drone Rules
07:40 8Apps for Flying Drones
03:02Pre-flight: Drone Flight Checklist
07:05 10How to Fly Overview: Take off, Hover & Land
14:36 11Straight Line & The Simple Box
04:34 12The 180 & The Box With Yaw
05:17 13Drawing Shapes
12:50 14Q&A
11:40 15DJI Intelligent Flight Modes
15:32 16DJI Go App: Photo Settings
29:02 17Tips for Capturing Drone Photos
28:40 18Creating Panoramas
09:58 19Post Processing for Drone Photography
29:10 20DJI Go App: Video Settings
13:41 21Accessories
19:10 22Tips for Capturing Drone Video
06:01 23Camera Moves
10:23 24Post Processing For Videography
07:02 25Simple Color Correction For Footage
07:48 26Adding Music & SFX
09:48Lesson Info
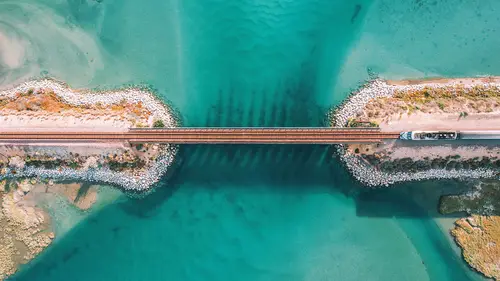
How to Fly Overview: Take off, Hover & Land
We went out and we filmed out, probably about 45 minutes away, in a beautiful spot, took the drone up, did some flying exercises. We even have a drone angle to show you so pretty excited to show you some of this footage. The main take-away here is to get comfortable with flying, and if you guys understand how the sticks work, and you feel good with how the pressure is when you go forward on the right stick and you watch the drone move forward and that feels comfortable to you, then you should eventually be able to eventually face the other way and do it, and it all starts to become second nature, and that's really the goal. So you have to practice, you have to put in the work, but I'm giving you guys some goals to aim for, that's really my mission today. So how to fly. Really, just real quick, I wanna talk about a couple drone terms that you might hear me reference. But these really come back from the fixed aircraft days where they had some terms to denote certain movements of the airc...
raft, and they have been brought over into the drone world, so they still apply. So I've created this little graphic for you and it basically is to break down what the left stick means and what the right stick means. And in the videos I will refer to the left stick and the right stick, just to make it simple, but let's start with the throttle. The throttle on the left stick, when you go forward, with that, that's actually causing the drone to rise up, to ascend, and when you go down with it, the drone descends. And that's gonna feel really comfortable because you're gonna be like up is up, down is down. That's pretty straightforward. On that same stick though, the left and right is gonna be our yaw, so that's the fancy word that you need to learn today is yaw. And what that does is that rotates the drone around either clockwise or counter clockwise. So your drone can actually twist around, twist around, and yaw controls that, you're doing that with the left stick. On the right stick, we have pitch, and that controls the drone moving forward, which that'll feel really natural. It's forward, up, up forward, that's gonna feel really easy. Back, down. Down's gonna go back, so that should be fairly comfortable. Roll though, this is different than yaw, so if yaw twists the drone around, the roll will actually make the drone go to the side. So you can go left and right to the side. So once you start to understand those movements and you get comfortable with it, you're not gonna be like all right, right stick, left stick. You're not gonna be doing that. You're just gonna be like, you're just gonna be doing this and it's gonna feel really easy. Now the trick is I encourage you guys to always look forward, meaning that if the drone's facing this way, you're looking this way. So that your left is the drone's left and your right is the drone's right, then it's much easier. But if you think some of these exercises are easy, maybe you've done some flying a little bit, you're a little comfortable with it, I then either encourage you to try it like, turn to the side, try a different angle, and now go forward, turn, all those things. Sometimes I'm flying and my drone's just way behind me, but I'm still going like this, and probably looking at my screen, right? But the point is, is you want flying to be second nature. You want to be comfortable with it and for those of you that are afraid, you're like, oh I don't wanna crash, I don't want my drone to hit a tree. All those fears, it's because you need to get comfortable with flying, so you have to practice, right. So the first thing that I'm gonna show you is how to take off, how to hover, and how to land, and I will let you know that if you have a DJI drone, there are built in features where you can just hit a button and be like, take off, and that's pretty cool. And you can be like, land, and it just lands, and that's awesome, didn't have that in 2014. That did not exist, so it's really cool. But it's still very important that you learn how to do this manually so I'm gonna show you how to do it manually, okay. So there's the automatic way and there's the manual way, and we'll just play the first video. It looks like I put this screen up too, because I'm also gonna show you guys how to calibrate your compass. I'm gonna show you how to turn on your drone and how to turn on your remote controller and just so you guys know, I do have a special hookup here coming out of the HDMI port and this is just recording my screen so that you guys can see exactly what I'm seeing here on my screen. So I'm gonna come down to the drone and right here where this battery is, there's this button, I'm gonna push this once, and then push it again and hold. Wait 'til it boots up, and then I'm gonna step away. And I'm gonna let this boot up right now, it's gonna probably take 30 seconds to 60 seconds or so. And while it's doing that I'm gonna also turn on my remote controller, and I'm gonna do the same thing, I'm gonna push it once and then hold, and it boots up. The screen's gonna take a minute to come online. And sometimes you might get a popup letting you know, hey there's some new software to download. You can go ahead and do that once you have a wifi connection, so obviously I'm out here in Washington in the middle of nowhere not close to any signal. So I'm just gonna hit wait to download and I'll do that when I get back home. I'm now going to enter into the DJI Go app. So this is the home screen for my particular set up, if you have your own smartphone, an Android, an iPhone, a tablet, it'll look slightly different but it's gonna have this same button that says Go Fly and that's entering inside the DJI Go app you're now gonna then see what the camera sees. Every now and then I do get a popup with this menu setting. I'm gonna actually exit out of it first and then now I'm seeing what the camera is seeing. So if you wait about 60 seconds or so you will then be giving the drone time to acquire signal from all the GPS satellites in space. And that's important because your drone will hover in place if it's connected to a GPS signal. So the more satellites your drone's connected to, the stronger the signal is. So I can find that right up here in the top portion of my screen, right next to the satellites, it's gonna have a bar readout and obviously the more bars the more GPS satellites I'm connected to. So what I'm gonna do before I even start to fly is I'm gonna calibrate the compass, and this is important because your drone's compass determines which way is North, which way is South, which way is West, which way is East. Once it knows those things, it can then determine how to keep the drone in place because it's using GPS coordinates. So we wanna make sure those are dialed in. So some people do this when they fly every single time, I personally do it when I'm flying at a new location. So I've come from Southern California all the way up here to Washington, so I'm absolutely going to calibrate my compass and make sure everything's right. So what I'm gonna do to get to the compass calibration settings, is I'm gonna come over here to the top right hand side of my screen where the three dots are, and then gonna go to the aircraft tab. I'm gonna scroll all the way down 'til I get to advanced settings. I'll click that and then I'm gonna go right here to Sensors State. And then right in here you're gonna see a tab for IMU and then for compass. So here is my compass setting and I have green lines, so looks like it's happy, but I'm gonna come right here to the calibrate compass. It now gives me a popup showing me exactly what I need to do so I'm gonna show you how to do that. I'm gonna follow instructions, it says rotate your aircraft 360 degrees horizontally. Pick up the drone, rotate it. Wait for the screen to change and then I'll set it down. And now it's asking me to turn the drone on its side, and then to rotate it. So now that we've calibrated the compass we can now start up our drone. The first thing I just wanna make sure you guys are aware of is you always wanna make sure you're clear of any obstacles, that could be a little kid playing off to the side, that could be a dog that might try to run through the scene. That could be something overhead, like wires or a lamppost, something like that. So my area is very clear so I feel comfortable with now taking off. The way that I'm gonna do that is, I'm going to bring the two sticks, the right stick and the left stick down into the center and once I do that the propellers will start up and then it'll wait for my next input. Once I'm ready I will then give it some throttle with the left stick and as I move up on the left stick the drone will go up in the air, it'll start to ascend. So I'm gonna do that now, I'm gonna bring the two sticks down into the center. Let go. And now it's waiting for my next input. So with the left stick I'm gonna take the throttle up. (drone whirring) So I'm gonna raise the drone up maybe about 10 feet and that's just to make sure that if someone were to walk through it obviously wouldn't hit them. Now the drone's in the air and you might think, oh to get the drone to turn off, you're gonna do the same thing, bring it down into the center. But no that's actually not right, we actually wanna lower the drone. So to go up in the air, we push this left stick up. What I'm gonna do is push the left stick down, and it's just smooth, just a little bit of movement on that and I'm just lowering it and I'll let go for this moment just so you can see I'm pretty close to the ground and then I'm just gonna guide it down with the left stick, a little bit more, and then once I hit my landing pad I'll go all the way down with the left stick. So I didn't touch this right stick at all. You may think it's like, oh just do it backwards, the way you turn it on, that's not right, that's actually how I did my first crash, so don't do what I did. To bring it lower all you need to do is focus on this left stick right here. So I just showed you how to take off and how to land manually, and I think it's really important that you practice that, you wanna be comfortable with that. But DJI does have some smart features built in and I can auto take-off and I can auto-land which is pretty cool. But again I think you should learn how to do it yourself first. So to do the auto feature I'm gonna take off by clicking this left button right here with the up arrow, and before it takes off it just asks me, are you sure that it's safe to take off. And I'm gonna look around, I'm gonna confirm yes it's safe to take off. And then I will then slide that slider all the way to the right. And it's gonna take off, it's maybe about four feet up in the air. Again I wanna be a little higher, just in case something were to run into the scene they're not gonna get hit. And the reason why I let it hover, again, just for a few moments is just to make sure that it's not squirmy, there's not some interference that it's just gonna fly off and hit something. I'm making sure that the drone is stable, and once it's stable, I know oh I can go fly, I could take off, I could go really high in the air or something like that. So now let's just bring it down automatically with the auto mode. So right where that auto take off button is, now there's a down arrow and that means auto land, so I'm gonna push that and it's gonna ask me, are you sure you wanna land the aircraft. I'll do one last check, there's no dogs, there's no kids, it's safe, I will then hit okay. The drone's starting to land on its own. And I didn't touch any sticks, you guys just saw me touch a button, so this is pretty impressive. So again that's a feature for you guys if you wanna do the auto mode for taking off and for landing. Awesome, so hopefully that makes a little more sense with that whole compass calibration thing. Some people do that every time they fly, I personally don't do that. I just do it when I change locations. But we call that the calibration dance and you look like a nerd doing it. But it's really important right, you like to use those GPS features like having the drone hover, having it know where home is. You gotta calibrate that compass, right? So another feature that I wanna point out to you is the return to home, RTH. On the Mavic, the Mavics, the return to home is on the opposite side of the power button, it's right here. You can push this, and the drone will automatically come back to where it took off. So it records where it took off. It's the home point. On the Phantom Inspire, the button's right here. And just so you know there is the difference between auto land and return to home. The auto land is, it's gonna land wherever you push that. Important to know that, right? Return to home means, wherever it is, it's gonna come all the way back to where it's at. Now an important setting in the return to home feature is to make sure that you're aware of how tall are the obstacles near you. So you can, if you're gonna utilize that feature, before you take off, be like, all right these trees are about 40 feet. Set in your return to home feature something greater than 40 feet because what the drone does is it shoots up in the air really high and then it follows a path and then it comes right over the home point and it lands. So you just wanna make sure that in that setting you adjust it accordingly. Another feature that's handy though, is if you do have obstacle avoidance on, it'll sense those obstacles, right, but I personally, I don't rely on obstacle avoidance anymore. I've had too many issues, right? That drone, the Mavic hitting the wall. The Mavic falls and the gimbal's broken. It's like I need to be aware first and obstacle avoidance is always like a second backup. That's how I treat that feature.
Ratings and Reviews
MARGARET NICOSIA
Dirk really did a nice job taking new students thru exercises to gain confidence. The work in Lightroom and Photoshop was helpful, but I wish more time could have been focused on flying or tips. Dirk has presets that he offers. It would have been helpful to see the results using those presets. Looking forward to the free which Drone to buy class and the advanced class
JBPhotoDesign
I definitely recommend this course if you are thinking about getting into drone photography looking for the fundamentals. I now feel pretty confident I can get started and that my learning curve will be greatly shortened thanks to the technology available today and a great roadmap of getting started. If you are already started... follow up with his advanced topics... I know I will.
MikeD
Super class. As a beginner I had little idea what to expect and never got started because of all the talk of people crashing drones right and left and losing a fortune. Dallas made it seem simple. So I bought a Tello beginners drone (great starter by the way), got hooked and am now flying a DJI Mavic Pro 2 and studying for a commercial license. Not sure, this is a great class to start with.