Lessons
Chapter 1: Introduction
1Class Project
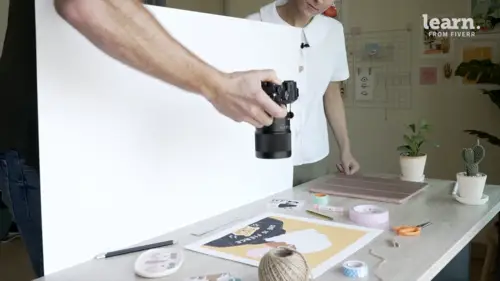
00:55 2Equipment
05:44 3Chapter 1: Quiz
Chapter 2: The Basics
4Camera and Phone Settings
06:07 5Anatomy Of a Good Photo Of Art
10:41 6Example Images - A Breakdown
08:18Inspiration
03:28 8Chapter 2: Quiz
Chapter 3: Shooting
9Shooting in Studio
15:24 10Shooting Outside
05:13 11Chapter 3: Quiz
Chapter 4: Editing
12Basic Edits and Making Mockups in Photoshop
20:04 13Smartphone Editing
04:45 14Chapter 4: Quiz
Chapter 5: Conclusion
15Conclusion
01:57Final Quiz
16Final Quiz
Lesson Info
Camera and Phone Settings
So now I want to talk about camera settings and this is relevant for both smartphone shooters and for those of you that are shooting on a proper camera. So for shooting on your smartphone, the only thing that you're really gonna need is to enable the grid on your phone. You can do this for both iphones and android phones for your iphone users go ahead and just go to settings camera and then enable that grid. That's all you have to do for android users, it's pretty much the same process. Just go to your settings and enable the grid. The reason why the greatest so important is because it really allows us to evaluate where everything is in our frame and also make sure that our phone is perfectly level when we're shooting those flat lays. That's important because we want to make sure our phone is nice and level when we're shooting the flat lights to ensure everything just looks as good as possible. So the basic camera apps on the iphone and android phones are going to be totally fine. They...
're going to do everything that you need them to do. And that's especially the case with the flat lays. Now, once we start getting a little bit more creative, we're doing the straight up shots where we're taking photos of our artwork out in front of us, then you might get to a point where you want to have kind of a blurry background to give it that artistic look and to kind of blur the background behind it and really put the focus on the artwork. So some of the new iphones have a 50 millimeter lens that has this thing called portrait mode and android phones have this as well. And it allows you to basically to blur the background behind your image. And that gives it a really cool artistic look. If you don't have a newer iphone with that third camera lens, that's totally fine, you can actually use an app called focus and that's spelled F O C O S. That's for iphone for android, you can use an app called after focus and these outs will basically allow you to blur the background behind your image without having that third lens. So it'll give you that really cool artistic look without having that extra lens. Now, once again, you're not going to want to be using these apps when we're shooting flat layers because with a flat like we want everything nice and then focused. But if we're trying to get creative, we want to blow the background with the straight up shots totally fine. You can use these apps to get that creative look now for those of you that are shooting with your DSLR or your wireless camera camera settings aren't gonna play that big of a role. And actually auto is probably going to do the trick most of the time with these photos because it's pretty straightforward and you're not really stressing your camera too much. But as a photographer, I always shoot in manual and I do want to give you guys some tips for capturing the best photo that you can. So I'm just gonna be going over the basics here. But if you really want to understand the ins and outs of exposure and a photography, I highly recommend checking out my photography essentials course you'll love it if you are interested in learning more about photography. But for this course I just want to focus on a few simple principles that will guide you for this shoot. So the three things you want to worry about when you're shooting these types of photos is number one, you want to make sure your aperture is set to a value that's gonna ensure you have nice crisp sharpness throughout your frame. You're gonna want to make sure your shutter speed is set above 1, 1/ of a second. Anything above that is fine reason being if you go below that, well then you're gonna have camera shaking your photo and you don't want blurry photos. And then the last thing is just to keep your eye so as low as possible to ensure that you have the best image quality that you can. So with aperture you want to say your aperture anywhere between F four and F eight. Most lenses are sharpest around there and that's going to give you the best depth of field throughout your frame to make sure everything is nice and in focus. Now if you're shooting a straight up photo and you want to have the background blurred. Well then you're going to want to open up your aperture as wide as possible and you can do that by setting it to its maximum aperture. So that might be F four, that might be F 2.8, that might be F 1.8 or so. My lenses those can open up to F 1.4 and that will really create a nice blurry artistic background. So for shutter speed, like I said I always recommend setting it to 1/50 of a second or anything faster than that. Um You can use shutter speed to balance out your exposure. So once you set your aperture and then you set your I. S. 02 100. Then you can just adjust your shutter speed to ensure that you have a balanced exposure in your image and you will know that you have a balanced exposure in your image. If your light meter lines up in the middle, if you guys don't want to shoot in manual you can just simply shoot in aperture priority mode, a little a mode on the camera then you can just say your aperture and the camera will do the rest and most likely it's going to be perfectly fine. So with camera settings they're pretty simple but know that they are going to change with every environment that you go into so make sure you're really paying attention to them If you're shooting with a DSLR or a wireless camera. So the last camera setting I want to go over is white balance and white balance is essentially what the camera understands. True white to be. If your white balance is off, the colors in your image are going to look a little bit off, they might look really warm, they might look really blue. So you want to make sure your white balance is set to a value where it's gonna look the best and most of the time auto white balance is going to be totally fine. The camera is really smart, it's going to see the white points in your image and it's gonna set your white balance to a value that looks the best. If you don't want to use auto white balance, I recommend using daylight or cloudy and then you can just go ahead and adjust the white balance and editing which I'm gonna show you how to do later on in this course. So just to reiterate if you're shooting on a smartphone, make sure you have that grid enabled and then you can check out some of those apps for getting that blurry background. If you're shooting on a DSLR first, make sure your aperture set anywhere between F four and F eight, make sure your shutter speed is above 1 1/50 of a second and then make sure your I. S. O. Is as low as possible and that's all you need to know to capture some awesome photos. So in the next lesson we're gonna talk about what constitutes a good photo. So what are the three factors that contribute to an image being beautiful? So let's go talk about that now.