Timeline Modifications
Lesson 4 from: Advanced Editing Techniques in Adobe Premiere ProAbba Shapiro
Timeline Modifications
Lesson 4 from: Advanced Editing Techniques in Adobe Premiere ProAbba Shapiro
Lessons
Class Introduction
04:42 2Taking Control of Your Timeline
10:46 3Best Hidden Keyboard Shortcuts
18:10 4Timeline Modifications
15:06 5Preference Changes For Efficiency.
18:38 6Tips for Navigating the Timeline
11:34 7More Keyboard Shortcuts to Save Time
07:57 8Useful Tips for Editing an Interview
26:12Lesson Info
Timeline Modifications
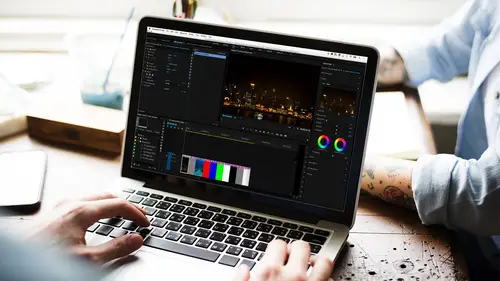
We can do very similar things, though not as many with the video side to add elements. So again if you go here to the wrench, customize the video header, again you have these options, and they're kind of all in place. But again, I might move my video to the top track, and I might move my sync lock to a lower track, probably even to the bottom track. And now when I go ahead and I close this track, might need to let it refresh... It didn't take it. Now you see video one, two and three, and again, you can go back and rename that so you can have video one being Interviews, video two, you can rename that track to be Titles, probably that would be B roll, video track three, again rename that, and that could be B roll or whatever. And now it's a lot more useful. So that's one of the cool things when you go under the wrench and how you can modify things. When you make a new sequence... You simply go File, New or Command N, and you get this dialogue box that probably everybody is familiar with.
You've finally figured out what the best default sequence is for you. If you haven't, I recommend using DSLR 1080p30, 24 or 25, depending on if you're in a PAL or NTSC country. But what you don't do is you often don't go to these other tabs, and if you go to the Settings tabs that actually has the size and everything you want to... But under Tracks you can, when making a new sequence, actually name your audio tracks in advance. So I could say track one is always narration. Track two is always voice on camera. Track three is always music track. Track four is always ambience. And I can even say if it's a mono track, maybe any time I put anything on track one or two, I want it to be mono, so if someone recorded it in stereo, with a stereo mic on the camera, I want to make sure that it comes out dead center, I just make it a mono track. So whenever I put things on that track, it always comes out of the center speaker. There also I can control panning. But this is the nice thing, once I make these changes, and I can say I want so many audio tracks. Let me add an audio track, and I rename them, and I say, "I want to start." I always like to have four video tracks, okay? Once I do all of this, I can save this as a preset. I can call it Abba's Preferred Track, and now when I make a new sequence I choose Abba's Preferred Layout, and it will create a new sequence with all of the specs that I like, and the tracks will already be renamed the way I like to rename them. And as a matter of fact, sometimes I like it when I open my new sequence, is that I like the audio track one to be expanded. I don't want to have to manually do it. I click this button that says Open, so when I launch that new sequence that track is already expanded. So that's some of the controls that you have that we tend not to look at when we're working with Premiere, and that can make things a lot more efficient in your timeline. I'm going to go ahead, and we'll hit Cancel for that because I don't need a new track. I've been speaking quickly. I'm curious if anybody has written in any questions, or if we have any questions from the audience. Yeah, there's one that came in a few minutes ago, "Is there a way to lock a clip in place "on the timeline without locking the whole track?" So this person says, "Trying to keep many tracks of music "video in sync without having 40 tracks." Does that make sense? It makes sense; so the question is yeah, "Can I lock it so that I can't accidentally move it?" You generally can only lock a track. Okay. So their current workflow is probably the only workflow, which is "Oh, I put this kind of music on a track, and I lock it." Now there is the possibility that they might be building. If they're building some sort of an audio bed that they want to keep locked, what I would do, and I would have a bunch of audio tracks here, let me throw in that second cut of music, we'll throw that in there, we'll duplicate it again maybe just to have the implication of more tracks. I may take all of these, and I should be able to do this, sometimes I remember I can do it, and then I realize that's a different application that I'm working in. But I should be able to select all of this audio, right click, and I should be able to, no I can't nest it. I thought I could actually group these into a nest. Let's see if I merge them what happens. No, it doesn't let me do that. So there's no way to do that, I am trying to think. The only other options that they might have, and I don't think this necessarily solves their problem, is we have these tracks here, but what a lot of people don't realize is that you can create a submix track. And so if you have a lot of individual tracks, maybe individual tracks of ambience, you can create a submix, you can go. I'm going to say Add Tracks, and I'm going to go over here, and it's called this submix track. I'm just going to add one; I don't want to add any other audio tracks, and by the way, this is a great little thing I just did, add track. If you want to add tracks before or after, you can just put it exactly where you want it to be. You don't have to move things up and down, you say, "Oh no, I forgot to put in a second track "that I want for the interviewer's questions." You could do that, but you know, I don't want any of these for now, I just want the submix. I can choose what kind of track it is, and I'm going to say OK; and you'll notice here that I now have a track called Submix. And what I can do is I can say, "I want tracks one, two and three to go into that submix." And then I can pod it up or down as a group. And to do that you would go into some of your audio editing workspaces, and what this opens up is your audio track mixer. So let me get the right mixer here. There we go, audio track mixer, and if we look at this closely, I'm going to bring this full screen by hitting the tilda key... One of these little guys should be my submix. Oh there it is, submix is down there. It's this track here. So I can send, this is actually, should be called submix, the master... I can send any track I want to that submix, okay? So all of these three are going to this one, which is the submix, and I can control those three tracks audio levels or panning all at once. And you can have multiple submixes, and you can actually put submixes inside of other submixes, so this is the most powerful audio mixing tool I've ever seen in a video editing application. But it is incredibly powerful, you can add effects to it, any kind of notch filters and equalizers and whatnot, so it's pretty powerful. But as to the original question, what you would need to do is you would need to lock tracks, and for those people who aren't familiar with that, if I hit this little lock button, I can no longer accidentally move any of these elements. That's what that little hash is, but I can still move these other ones. Now, every technique always has a little trick to it. So if I wanted to, if I hold down the Shift key, I can lock all of my tracks at once, okay? So maybe you just want to move the one track, and he doesn't want to go through and lock the other 39. So Shift will turn them all on and off. If I wanted to turn them all on: I hold Shift, I lock them all, and then I click on the one that I don't want to be locked. So now when I work with this I can only affect this track. Every single one of my other tracks is locked. That could possibly be very helpful in reference to his question and to other people's questions, being able to lock tracks. You can do the same thing with video. Again, you can lock a video track so you don't accidentally move it. The Shift key just lets you select everything, and then you can just turn on or off the one that you want. So those are very, very useful, and by the way, that Shift works in other instances too. So if I wanted to make sure all of my target tracks are selected, I can hold the Shift key, turning them all on and off, and also source and destination tracks. So you don't have to sit there and step through. You can hold down the Shift key, and you can be in good shape. I do want to point out for some folks that may not be as familiar with this, I'm going to go ahead and get back to the editing tool, and let's make our tracks a little bit larger, that sometimes you'll notice that you have sources selection available, and sometimes you don't. And some of the material I am covering here has been covered in the other classes, but my assumption is not everybody has watched all the other classes. So right now, I only see the audio source as being available, and that's because the clip that currently was loaded in my viewer, and let's go ahead and reset this back to our traditional layout, was an audio clip with only one channel. But if I load a clip in that has more than one audio track, so I loaded this interview, and I think this is just a mono track, yeah. It's a stereo track, but it's still going to go to track one, that will be lit up. If I open something that has more audio tracks, and let's see if I have one in here... I may or may not; I don't think I do. You would actually see all of the audio tracks, so if you have something that's like... Eight tracks of audio, you would see all of those in your sources and be able to target them. Same thing for video, and I'm going to show you an example. I'm going to show you, actually I'm going to cheat here and just see if I have anything with more than two or four tracks. You can go here into the list, Metadata Display, Project Management, always like to see Media Type, but let's see if I can see Audio Usage. No, no, no, no, no, I probably do have my tracks here, but I can set it up to show me what the audio tracks. Here we go, this would tell me right there: 24-bit... 4 Mono. So this clip here does have four tracks of audio to it. So if I double click on this one to open it up, you will see here that I have the potential for four tracks of audio to bring it in. So this will reflect whatever is loaded into your source monitor. If there is no audio to a clip, it'll just show the video, okay? If there's multiple video, and that can happen in a couple of instances, you bring in a Photoshop document, and I bet I have one buried in here. Here we go, you guys will love this. This is a Photoshop document of me that I brought in, in layers, yeah like that? So if I go ahead and I load this into my source monitor, and I look at this, you'll see that I actually have three target tracks in my video because there's three layers in this. Now normally I'd bring them all in, but if I choose to, maybe I don't want to bring the @AbbaShapiro. I could turn that off and might go ahead and edit this in, it's only going to bring in the top two tracks. So that's how you control that. This is, by the way, just to get your head wrapped around it if you are relatively new to this, this is your source. So this is saying, "What elements "of the original clip am I putting in?" And then I'm saying, "This is my target. "Where do I want it to go?" So track targeting is pretty key, and I'm going to do this using something much less complex than my face. We'll do it with a single video track. So we'll go here actually, I'm even going to do a still. So I have this still image; I have this bottle of wine. It's always good to have a bottle of wine on a Friday afternoon. And I'm going to go ahead and I'm going to throw it right there on my timeline. I want it to land there; I'm very specific. What do I need to do? I need to mark an end point. I'm just telling it where to go. I never get lost, people are always telling me where to go. There's a rimshot happening somewhere in the world. So there's my end point, but I don't want the wine glass to go onto track V1, I want it to go on V2 or V3. I'm going to go onto V2 here. Let me go ahead and do my Shift Plus, get everything the same size. That's my target area, so if I go ahead, I mean normally we would go, "I don't know how to get it there. "I'll just drag it to the second layer." You target the second layer there, and now if I use my overwrite or insert key, overwrite being the period, insert being the comma, think of the insert, the comma as wedging it in between. Overwrite, it'll put it exactly where I want it on track two where my playhead is parked, and that's how I target my tracks. I'm going here to my target track, and that is what it did. Yes, it went exactly where I wanted it to be. So that's how I can choose where to target things. If you happen to have multiple tracks turned on for your targeting, and there's only one source track, it'll go to the lowest active track. So that's how this works. That's how you can target your audio. So perhaps you're putting in a bunch of music, and instead of having to drag it into tracks three and four, you just turn off tracks one and two for targeting, and every time you do an overwrite or an insert edit, it goes exactly where you want it to be. So being able to take control of your timeline is pretty, pretty powerful.
Ratings and Reviews
carla valencia
great class! easy to follow and very good tips.
perrault095
A lot of new information on a color correction and color grading for me. Abba's shortcuts are very useful. This class will speed my workflow. Highly recommend this class. I am very thankful to Abba for answering all my questions!
Shafi Mushtaq
Learned so much in like 1 hour only even though I'm watching in 2022! Still worth it!