Lesson Info
13. Masking & Final Tips
Lessons
Class Introduction
04:42 2Taking Control of Your Timeline
10:46 3Best Hidden Keyboard Shortcuts
18:10 4Timeline Modifications
15:06 5Preference Changes For Efficiency.
18:38 6Tips for Navigating the Timeline
11:34 7More Keyboard Shortcuts to Save Time
07:57 8Useful Tips for Editing an Interview
26:12Lesson Info
Masking & Final Tips
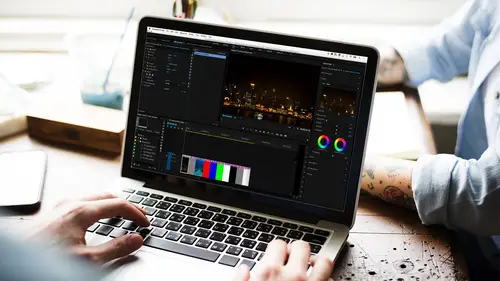
I need to go ahead and open up my Premiere project file again. And so masking is something that almost every single effect has the ability to create a mask. So if I go ahead and there's a couple ways that people would use the mask, that's why I kind of wanted the clarification, but if I go ahead and throw in effects, say I throw an effect on Collin and I'm gonna just do a blur. I'll do a Gaussian blur. I'll throw it on here. Did I actually get the Gaussian blur on there? No I did not. Double-click, there we go. Gaussian blur and I will make this blurry. What it looks like when I wake up in the morning. Get the cat hair out of my eyes. By the way, I've mentioned this in the previous class but I want everybody to know this 'cause it's useful. When you blur something you'll sometimes notice, Oh! it's not happening here because this is not scaled down. Uh, I'm tricking myself here. Let's make sure this is set to frame size. There we go. When you blur something the edges get really dark bec...
ause it's actually blurring the black that's off screen so if you do use Blurriness, or the Gaussian blur, go ahead and check the "Repeat Edge Pixels" button. We covered that in the six-hour class. May have not in the boot camp. But boom! There we go. So now it's nice and pretty there. And I wanna create a mask where Collin is so that the background is blurred. I'm just gonna do a general shape mask. I'm not gonna actually do something where I'm drawing an edge around him. So with every effect, you'll see these three icons. I know this might be surprising, this one makes a circle or an oval. This one makes a square. And this one lets you draw a shape. So, I'm gonna go ahead create a circle. Move it in the middle. So what I'm doing here is the mask is showing just the effect. Just the blurry part. Come on, down, down, down, down down. And done. So there's my mask. Let me expand it a little bit. Be good mouse. See it still thinks I'm touching the mask. These new touch, there you go. I never like to answer mask questions because that means that I need to have my mouse. I need to know how to use a Trackpad. There we go. There we go I think I'm good. So once I make that shape I can go ahead and if I want to I can invert it. So now the mask is on everything else but that one area. I can if I need to expand it a little bit. It will invert that again. If I want to I can put a nice little soft edge on it. Okay, so there I have a mask. Everything else is blurred. And maybe what I wanna do is, maybe I don't want it to be so extreme, I'm gonna take that blurriness down to just a light level. Maybe something like that. And so now, I'm pretty sloppy, but maybe I'll do a little more of a blur but my eye is drawn to the sharpest area of my image. So I have that masked shape. Now if I wanted to, I could even copy that mask 'cause you can have multiple masks. I can select it and go "copy" and if I wanted to I could paste that mask on this clip. Okay, so now that mask is masking in or masking out my lighting effect. So I can use masks in multiple masks to control any effect. It's really useful for when you're doing color correction. If you wanna isolate somebody's face we saw that in the Color Correction class that you know you can, There's masks within the first Secondary, but sometimes you may change the color of a persons, maybe a flower, a red flower in the field and make it green. Green? Yellow. Yellow better than green. Make it yellow. But you want all the other flowers to stay red. So you do that mask with the luminance the Hugh Saturation Luminance and then you do a shape mask to isolate that one flower so all the other flowers don't change. Just the one inside of that shape. So you can create masks with any of these and just to show you the options, Oh look that's me. Um I could go ahead and I wonder if I have a I should have a mask on opacity, yeah. We could bring that down. And then if I want to draw something I should be able to draw a mask. It doesn't wanna draw 'cause it's four o'clock. And I probably put a bad filter on there. But, is there another question as we move forward or shall I continue with Masks? Uh let me see. I'll be talking long after the camera's stop rolling. This is a question from Max. He just wanted a clarification on how should you name proxies. When you were showing your proxy work flow. Any tips on naming them? The names will be put in a separate location. The thing is you shouldn't change the name of the proxies after you've created them. Because then Premiere may not be able to find them. It's looking for the proxies generally with a specific name and specific parameters in a specific location. Now if you do move them, which does happen. 'Cause maybe you've created them locally and wanna move them on external and vice versa. When you switch to "Proxies" you'll see "Media Offline" and you'll have the option to locate those proxies the exact same way that you would locate any media that goes offline because you've relocated it. But I would not change the name of the proxies from what I create because it's easier for it to switch back and forth. So something you've seen me do throughout the class is whenever I wanted to zoom in on any of these windows I've hit the tilde key. And the tilde key will make whatever window the mouse is over full screen and toggle it back. Very useful and I've been doing that all day. But there's two variations of that. One variation is, if I have this one selected 'cause I never touch my mouse but my mouse is hovering down here somewhere, if I hit "Tilde", it's not gonna make that one bigger. It's gonna make this one bigger. But if I have one selected, and we're gonna use the shift key to do that. "Shift + 2" Oh that's nice I just called the effects window Shift Five. Okay. Silly me, I picked up something that doesn't really wanna make it to one again. "Shift + 1" Something in that window. Instead of hitting "Tilde", Because my mouse is over here. I hit "Shift + Tilde" and the selected window with the blue square around it is the one that gets bigger and smaller. So that's part one. Cool, cooler, this is coolest. You wanna show the client your final show. You put it over this window and you go ahead and hit "Tilde" and you play it and you're client is saying "I love the show, but what the heck is this stuff?" because of course, they have the attention span of a gnat. Right? So instead of hitting the "Tilde" key hit "Control + Tilde". It goes full screen without any distractions just like you're watching it in a movie theater and you're good to go. So that's my big finish. "Control + Tilde" let's it go full screen without any distractions.
Ratings and Reviews
carla valencia
great class! easy to follow and very good tips.
perrault095
A lot of new information on a color correction and color grading for me. Abba's shortcuts are very useful. This class will speed my workflow. Highly recommend this class. I am very thankful to Abba for answering all my questions!
Shafi Mushtaq
Learned so much in like 1 hour only even though I'm watching in 2022! Still worth it!