Warping with the Smudge Tool in Adobe® Photoshop®
Lesson 11 from: Shadowing in Adobe Photoshop for Digital ScrapbookersTraci Reed
Warping with the Smudge Tool in Adobe® Photoshop®
Lesson 11 from: Shadowing in Adobe Photoshop for Digital ScrapbookersTraci Reed
Lesson Info
11. Warping with the Smudge Tool in Adobe® Photoshop®
Lessons
Why You Should Scrapbook Digitally
10:34 2The Scrapbooking Journey
19:32 3Shadows & Behind Your Scrapbook in Adobe® Photoshop®
15:43 4The Anatomy of Shadows in Adobe® Photoshop®
11:38 5Shadowing Paper & Flat Objects
19:18 6Applying Layer Styles to Your Page
22:57 7Realistic Flat Object Shadowing
09:15 8Recoloring Shadows in Adobe® Photoshop®
07:26Extraction with the Pen Tool
16:55 10Building the Layout with Extracted Images
15:52 11Warping with the Smudge Tool in Adobe® Photoshop®
07:10 12Distort Shadows with Wavelength
04:00 13Making an Action in Adobe® Photoshop®
05:01 14Warp Shadows with Transform Tool
03:15 15Warp Shadows with Gradient Tool
03:43 16Intro to the Adobe® Photoshop® Puppet Warp Tool
10:34 17Creating Effective Inner Shadows in Adobe® Photoshop®
09:16Lesson Info
Warping with the Smudge Tool in Adobe® Photoshop®
There's a bunch of different ways that you can edit and warp your shadows. There's not just one method and not just one way works for everything, so we're going to be looking at a few different ways to make your shadows really pop. And then we're also going to be showing how to make things look like they're bending. So if you're if you have something, the shadow that looks like it's spending than also the object has to look like it spending. So we're going to learn how to do that really easily. Two it's. So easy, it's going to blow your mind and then last but not least, we are going to be breaking more rules. We break a lot of shadow rules we make him and then we break him so let's get started with warping. So the first way that we are going tio warp things is with the smudge tool. Now, um, because anybody can ah, the online audience. If you ever use warping or this much tooling your scrapbooking, let me know. Does anybody ever bother toe work their stuff? No. Yeah, because it's well, ...
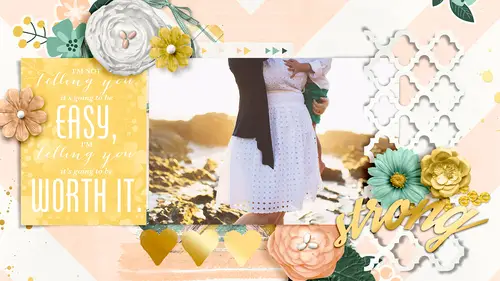
it's? Like where do you start? Right, it's, like why I'm barely covering how to or I'm barely understanding how to shadow in the first place why am I going to get really complicated with warping and also it's a fun thing it's not like a crazy necessary thing so a lot of people don't even ever bother but it's so fun and once you find out how easy it is you're just going to warp everything and everything is gonna look like it's curling away from the pages so let's talk about this much tool this much tool is underneath your blur tool and what it is is it's a way tio oh it's a way for you to take some pixels and just kind of bump him over a little bit and the reason that we would use this is if we have things like this flower that has many petals if we were to use on all over method of war ping then they would all the petals would change but really we only have some pedals that we want to change and some things that we want to look like they're farther away from the page and some things that we want to look closer so you go in petal by petal and adjust the shadow for everyone so what we're going to d'oh is create a layer from the drop shadow which is right clicking on the fx and create layer so now this has its own drop shadow and we can go in and edit it piece by piece and we're gonna want a bigger brush than this because we're going to move a lot of pixels at once so where it looks like the shadow or the pedals air touching we want the shadow to kind of disappear because there's not going to be aa lot of shadow and where it looks like it's coming up away from the page than we want to make the shadow move farther away so let's start with let's start with right here um so this looks to me like it would be touching the page it might be curling up more in the middle but let's take this tip over here so you can see the shadow if I turn off the layer on actually I think I'm going to make it darker just so we can see it better ok so right in here we're going to want to pull it out just a little bit because it looks like it's moving the the pedal looks like it's curling up and right here I'm going to say that it's touching so we're going to move it we're going to use this work till then we're just going to push we're going to click and drag to push the pixels back towards the flower so that there's they're not as extreme and you don't see them as much there's still shadow there but because it's close to the page we have a lot smaller shadow now, if we have something that's curling up like this now, we have a problem because the shadows on this side of the petal but it's curling up this way so we need to create some definition, so we're gonna have to move this shadow, go out a lot farther by clicking and dragging and just kind of following the line of the pedal. We just move it out a little bit so that there's more shadow and then way have this is pulled away. But it's also is above another pedal, so it doesn't need quite a cz much of a shadow because most of the shadows supposed be on top of the pedal, so we're gonna push it in a little bit. And it's super easy and it's. Just that little bit that you need to make your shadows look more realistic now. Let's, drop the opacity back down and you can see now that's probably too small. Let's. Make it a little higher. Yeah, so you can see now where the shadows exists that they didn't exist before or where we've moved them in because they're touching and it's really easy, let's. Do it on another one. Let's, move down to this leaf over here. I want to stay zoomed in so excuse the scrolling there we go okay so this leaf looks to me like it's flipping up away from the page so we have we want to make that more noticeable so obviously it's anchored towards the middle and then our towards the at this end and then it's coming out this way so I'm going to move I'm gonna create a layer for this layer style create layer so now it's on its own and we can actually I don't really want the shadow to be on the side at all so we can actually move the shadow lair a little bit thought make it easier on ourselves and now we can take this much tool again way we kind of want toe move it up this way and we want toe duplicate replicate the way that the leaf curves so yeah you got to make sure that you are replicating that effectively you're not you're not pulling it way out here because yeah that's pretty we like that yeah they're okay so to make it look like it's pulling away from the the center of where the the flower is where it's anchored so we want to move this in further and then suddenly has its lifting from the page then we we let the shadow come out a little bit larger this is a way dark shadow so let's drop the capacity of it so now it looks more like its floating on one side and anchored on other. So we use this much tool for things like this. Where is she really simple? And you know, and you don't want everything to be warped or every part of the shadow to be the same. So it's fun. You could go in and do it by hand. But there's also other ways toward.
Class Materials
bonus material with purchase
Ratings and Reviews
Diane
I bought all three of Traci's classes and am very impressed. Even though I consider myself a professional Photoshop user, I learned some great new tips and tricks. Not only that, I found the classes inspiring and it kicked my digital scrapbooking creativity up a few levels. More than worth the money. Easy to watch, inspiring and a great teacher.
L. Phillips
This class was fascinating and moved at a good pace. Scrapbookers these days use so many varied Photoshop skills and are some of the most creative thinkers around. I learned so many practical - use it right now! - tricks for shadowing any kind of object and make styles out of them for one-click usability. There's a bit much of the biography section at the front of the class but I felt the usable information was enough to warrant the purchase so I can skip the personal section. Traci is a friendly and clear speaker, and a wealth of knowledge. She should definitely be featured in more advanced scrapbooking classes AND even for creating vector embellishments!
a Creativelive Student
Awesome class! WOW, I had no idea about the world of shadowing. I just started digital scrapbooking and knew my layouts were lacking something and now I know what...depth! I definitely feel more confident now in adding shadows to my pages and I have also graduated from Elements to the full version of PS thanks to Traci's suggestion. I am headed now to search for more classes by Traci. Thanks for a great class!