Batch Processing Photos for Digital Scrapbooking
Lesson 6 from: Design Digital Scrapbook Layouts in PhotoshopTraci Reed
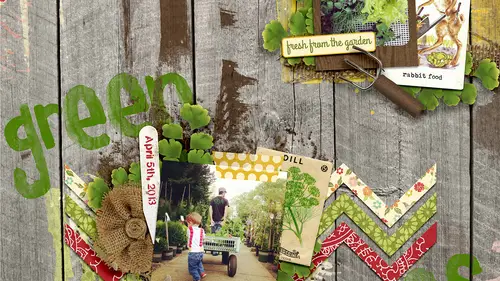
Batch Processing Photos for Digital Scrapbooking
Lesson 6 from: Design Digital Scrapbook Layouts in PhotoshopTraci Reed
Lesson Info
6. Batch Processing Photos for Digital Scrapbooking
Lessons
Free Preview: Organizing Your Photos for Digital Scrapbooking
10:00 2Including Videos in Your Digital Scrapbook
02:59 3Organizing Your Digital Scrapbooking Layouts
05:07 4Organizing Your Supplies
12:32 5Organizing Your Templates
06:58 6Batch Processing Photos for Digital Scrapbooking
09:58 7Adding Photos to Scrapbooking Templates
08:51 8Adding Embellishments to Scrapbooking Templates
10:29Adding Alphabets to Scrapbooking Templates
08:48 10Making the Digital Template Your Own
13:57 11Building Layouts by Scraplifting
14:08 12Building Depth with Scrapbooking Embellishments
10:27 13How to Make Blended Scrapbooking Layouts
08:05 14Create Balance with Clusters
07:24 15Scrapbooking with Multi Photo Digital Scrapbook Layouts
06:12 16Making a Block Layout
16:50 17Organizing Your Digital Pocket Scrapbooks
07:04 18Create a Digital Pocket Scrapbook Canvas
09:16 19Building Visual Pocket Layouts
12:46 20Embellishing Each of Your Scrapbook Pockets
12:04 21Building Titles & Journaling on Pockets
15:23 22Merging Pockets to Print Scrapbook Pages
06:13 23Creating Hybrid Scrapbooking Pages and Books
08:02Lesson Info
Batch Processing Photos for Digital Scrapbooking
Let's actually hop into photo shopped for our last segment, and we are going to talk about batch processing, um, and making it easier when you're pulling your pictures off of your camera editing. Ok, so what can you d'oh to make your process easier before you start scrapbooking? Well, you can pull all of your photos off of your camera and put him in a folder and deal with them later, but then maybe you have to spend extra time every time you open up your photos trying to fix them, trying to make sure that they're usable. Maybe you want tio run filters on them, but they're not ready for filters yet if you just follow a few simple steps when you're pulling your photos off of your camera just to fix them to make them a little bit better, I'm not talking about always running a destructive action on them that makes them different. I'm just talking about, um, unease, iwork flow and you know, it doesn't even have to be the same for every pictures. Now we just have a quick question from mali. ...
Beeman is asking are using to you use light room for organizing a tall to use light rebuttal I dio every now and then I actually prefer, um photo shopped for editing photos still, I know that light room is super capable, but I like to have a few programs running as possible, so I'm so used to photo shop I like to use photo shop I actually have the rat rad lab plug in that work similar to, um, light room that works too that I normally use, so I prefer that. But even before you go to the rad lab, plug in or if you if you wanna add filters to your photos, this photo is adorable, I love it, but it's a little dark and it could be fixed, so I'm going to show you a couple steps and what they dio um, the first thing I'm gonna do is I'm going to duplicate this layer come in jay to make another copy of my picture, and then I'm going to set it to screen now that really lightens it up, but you can see that it adds some light to my photo and instantly takes your photo from too dark too in this instance too light, so I'm going tio drop the opacity down a bit and better the photo looks better already now if you have a photo that's too light, so let's bump this up and let's pretend that this is the way that the photo came out of the the computer are the camera you can duplicate the layer and instead of putting it to screen you can put it to multiply and it will darken the photo this is obviously too much but if you have something that's blown out a little bit and it's too too dark then you can use multiply instead and you can adjust the brightness that way so the photos cute but make it even cuter um this is kind of a dull photo to me so I like to add a hue and saturation layer and you can see if you bump the saturation way of it's ridiculous but just a slight increase in your saturation can really make your photos more dynamic and now maybe your photo is a little bit too warm or a little bit too cold which means it's too blue or two yellow you can add a color balance layer and you can come in and adjust these directly so this one's a little bit cool so I'm gonna take it away from the blue and move it into the yellow a little bit just to warm him up and make him give him a little bit of its hand instead of a blue fade now these are things that are going to vary of course for every photo but you can set it up so that you have these options automatically for every photo I'm going to add one more layer now that I like the way that this looks it's cute so I'm going tio create emerged layer now I'm not going to merge it completely because that would take the original photo away and I don't want that yet so if you hit command options shift and e all together it's going to create emerged um photo from all of your layers but it will not destroy the original so it will keep all of your layers um underneath that still so I'm going to take this merged photo and I'm going to add a sharpening filter to it just to make him a little bit sharper so filter sharpen on sharp mask and I normally like tio my camera because I shouldn't raw is normally a little bit fuzzy, so I liked about my sharpening up quite a bit to make sure that I get it nice and sharp around the edges so I do one hundred fifty three and then a threshold of zero now every every filter or every photo is going to need a different sharpening filter is going to depend on your camera it's going to depend on how the photo looks when he came out of the camera? Obviously you're not going to be able to completely fix a super blurry phono, but you can bring some of them they're a little fuzzy around the edges back to life with a sharpening filter okay, so if I open up every picture always ended this every single time that would not save me time I do not need to do that however I can create in action just like I did before our previous classes for the warping of the shadows and the shadow class and when I do that let's open up a new folder are new file let's open up this one instead I'm actually going to open up the action that I already recorded since we've talked about recording actions and I'm going to show you here we go drag it and drop it into photo shop and I'm going to show you how this action run so it's in here now and if I press play uh it comes up does the first few steps that we did with the lightning and the color bounce and he saturation and asked me to stop and adjust these layers so that it looks right for me and actually looks pretty decent like it I reduce that it's gonna be too dark so let's let's leave it the way it is and once I haven't adjusted then I press play again and it gives me the sharpening layer now even if I did that every time it would still take a long time so what I can d'oh is I can open it but I couldn't do a bunch of photos at once he would go to file automate batch and it will let you pick the photo that you want to d'oh and then you can choose the source folder choose and I'm going to pick we go to my passport creative live tape three signal one photo editing I'm gonna pick that folder with the two photos and it choose you can say that enclose it when you're done what you're not gonna want to do because you're gonna want to adjust it a little bit I'm so I'm gonna hit none and it will it will run it all for me he did stop do that so you can hit, stop, adjust and keep going or you could just let it go and it will do its thing and it will have at the end it will have all of your photos with all of these steps and even just a just closed just close just close so it stays the same time. It saves you some steps if you have an action where you don't have tio adjust specific settings, you can just run it and it will do all of your photos and you can have it saving close and that way they're all done so maybe something that doesn't have a cat color balance and he's saturation you know all of these photos are really dark, so we're going out of screen leered all of them you can do them all at once so it's really about creating a work flow that works for you and the way that you take pictures maybe you always say pictures in your house and they're always really dark and so you know that you are going to have to run a lightning step on all of these photos always so you can create yourself in action to lighten these photos and batch process at all the way across it's not a permanent change your original photo still there or no, it depends. It depends on how you set it up, but yes, most of time it will say that in a in a new folder that's called if you have to say said it to say okay, so yeah, but if you haven't set to save instead of keep him open so that you can add it them it will actually create a folder within the folder that you selected that has all of the edits instead of destroying your original pictures. Good question. Yeah. So then you can go through and say, oh, well, that action did not work on that photo. So forget that and you can go in and adjust that one if you want to know the reason that we do this and is not so that we can create more steps for ourselves when we pull the pictures off the camera is so that later down the line, when we're trying tio beat the deadline for a shutterfly coupon. All of these photos are already done for us, and so we can use them, and we don't have to think about it. We don't have to go, okay. I have fifty photos that I need to process so that I can get them out and printed, and I have to go through, and I have to fix every single one. No, we don't. We're just adding a couple of steps when we pull them off of the camera, so that later on down the line, we do less.
Class Materials
bonus material with purchase
Ratings and Reviews
a Creativelive Student
Great series of classes! For anyone from beginner to advanced Photoshop user, you will get something from these classes! Traci is a great teacher and easy to understand why she works the way she does. I would highly recommend these classes to anyone wanting to learn tips and tricks from a great scrapbook designer!
Krista
I'm currently halfway through the courses, and I am so glad I decided to watch these. I haven't been scrapping for very long, and am mostly self taught through tutorials found on the internet and youtube. I found that various concepts weren't explained to me (how to really use a template, designer intentions, how to use other layouts for inspiration) and so I sort of hit a wall trying to get further in scrapping digitally. This course basically broke down the walls and provided me with so much info and inspiration that I feel really comfortable in taking my efforts further. Whereas before I was thinking that I might always be stuck with a mediocre result :) thank you Traci!!