Tour The Interface: Video Tracks
Lesson 8 from: Adobe Premiere Pro CC Video Editing: The Complete GuideAbba Shapiro
Tour The Interface: Video Tracks
Lesson 8 from: Adobe Premiere Pro CC Video Editing: The Complete GuideAbba Shapiro
Lesson Info
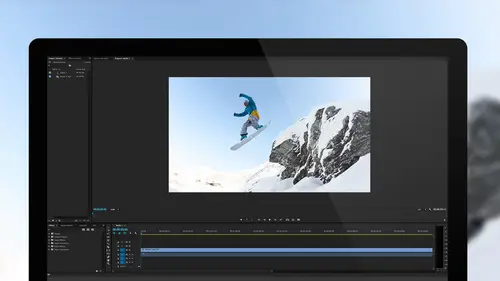
8. Tour The Interface: Video Tracks
Summary (Generated from Transcript)
In this lesson, the instructor gives a tour of the Adobe Premiere Pro CC interface and explains how to work with video tracks. He demonstrates how to import clips, mark in and out points, bring in only the video part of a clip, and arrange clips on different tracks. He also shows how to use the snapping feature, scrub through clips, adjust clip durations, and hide/unhide clips in the timeline. The lesson emphasizes the importance of making intentional editing decisions and developing a story through the arrangement of clips on the timeline.
Q&A:
What is the purpose of hitting Option and double-clicking on a clip in the media panel?
Hitting Option and double-clicking on a clip in the media panel opens it in a new tab for easy access.
How can you bring in only the video part of a clip?
Instead of grabbing the picture, you can grab the little video icon to bring in only the video part of a clip.
How can you mark in and out points directly in the project area?
You can scrub through a clip in the project area and mark in and out points by clicking and dragging on the clip timeline.
How can you adjust the duration of a clip?
You can select a clip and mark a new out point wherever the playhead is located to change the duration. You can also drag the clip to make it longer or shorter.
How can you hide a clip in the timeline while still keeping it in the timeline?
Right-click on the clip and uncheck Enable to make it invisible in the timeline.
How can you rearrange clips on different tracks?
You can drag a clip to a different track to rearrange it. Clips on upper tracks will block anything on lower tracks, and stacking shots on top of each other allows for easy comparison.
Lessons
Understanding Editing: Bootcamp Overview
07:25 2Understanding Editing: Overview
25:25 3Understanding Editing: Video Examples
25:07 4Tour The Interface: Digital Video Workflow
16:38 5Tour The Interface: Project Panel
12:28 6Tour The Interface: Choosing Your Shot
07:18 7Tour The Interface: Music And Voice Over
10:31 8Tour The Interface: Video Tracks
05:26Tour The Interface: Edit Markers
08:46 10Building a Rough Cut: Cut Planning
21:46 11Building a Rough Cut: Selecting Media
25:01 12Building a Rough Cut: The Edit
30:50 13Building a Rough Cut: Edit Points
13:43 14Refining Your Edit: Preparation
10:29 15Refining Your Edit: Making Cuts
25:19 16Refining Your Edit: Using Markers
16:31 17Refining Your Edit: J and L Cuts
15:57 18Refining Your Edit: Replace Edit
05:04 19Working with Audio: Overview
17:43 20Working with Audio: Levels
13:36 21Working with Audio: Music
10:00 22Working with Audio: Mixing And Syncing
14:50 23Transitions: Overview
13:44 24Transitions: Effect Controls
09:31 25Filters & Effects: Overview
18:05 26Filters & Effects: Using Multiple Filters
22:18 27Motion & Animation: Motion And Animation Overview
09:40 28Motion & Animation: Movement With Still Images
26:56 29Motion & Animation: Picture In Picture
10:57 30Motion & Animation: Motion Effects
17:08 31Titling & Graphics: Overview
27:11 32Titling & Graphics: Advanced Tools
11:03 33Titling & Graphics: Roll And Crawl Effects
08:01 34Titling & Graphics: Working With Photoshop
12:17 35Speed Changes: Overview
21:12 36Speed Changes: Stills And Variable Speeds
06:23 37Color Correction: Overview
07:39 38Color Correction: Lumetri Scopes
11:32 39Color Correction: Contrast
21:37 40Color Correction: Advanced Tools
15:12 41Color Correction: Adjusting To A Master Clip
07:45 42Finishing: Prepping for Output
14:53 43Finishing: QC Edit Points
24:56 44Sharing & Exporting: Overview
29:05 45Sharing & Exporting: Size And Quality
24:46 46Ingesting Media:
28:39 47Ingesting Media: Transferring And Importing
31:15 48Media Management & Archiving
26:10 49Multi-Camera Editing: Overview
14:26 50Multi-Camera Editing: Creating A Sequence
20:04 51Multi-Camera Editing: Switching Multiple Cameras
15:31 52Multi-Camera Editing: Finalizing
12:37 53Creating Timelapses: Shooting Strategies
18:04 54Creating Timelapses: Editing Images
14:21 55Creating Timelapses: Importing Strategies
18:47 56Creating Timelapses: Animation
05:58 57Advanced Editing Techniques: Take Command Of Your Timeline
22:36 58Advanced Editing Techniques: Transitions
07:57 59Advanced Editing Techniques: Keyboard Shortcuts
12:00 60Advanced Editing Techniques: Preference Hacks
21:15 61Thinking Like an Editor: Editing Choices
31:55 62Thinking Like an Editor: Telling the Story
23:50 63Special Tools: Warp Stabilizer
17:59 64Special Tools: Morph Cut
06:56 65Special Tools: Green Screen
20:16Lesson Info
Tour The Interface: Video Tracks
I'm gonna jump back into our main panel. I have all of these raw clips. I'm going to go ahead and hit Option. Double click. It again puts it into its own tab. I like that. Moving it all the way over to the left. Now I have actually three tabs of my media that I can easily access. I like to look at this as icons, 'cause I can then see my images. Down here, I have a little slider, if I wanna make it bigger or smaller to see more things. To edit this in, I could load all my clips. Usually I would. I mean, normally, I wouldn't cut this in an hour. I'll go through, and I could load these very quickly and get an idea of what works. This is nice, this is people interacting. What's the moment? What's the moment that I find is special here? She's showing her stuff and she's smiling. That's pretty cool. That should be my out point. Then, maybe I'll scroll back here. She's showing, that's my in point. I can see the duration's about two seconds and 18 frames. I can go ahead and grab that. I just w...
ant the video. I don't want all of the sound, the background sound. There's lots of way to control bringing things in or not bringing things in. The easiest thing is, instead of grabbing the picture, I grab this little video icon. It only brings in the video part of the clip. Put that in right there. I bring it next to it, and there's something called snapping, and it snaps right next to that clip. Let's go ahead. We're quickly watch that. (pleasant instrumental music) These days, everybody talks about-- I can go through and put all these clips. I'm gonna do some things very quickly. I wanted to show you some of the controls. We're probably not gonna finish this. Instead of bringing the clip all the way up into my source monitor, I can, right here, scrub through it, and mark my in and out points directly in my project area inside this bin, and drag it there. I realized, I made the duration of this to be something ridiculous, six frames. Six frames is one fifth of a second. That's a little bit too short. I can go ahead and select that and wherever the play head is, I just mark a new out point. Now it's 10 frames, obviously I'm very zoomed in. It's gonna be once second. I wanna show you that. It's one second, I've marked it here. Drag it over. If I want it longer, all I have to do drag it out, and now I have. These days, everybody talks about print your work, print you work, as photographers. Okay, that's pretty good. I'm not locked into that. I think that's long enough. I don't want it to leave the, the frame, the image. I'm gonna grab one more picture. Actually, I'm gonna grab a couple of pictures. I'm gonna do something here. I'm gonna go ahead, click on this. This is where you can make yourself look like you really know what you're doing. One, don't use the shots that are bad, that you never like settled the camera, and two, the beautiful thing is, you don't have to show them the parts of the image that you didn't quite have focus at. It goes back to, if it's a still image, just crop out the mistakes, and you're good. I like this, I like the depth of field. We see Ken again. I'm gonna mark an in point and an out point. Throw that in. I'm gonna go down and look at this. I want you to see that. (pleasant instrumental music music) These days, everybody talks about-- It's nice. But you know what, I think it would be really cool if we started with Ken handing that up. We're not limited by the fact that we've already placed it into a certain order. Lot's of ways to move things around. I could drag this, put it over-- I'm gonna intentionally put this on the next track. I don't normally do this, but what I wanna show you is when I do that, you'll notice that anything on the upper track blocks anything on the lower track. It gives me some flexibility. You'll also notice that I have a moment where I see the scene below it. There's some danger to that, but it's also another way of thinking that, "Oh, what shot do I wanna use?" I don't wanna make the decision. Maybe I'll stack two shots on top of each other. I'll come back later and then I can look at each of them individually. As a matter of fact, there's a great little feature that if I have this shot, and I'm gonna do one thing here, so I don't get that little flash frame. I'm gonna stretch it out a little bit. Now it covers it completely. If I don't wanna see that, I can right click on it and uncheck Enable, and now it still is in my timeline, yet it's invisible. I can go back and do that. That's kind of a nice thing I can do. You know something? I just wanna flip flop these. There's lots of way to do that. I'm gonna bring that down. I've changed my story. What is my first image? (pleasant instrumental music) These days everybody talks about print your work, print your work, as photographers, and nobody does, and so we-- We're establishing a story here of, you know, what's happening, what she's talking about. I see print your work, that was very serendipitous, that I put that clip. You can listen and make notes. This is how you start developing what you're doing and you're throwing it onto a timeline.
Class Materials
Bonus Materials with Purchase
Ratings and Reviews
a Creativelive Student
I've never even tried video editing before this class. I opened the program once and panicked. After only 9 lessons I was able to throw a short video together (basic of course, but still pretty cool). I wish all of my teachers growing up were just like Abba. He goes over everything without dragging anything on for too long. He repeats things just enough for me to actually remember them, and he is funny. He keeps it fun and shows that even he makes mistakes. I can't even believe how much I have learned in less than a quarter of his class. I have a long way to go and am very excited to learn more. This class is worth every penny and more! I was hesitant on buying the class because I have CS6 and he works with CC, but I have already used what I've learned in his course to create a video. The first 9 lessons were already worth what I paid for the entire course. Thank you, Abba! You are an awesome teacher! You have me absolutely obsessed with creating right now! I highly recommend! You won't find this thorough of a course for this decent price!
Patricia Downey
Just bought this yesterday and cannot stop watching!!!! What a FANTASTIC teacher-- just love the way he explains everything. For someone like me (who has a zillion questions) it is perfect. As soon as he introduces a feature, he explains several aspects in such a way that's easy to grasp and remember. So, so happy I got this. Thank you Abba and CreativeLive!
a Creativelive Student
I am only on lesson 19 and I am so glad I bought this class, so worth it and Abba packs so much information into these lessons its crazy. I will for sure have to come back and watch again when I need to remember to do stuff or need a refresher. He is funny and quirky and a great teacher. I so recommend this to anyone wanting to become a better video editor!! I am coming from being self taught and using iMovie and he makes it so simple and understandable. Can't wait to learn more :)