Preferences in Adobe Lightroom CC
Lesson 7 from: Adobe Lightroom Classic CC for BeginnersJared Platt
Preferences in Adobe Lightroom CC
Lesson 7 from: Adobe Lightroom Classic CC for BeginnersJared Platt
Lessons
Introduction to the Catalog Style System
23:54 2File Location and Methods
41:25 3Main Structure of Adobe Lightroom CC 2017
18:09 4Importing A to Z
27:26 5Image Selection Made Quick and Easy
12:34 6Methods of Image Organization
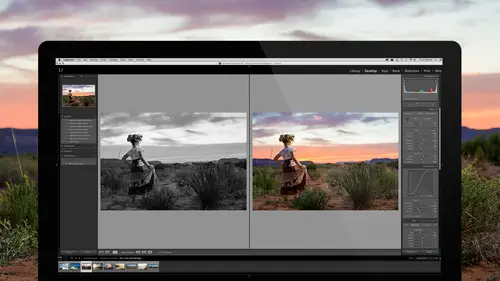
29:26 7Preferences in Adobe Lightroom CC
28:30 8Library, Develop and Map Modules
10:58Book and Slideshow Modules
07:50 10Print and Web Modules
13:08 11Developing Techniques
16:51 12Synchronizing Adjustments
23:05 13Additional Editing Tricks
13:13 14Fast Editing Presets
24:18 15Quick Develop Tool
06:57 16Using Local Adjustments
31:58 17Retouching Tools for Landscapes
22:45 18Dodging and Burning with Landscape Images
19:11 19Additional Landscaping Tools
07:30 20Retouching Tools for Portraits
28:17 21Create an HDR and Panorama
16:00 22Manipulating Image Structures
11:24 23Module Presets and Hidden Presets
18:37 24How to Create a Portfolio
26:06 25Connecting Your Portfolio With Lightroom Mobile
12:22 26Using Adobe Stock
29:58 27Publishing Images to Social Media
28:16 28Creating a Layout for Books
26:56 29Exporting a Book and Beyond
19:11Lesson Info
Preferences in Adobe Lightroom CC
Alright so, our job now is to go into Lightroom and talk about the tools that we have available to us. You learn how to get your images into Lightroom, and you learned how to select your images, organize them, but now let's talk about the tools. Once we've gotten in here, what do we have available to us, and what can we do with them inside of Lightroom? And before we do that, there was a question, well what if I brought my images in, but I didn't build the right previews or I didn't build the smart previews or something like that, how do I do that. Simple answer to that is to command a, select everything that you have either in the whole catalog or just in one folder or something like that, and then go up to the library menu, and in the library menu is a place called previews, and then you can either build standard previews you can build one for ones, or, you can discard the one for one previews. So if you feel like a catalog has gotten way too big, just go to everything from like 2000...
, well it's like 2017 now, so go to everything and before, highlight it all and get rid of the one for one previews. You can still keep the smart previews, but just get rid of the one for ones, and that'll cut your catalog size down way way small in comparison to what it is currently. So just, just get rid of those, cause you're not using them hardly ever, and it'll build them when it needs them. So there's no reason to keep all of those. You can also build smart previews here, or you can discard the smart previews, but, don't click discard smart previews if you don't mean to because then you have to rebuild them. Last night I was a little tired, and I accidentally pushed that and I lost some of my smart previews but I'm traveling and so I don't have the original files to build the smart previews. Fortunately for me, I'm really tricky, and I was able to rebuild them, without having them attached to my computer, which is a whole different story. We won't even go there, but it took a little while, and a little finagling and some like vp and stuff. But I got it done. So, just remember to hover over this and make sure you're actually hovering over the correct one before you click it, cause you don't wanna just throw away your smart previews they're really important. And by the way, you can actually build the previews, from the smart previews. So if you're building these jpeg previews, they can be built from the smart previews. So as long as you have smart previews, you're completely gold. That's the key, those smart previews. So if I were you if I were everybody in this audience, I would go home and highlight everything in my catalog, build the smart previews and go to bed. That's what I would do. Unless you have something to do. Don't go to bed at like four in the afternoon. I'm just saying, let it work on them, because once you have those smart previews you have so much more capabilities inside of Lightroom. You are freed from the original photos. Okay, so, let's start by talking about preferences shall we. Okay preferences are important things. And I'm just gonna go through and show you preferences that are important. So if you go up to the Lightroom menu in a Mac, I think it's in the edit menu on a PC, you go down to the preferences, and there's two different types of preferences, there's catalog preferences, and there's preferences. So let's start with the catalog preferences, just so that... Catalog preferences, it only deals with the catalog that you're in, so each catalog can have it's own set of preferences in these, it's a small set of preferences, but you can see them. So some of the most important ones, this is one of the most important ones. Automatically write changes to XMP. If you toggle this on, it will automatically any time you change something on a photo, it will automatically write that change to it's own catalog and also to an XMP file which will sit right next to the photo. The problem with that is that it has to write two things instead of one so it takes more time, which means it bogs the system down a little bit, and so you'll notice that Lightroom becomes a little slower. However, the good side, the up side, which is a pretty good upside, is that everything is backed up instantaneously to a secondary source. Which means that if you're working on your catalog and somehow your catalog dies or goes south, or gets lost or corrupt or whatever, all you have to do is open up another catalog and when you import those files the XMP changes will come in and it will be exactly as you left it. All the keywords, all the adjustments, everything about that file will be back in. So it's kind of a fail-safe backup. But the real reason for it's existence is for people who go back and forth between Lightroom and Photoshop or Lightroom and Bridge, because if you write the XMP files it's making a copy of the adjustments that you made and then if you just close Lightroom down and you go to Photoshop and you open one of those documents from Photoshop directly, Photoshop will know what you did in Lightroom because the XMP tells it what you did. So it's just a secondary file. So if you have file number one, there will be a file right next to it called number one.xmp. I don't necessarily like to have them written that way, I think it clutters up things and it slows it down a little bit so I just don't do it, but it's certainly a viable option and if you're afraid of losing stuff or if you want to, if you're the type that goes from Lightroom to Bridge back and forth, then you definitely wanna turn that on, because you wanna see in Bridge exactly what you did in Lightroom. And that will help connect the two. Yeah? Jared I have a quick question that has been coming up the entire class which is, how many catalogs do you have, because you mentioned having multiple catalogs. How many images can you put into a single catalog? Is there a limit? Well I have 60,000 in mine right now, so that should tell you that I have one, rather than multiple, cause if I had 60,000 in each catalog I'd have five, that's a lot of images. So, for me, I put everything into one catalog, because a catalog is a little bit like a dog. And we just bought a dog. And it takes a long time to train a dog not to pee and poop all over the place, and so we're getting to the point where the dog only has an accident once a day. And we're counting that as a big success, but three, four months down the road when that dog is going outside to go to the bathroom, I'm gonna be screaming hallelujah and I don't want to lose that dog, because I've trained it. It wouldn't make any sense for me to train a dog for a half a year, and then go get a different dog. Catalogs are just like dogs. You train them, why would you want to throw that catalog away and go get a new one just to train it all over again? See? So, and the great thing is the catalog has the keywords, they're auto keywords, so it knows, that the suggestion box that I showed you right below the keyword entry point, that suggests keywords based on what keywords you used with other images so it knows, oh every time he types in boy he also types in child, I'll just put it in there. But your catalog, your new catalog, your new doggy catalog, will not know that, and so your new Lightroom catalog will pee and poop all over the place, and you won't be happy about it. So I'm just telling you, it's better to keep one. I don't think we'll forget that answer. Yes. And by the way the catalog we're working on right now, I've had since Lightroom one. Wow. It's the same catalog, it's just morphed for the last, 15 years or 10 years or however long it's been. So I just started with that catalog and every time a new Lightroom comes I just open it and it updates it, and it's the same catalog, so I've had this dog, for as long as Lightroom exists. So it's like an old dog that sits by you and fetches your paper and gets your slippers for you, like it does everything I want it to do. Don't wanna change it. Yeah. And you can teach it new tricks? And you can teach it new tricks. Every time Lightroom updates, which is why you wanna be on cc cause it updates like every four months. But that does bring up a point and that is, there's gonna be a point at which it's gonna be too big, if you just keep putting photos in it and they don't ever go away, so don't make it like the Dead Sea where water goes in and stays there and never leaves because then it becomes salty and it's gross and you don't wanna swim in it. So you've gotta have stuff coming in and stuff going out. So everything comes in as a job, we just showed you how to import, well, when you're done, only keep the good stuff, get rid of the old, the stuff you're not using. Right, get rid of the stuff, and we'll talk about that a little bit at the very end of this class. But if you wanna know more about that topic though, I have a great class here on Creative Live, it's called Ultimate Lightroom CC Workflow. And that really is about everything to do with bringing them in, working on all of the systems, getting them out to the client, archiving them, what hard drives, all that kind of stuff. That's really what that's about, is workflow. Whereas here we're just trying to introduce Lightroom and help you get comfortable with it. Alright, so that's the first XMP changes. But in addition to that, you have, for instance, address lookup is a really good one. And we'll talk about maps in just a minute. So I want those checked because I want it to be able to look on the web for addresses, it makes it easier for me to find things. So that's important, I turn this one off. Face Detection, automatically detect faces in all photos. If you do that, you will go why is Lightroom so slow? Because it's trying to look at faces in every photo. You don't need to do that. Just, you can turn face detection on when you need it, in certain areas, just turn this one off. So anyway that's the important things there. File handling-wise, this is where you get to choose what size your standard preview is. You can also do an auto. If you do auto it will change the preview based on the size of your main monitor. So if you have a really big monitor it'll build a really big preview, if you have a laptop it'll build 1920, if you have, you know it'll just kinda build it based on what it knows you need for that monitor, so you can choose that. And then the other things that's really important here, is in the general settings, let's see, yeah in the general settings and that's that every time Lightroom exits we need to back it up. Okay so make sure that you have that set that way. Don't set it any other way, set it that way. When you exit, you wanna back it up. Okay, so those are the most important settings there. And then the most important settings in the preferences menu is, first in the general area here, you want to make sure that you treat the jpegs and files next to the raws as separate photos. If you shoot a raw plus jpeg, you'd like them to come in separately so that then later on when you don't need those jpegs anymore you can highlight them all and delete them. Get rid of them, otherwise your catalog gets bigger and bigger and bigger with duplicate files and whatever. Just treat them as separate so that you can find them. I also like to turn off this, show import dialog when memory card is detected, cause I don't want Lightroom popping up and trying to take over cause remember, we put the files where we want them to go. We don't use Lightroom to shepard files around, from the actual cards. So those are the two most important options there. Presets, this is a big one I get. People wonder what happened to their presets. And I sell presets on my website, and so then I get these questions from people who have purchased presets, and they purchased them like three years ago, and they put them where they were supposed to go and they used them for three years, and then their system crashed and they're like I don't know where my presets are can I download them again, of course they can, they're on the store, they bought them so they can go and log in, but then I have to explain how to do that and whatever. Back up your presets. How do I find my presets? You go to the preferences, you click on presets, and there's a, right here, says show Lightroom presets folder, you simply click on it, and there they are, all of them, all you gotta do is take this Lightroom folder and copy it and put it in your drop box or on your creative cloud account or somewhere as the backup. And now everything, not just my presets, but every preset that you bought from everybody on the planet and every free preset you've downloaded, and every setting that you changed and made, it's all right there. That's important because they can come to me, and get my presets again, but, can they get them from everywhere and do they remember where they go them all and now they're gonna have to reorganize their presets and put them back where they're supposed to be and that's crazy. So just find that folder, copy it, and put it somewhere. And then anytime Lightroom crashes or dies, or you get your computer stolen, just get a new one, open Lightroom, and replace that folder and you'll be good to go. Everything will be just like it was, that's a good thing to do. Yes. When you clicked on that, and it went to Lightroom, did you create that or did it automatically create the folder of Lightroom and then the presets go into that? Right so when Lightroom installs Lightroom itself, that folder is installed, and then every time you put presets into Lightroom that's where they end up going. And if you wanna bulk install presets, if you wanna just take a bunch of folder of presets, and put them into Lightroom, all you have to do is go to this folder and click on the developed presets, and there's all your presets, and just drag a bunch of folders of presets in there. And then you'll be there. But keep in mind that those presets are only one folder deep so see how this organization goes, it's Lightroom, and then developed presets, and then inside that there's a folder of presets, right there, there's not another folder inside of that, because Lightroom can't see two or three folders deep. But the real key is, that once you've done all the installations and you're happy with the way Lightroom is, make sure you go to the preferences area, click on that show presets folder, so that it comes here, it will highlight your preset folder, and you just simply copy that, so right click it, and copy it, and then go to some other folder, like you could do it in your creative cloud files, I put it in my Lightroom backup right here, see that, presets. So see that Lightroom folder? That's the Lightroom folder that I just copied. And I would just right click here, and I would paste it, there, see it's preparing to paste, and then says do you want me to replace, merge, whatever, and images just going to replace it, and now I have the newest version of my laptop. And the great thing is that the creative cloud or a drop box, or a Google drive, is connected to my other computer as well. So now within the next, I don't know, 10, 15 minutes, it's not only here, it's up in the cloud as a backup and it's on my other computer, so then when I go to my other computer all I have to do is go to this Lightroom folder here, right click it, copy it, and then go over to Lightroom on my other computer, click on show Lightroom preset folder, and then go into here and replace this Lightroom folder right here, I just have to replace that with the one that came in on my drop box or on my creative cloud drive. Does that make sense? So that's, you can just keep everything updated that way. So this is, it's just important that you know where those presets are and make a copy of them so they don't get lost. Like how I went into some accent there. Make a copy. Okay, but here's the other thing people do, is that they click on here and they store the presets with the catalog, if you do that, it's great, because the presets will travel with the catalog, but if something happens to the catalog, then the presets go away, and then when they make a new catalog, the presets are no longer there because they're with the old catalog. And then they're like what happened to my presets I can't find them, well, you clicked that button. So don't click this button, I don't like this button. Okay, so, some other things that you should be aware of, is that in the presets area you can make the camera default which we'll talk about, these two items are important you can make your camera defaults specific to your ISO setting and you can make your camera defaults specific to your serial number. And we'll talk about those, but basically they allow you to automatically do everything that you need to do, it just does it, and so we'll show you those in our next session. External editing is where your gonna put all of your decisions on TIFF, like if I export something to Photoshop do I want it to go to a TIFF, do I want it to be a PSD, do I want it to be a jpeg, and for me, these are the most important file settings that I can give you. PSD or TIFF it doesn't really matter. TIFF is just more universal. I always export a prophoto rgb image because it's a better file type, it's got more color information. And then I do a 16 bit instead of an 8 bit. And then resolution 300 with no compression. That's what I want as a file when I'm working on an image in Photoshop, so that's how you should set things up. You can do PSD or TIFF, it's fine. Then when you're talking about file handling, it's just a question of how you want it to create names, like for instance here, this is kind of important. Do you want it to always have a web safe name? If you do, you can play here and say, anytime there is any of these characters, which the web doesn't like all that much, then you can replace them with what, a dash, or something like that, so you can choose those types of things. When a name has a space, do you wanna leave it as is, or do you wanna put a dash in it? If you do all of that then you're images will always be web safe, so they'll never send out an image that's got this weird character in it or something and then the webs like I don't know how to read that. Okay this is the most important setting for speed, that I can tell you about inside the Lightroom preferences. Right here, camera raw cache settings. You need a large cache, which is basically where it stores stuff, it's like the desktop where you set stuff down and organize it, so when Lightroom is trying to work on your files it doesn't have enough ram, then it takes over the cache. And it starts putting stuff in cache and moving it around. But it needs disk space for it. So that cache should be on the fastest disk you have, and it should be as big a possible file as you can create. So I've got 200 gigabytes, it starts at like five I think, or maybe 50, one is, one? It's one, that's what mine is. Oh my gosh one. One is not enough. One is not enough and it will make Lightroom slow. 200 gigabytes of cache will make Lightroom fast. So give it 200 gigabytes or whatever. If you only have 200 gigabytes on your drive don't give it 200, give it 100, but if you have a terabyte on your drive, give it 300, like give it a good size. Put 200, 300, that's a great size cache. Then, make sure it's on the fastest hard drive. So if you were to install a SSD, solid state hard drive, just for the Lightroom catalog alone, that would be a nice place for the cache too. Because then it's just this big pot of cache. (laughs) Okay, now right below it is the cache settings for video. Almost everybody is going to notice that when they try and play a video inside of Lightroom, especially when it's a video that comes from an actual, SLR camera, so it's a really good video capturer it's gonna go jumping and it's slow and it's not good video. That's because they have their cache set low. So if you're working on video and it matters to you, you need to increase that size too, to something very large. I don't really do much video on it, so I don't care all that much. But you can also just tell it don't limit the cache size. And then it will just use as much as it needs. Alright? So just kinda pay attention to that as well. And then of course you can always purge the cache if you feel like things have just gotten slow and out of control. Okay so then there are some other things like performance. Performance, if you have a really good graphics card, then use it as part of your processor. That will help Lightroom, now Lightroom will have multiple processors it can use. Cause if it's not using the video for watching a movie, it can then use it for exporting. But if you're watching Hulu or Vimeo while your working on Lightroom, Lightroom can't use the video processor for speeding your workflow up. So if you're watching Vimeo and you're wondering why it's slow, (laughs) there's two problems. You can guess what the other problem is. Alright, and then, this is the check box that we want to play with, so if you're using 50 or 40 megapixel images and Lightroom is slowing down, click on this check box and then you will automatically tell Lightroom, don't ever look at the original files. If you have a smart preview only work on the smart preview don't work on the original file, and suddenly Lightroom goes zippity fast, because it's no longer having to go and look at those huge files, it's looking at small ones. Okay? You can do that if you have normal size files and it'll go faster because it's looking at it even smaller but my computers are fast enough that my, 20, 21, 22 megapixel files, they're not slowing it down so I'm fine. And then Lightroom mobile, Lightroom mobile is a tool that's available to us and we want to use it. But in order for us to use it remember, you can't, when we were importing, we made a collection. And we made that collection available to Lightroom mobile. You can't do that unless you sign into Lightroom mobile. And you can't sign into Lightroom mobile unless you have a creative cloud account. Because you can have Lightroom mobile on your phone and on your tablet, but it won't connect to the cloud unless you are a cc member. Okay? So you have to sign up for the creative cloud and you can do that, they have a great price, I mean it's $9.99 or whatever a month, for Photoshop and Lightroom and you always have a license to it, you have two licenses that you can use on the laptop and a desktop or two laptops or two desktops or whatever. So it's a great deal plus you have access to this cloud. So all you need to do is sign into it, and this is the information here. But make sure that you do one thing. This is important. When you sign into Lightroom mobile, come to this preference dialog box, and change where it puts the photos. Cause if you take a picture with your phone you have the ability to like have it sent over to your computer, just make sure that you actually put this in the right spot and the right spot depends on what you're doing, so for me, the right spot is on my catalog drive. So wherever your catalog is, put a folder right next to the catalog that says Lightroom mobile. If you only use one computer, you put that in the catalog file or you put it right next to catalog file in your one computer. If you're putting it on a secondary solid state drive that you can port back and forth between computers, you put it on that one, that way, no matter where you are you still have access to all those files and it keeps putting them in the same place. Because if I take my solid state drive that has the Lightroom catalog and I put it on Kenna's computer, and then I start working on Lightroom mobile I want it to still be able to access the Lightroom mobile centric folder, so it has to be on this drive with it. So just make sure that you understand that Lightroom mobile needs a folder that's associated with the cloud. And you just wanna sign in to the right place and say this is going to be on the drive, just put it right next to whatever, wherever the Lightroom catalog is, that's where you want it. And Lightroom mobile can only attach to one catalog. Which is another reason to have the one dog. (laughs) Okay? So... Yes. Jared for people who are new, can you explain the difference, or is there a difference, between Lightroom six and Lightroom cc. There is a difference. Originally when they first introduced Lightroom cc and Lightroom six it was the same thing. But as time goes on they're diverging because Lightroom six only gets updates as necessary, Lightroom cc gets updates every couple months. And that's the way it's gonna go forever. And so at one point those of you that are on Lightroom six are going to be as though you're using Lightroom four, you're gonna be just in the past, Lightroom cc is just gonna keep going. So Lightroom six is just kind of like if you want a stand alone version. I don't know if they'll update it, they might. They say they're not going to, but it's possible that they might say well okay we'll give you Lightroom seven but it'll be every two years at the most, if they do it, but I don't know if they will. Lightroom cc just gets updated all the time. So I get new tools constantly they just pop in. So, it's the way to go. Plus Lightroom six doesn't have access to the cloud. Only Lightroom cc does.
Class Materials
Bonus Materials with RSVP
Bonus Materials with Purchase
Ratings and Reviews
Melissa Maxwell
Worth every penny. I am completely new to Lightroom and it really is like learning a new language. Jared Platt did a great job explaining the most efficient ways to utilize Lightroom. There's a lot of technical jargon that can often make creatives lose interest, but it's important and useful information. I've watched several segments again and again. He's added years to my life and I am grateful. He's not my favorite instructor on this site, though, and I made good use of the 2x button on the screen.
Kat Jones
Well, I've been a Photoshop girl since the beginning and have dabbled with LR and thought I knew quite a bit about it!! It turns out I've just been playing with bits of it! This is an amazing course. I will need to buy it for all the tricky bits that I just haven't quite grasped. Jared is amazing. Clear, concise, methodical, smashing. Thank you, Creative Live. What a service! Cat Jones Wormit Fife Scotland PS - Delightful to see Jared's Scottish piccies - very familiar, although not with the model!!!
Elaine
What an excellent class. I'm a semi-beginner, already know the basics, but wow ... this class adds an extra layer of super AHA moments that shave years off your life! What a great teacher, thank you so much Jared!