Module Presets and Hidden Presets
Lesson 23 from: Adobe Lightroom Classic CC for BeginnersJared Platt
Module Presets and Hidden Presets
Lesson 23 from: Adobe Lightroom Classic CC for BeginnersJared Platt
Lessons
Introduction to the Catalog Style System
23:54 2File Location and Methods
41:25 3Main Structure of Adobe Lightroom CC 2017
18:09 4Importing A to Z
27:26 5Image Selection Made Quick and Easy
12:34 6Methods of Image Organization
29:26 7Preferences in Adobe Lightroom CC
28:30 8Library, Develop and Map Modules
10:58Book and Slideshow Modules
07:50 10Print and Web Modules
13:08 11Developing Techniques
16:51 12Synchronizing Adjustments
23:05 13Additional Editing Tricks
13:13 14Fast Editing Presets
24:18 15Quick Develop Tool
06:57 16Using Local Adjustments
31:58 17Retouching Tools for Landscapes
22:45 18Dodging and Burning with Landscape Images
19:11 19Additional Landscaping Tools
07:30 20Retouching Tools for Portraits
28:17 21Create an HDR and Panorama
16:00 22Manipulating Image Structures
11:24 23Module Presets and Hidden Presets
18:37 24How to Create a Portfolio
26:06 25Connecting Your Portfolio With Lightroom Mobile
12:22 26Using Adobe Stock
29:58 27Publishing Images to Social Media
28:16 28Creating a Layout for Books
26:56 29Exporting a Book and Beyond
19:11Lesson Info
Module Presets and Hidden Presets
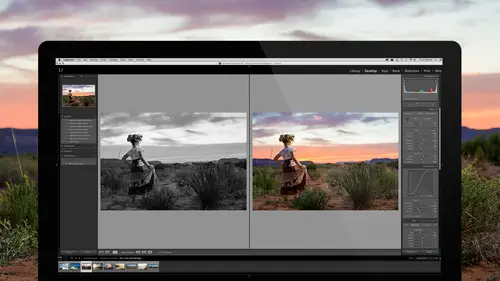
Okay, so now we were going to go to preset land again, and it's a different type of preset. I wanted to talk to you about where all these other presets are because there's presets everywhere in Lightroom, and so I wanted you to recognize that they are there so that you know to start looking for them and using them. Whatever it is you're going to do with presets, you need to know where they are. So if I go to the Lightroom preferences area ... And then for a PC it's in the edit menu, click on preferences. Inside of there, there's a preset panel, and that preset panel has a button that says show Lightroom preset folders. When I click on that, that's the folder, and inside of there is a folder called develop presets. That's where all of your develop presets go, but I want you to see also ... And by the way, it's only one folder deep. You get one folder for organizational purposes, so develop presents then you get a folder like the black and white collection that you just got from me if yo...
u bought this course. You just drag that folder into this develop presets folder. You bring that JPBW collections. Just drag it in there, and then you'll have these inside of it, but if you put a folder in here ... So if you take that folder, the black and white collection, and you put it in the user presets folder like that, so that it's user preset then a folder, none of these will show up in Lightroom because it can only see one folder deep. So just make sure you drag that folder out into this folder so that it's one folder deep from the develop presets. Okay, now there's other presets. So there are export action presets that we'll talk about in a minute. There's export presets, so, for instance, if you go to the export menu, which we're going to go to. The export presets are quick ways to set up all of the settings for how big you want the file, and what quality, and whether or not you want a water mark on it, and stuff like that. That's all inside of the export dialog box, so we set up presets to specify our preferences on that, and then we just click them, but, again, they're one folder deep, and you can see them right there. So there's all of our presets. We also have external editor presets. So earlier when I was going through preferences and showed you were to set up the file type, and size, and stuff like that, that you want when it sends it to Photoshop, this is where those presets go. There are presets in there. There's also keyword sets. So as you save a keyword set it becomes a preset. All of these are presets right here, and you need to understand that that's where they are because if you ever want to share your presets with a different computer, you need to come and grab this Lightroom folder, copy it, and then share it with the other computer. And we went over that yesterday. You put it into your Lightroom CC, or not your Lightroom CC, but your Adobe Creative Cloud folder. And it synchronizes with every computer that's attached to the creative cloud, and so you can just grab that preset, that Lightroom preset folder, and then overwrite the older one in your other computer, and now both of your computers are synchronized so that they both have the same presets in them. But there's another set of presets that I'm going to show you right now that don't exist in the Lightroom folder, and that is if you go to Lightroom, and you go ... Let's say you're developing something. Let's just go to our ... Let's go here. No, let's go here. And let's say we're going to work on this photo here, and we go to the develop module. We're looking at this photo. We've added a little extra contrast to it, some extra clarity, and then I want to change it to black and white. If I go over here to my presets, and I click on one of my black and whites, like the classic one. And let's say I do classic deep contrast. Click on that. And so I get that look from it, but one of the things that's involved is the tone curve in that preset. Those tone curves are here. See those tone curves? Those tone curves are not in the Lightroom preset folder. You can make them. Any time you make a curve and you like it, just click on here, and you can just save that as a preset. So right now I can't save it because it's no different, but if I went in and changed it just a little bit. So I'm just going to change that just a tad bit. If I click on here, now it says save. So I can save my own presets, and it puts them in this list, but they don't show up in that Lightroom folder. They actually show up, if you look here, so they're all inside of Adobe Lightroom, and then here's the develop presets. But it doesn't show up in here. It's actually right over here above the Lightroom folder in the CameraRaw folder. Click on that. And the reason it's there, see that curves folder? It's In the curves folder, and if I go to the curves folder, you can see there's all of my curves. So the reason it's in there is because it needs to be available to Lightroom and to Photoshop, because it has to be available to CameraRaw in Photoshop. And so the curves are actually inside of the CameraRaw folder. So if you really want to be backed up, so you can have access to all of the presets that you have in Lightroom and Photoshop, you want to save your CameraRaw folder and your Lighroom folder. So these two folders right there. So everybody should write that down, or take a screenshot, or rewind it and watch it, or whatever, but you need to know that those are the two spots where that goes. And you need to make a note of it for yourself, and that's what you need to do every single time you want to backup your presets. You need to say, "That's it. Right there. CameraRaw. Lightroom. Those are the two things." Right? And just if I were you, I would ... If you're the type of person that doesn't ... Some people just remember things. They look at it and they go, "Okay. Got it." Kenna doesn't? Okay, so, Kenna, what you should do is you should put a note on your desk that says backup my presets. And then it says the pathway to these two things. Or, even better, the best way to do this is to ... See this little folder right here? Just simply, if you're on a Mac ... I don't know what you do on a PC, so you'll just have to extrapolate. But if you're on a Mac, just go and grab this Adobe folder, or you could grab the Lightroom folder and then the CameraRaw folder. And just grab whatever folder you always need to get access to. Grab it and drag it over to this constant, the favorites area, and just put it in there, and now it's gonna be there forever. And then I can go and grab my CameraRaw, and drag it right there, and put it right there, and now I have Library and CameraRaw. So if I click on it, I just get there. That way if I ever want to back these up, all I have to do is go there, grab this, grab my curves folder, and drag it into wherever I want to back it up 'cause it's just a shortcut to there. But that's really important. Know where those are. Okay, you have a question. Yes, so since your curve presets are in your CameraRaw folder, and you can access them from Photoshop too if you wanted to maybe do that. If you ever are in Photoshop, does that mean you can create the presets in Photoshop as well and they translate equally right back to Lightroom, without having to make them in Lightroom? Does that make? Say again. Does it go both ways with your curve presets? So if I make a curve preset in Photoshop, Lightroom automatically updates. If you save the curve preset inside of Photoshop in CameraRaw. Not in the curves. Not in normal Photoshop, but in CameraRaw inside of Lightroom. [Male Participant] Okay. Or I mean inside of Photoshop. If you save it there, it will save it to that same folder, and then when you open Lightroom again, it will see that. [Male Participant] Okay. Because CameraRaw is the engine that drives both. Yeah, so if I'm working- But it's only in CameraRaw. Yeah, if I'm working with smart object Raws, I can use, I can access all that. Correct. Yeah, so for those of you who are advanced, he was just talking about smart objects. If I want to work on a Raw image in Photoshop, I actually can do that, but it has to be as a smart object. And so if you don't know what that means, don't let it bother you. Don't loose sleep over it. You can learn more about smart objects on some other class. [Male Participant] Sorry to get us off track. (laughs) No, that's okay, but just know that you can. So someone out there is saying, "You can work on a Raw image in Photoshop." We know, but it's a complicated and a fairly screwy process. Really, Lightroom should be able to just work on a Raw image without being a smart object. Someday we'll get there, hopefully. But right now, you have to make a smart object for it to truly be able to work on it, and then you're just working on it kind off 'cause you're really going to CameraRaw to do it. You're not doing it in Photoshop. So, okay, all right, yeah, that's advanced. Presets right here inside of the tone curve. Those exists. Also, another place that presets exists is down here in the camera calibration area, but they're really difficult to make. But you should know that they exist because once you get more advanced, you're going to want to use them. So camera calibration, if you come down here in the profile, if you click on here, every image is going to have a set of profiles based on the color that is registered in your camera. And so all of these, if you're a Cannon user, you'll recognize these as the same things that are inside of the camera itself. You can choose in your picture styles. You can choose camera faithful, camera landscape, camera neutral, portrait, standard. And that just changes the responses that your camera has to color, and so Photoshop, or I mean Lightroom, is actually approximating those styles for each camera. So every camera has those, and Lightroom, before they launch a camera inside of Lightroom, they try and approximate the way that your camera deals with color inside of here. But you can create new profiles in two different ways. The first way that you can create a profile is you can actually use ... I use the Colorchecker Passport by XWrite. It's just a grid of colors that you take a picture of, and then they have, in Lightroom, there's an actual, there's a plugin made by XWrite, and you just simply point at that color checker, take a picture of it, and then it will create one of these profiles and install it right here inside of the profile maker. So this is just another place where presets are, and then I could always choose that, and I would get the perfect color for that lighting scenario. So just be aware that that's there. There's another way to make them, and that's through there's this profile maker that Adobe has, that you can download. And you open a DNG in it and you can mess with the colors. You'd be surprised what you can do with it. You could screw with the curves, and colors, and all sorts of stuff, and then you can apply it as like this underlying curve thing. So it's a really masterful way to play with images, but just be aware that that's super advanced, but I want you to know that those are there because later on you're gonna want to play with those, and they are presets that are there. The other place that presets exist is in the export dialog box, which we'll talk about in a little while. But I want you to see that the presets are right over here on the left hand side. You want those presets active in your life because they will ... This, that is a lot of settings to set up on export. You should never touch those more than once. Just simply click on a preset. So if I want to email something, I click on email 1200 pixels. Click on it. It's set, and it's done, and then I hit export. So I want that kind of activity when I'm dealing with that. So every modules has presets as well, so you have presets in the book module, slideshow, print module, web module, but they're all called templates instead of presets. And then in the library you also have access to your presets, so if you're in the library module ... Like, for instance, you're right here, and you see this image of your kid, and you want to add a preset to it. You can also access your presets right here in the quick develop area. Just see that saved presets. Click on there and then just go to whichever. Let's go to the color preset, and let's do like a color portrait film. Let's do kind of a vivid soft color. Click on it. And see how it's just changed? It's changed that. So I have access to those presets, but even cooler than that is I also have access to the presets inside of this little spray can. So I click on the spray can, come down to the settings on the spray can, and tell it to spray settings. And then I can choose any settings I want. So let's do black and white collection. Let's do tone sepia basic. No, let's do like a bright reds. That's an interesting one. And so then I'm going to go through and just say, "I want this one to be that. I want this one. I want this one." You see how that works? And I can also click and drag, so I can just say, "All of these." So it's really easy to add those presets in other places as well. So if you are not using presets, I highly suggest that you get in the mood of using presets because it makes things really easy to quickly do stuff. Plus it allows you to be very consistent about your styles because you know this preset is going to be across all of these files, and you can just spray it onto them. And if you've designed your presets right, like we talked about in our last session or two sessions ago. If you've designed the presets right, they won't overwrite the original image settings, so you can adjust your images and then go spray presets on them, and it won't change them. It will just add style to them. I want to show you one last thing. When I'm exporting an image ... So let me go to the export dialog box right down here in the bottom left hand corner, and export action is at the very bottom of our exporting. So not in ... If we're going to save an image to a JPEG to the hard drive, when I'm exporting I can also use actions that are in Photoshop. So those of you who know how to use Photoshop, and you're using actions, you can do that right here. You can tell Lightroom, "When you're done exporting this image, I want you to drop it into Photoshop, and have Photoshop run an action to this photograph or to an entire folder full of photographs. And you can see these are all of the actions that I have available. So if I want to add some kind of a grain, which I don't do anymore because now Lightroom grain is so great. But if I wanted to do some album file, or if I wanted this skin soften, or something like that, I could do that just by clicking on that, and now Lightroom is going to finish the images, export a folder of images, then take the folder of images, drop it into Photoshop, run the action from Photoshop, Photoshop will finish the action, close everything down, and then you'll have everything available to you. So you don't have to run the action yourself. So that's only if you know how to use actions. I don't want to get complicated, but I want you to realize if you know how to use actions, all you have to do is choose the action that you want to make. So you go, and, again, I don't want to get complicated, but we're gonna just say you go to Photoshop. You go to file, automate, and then you're going to create a droplet. In the create droplet category you choose the action you want to use, and you answer some questions about how you want it to run, and hit okay, and it's going to create an action. Or I mean it's going to create a droplet that is an action, so it's just a program version of your action, and then that is going to go into the presets folder, into that export actions folder that we talked about. So it's going to go into your preset area. So you go to Lightroom, and then you go into your export actions, which is right here. And you can see that's what a droplet looks like. So that droplet right there is just an action in a program form. So if you know how to use actions, go ahead an make a droplet of an action, put it in this folder, and from then on out you can tell Lightroom to tell Photoshop to do things. That's as far as I'm going to go on that because it can get too complicated, but I do want you to know it's there for those people who are Photoshop users. I want you to realize that that possibility exists for you.
Class Materials
Bonus Materials with RSVP
Bonus Materials with Purchase
Ratings and Reviews
Melissa Maxwell
Worth every penny. I am completely new to Lightroom and it really is like learning a new language. Jared Platt did a great job explaining the most efficient ways to utilize Lightroom. There's a lot of technical jargon that can often make creatives lose interest, but it's important and useful information. I've watched several segments again and again. He's added years to my life and I am grateful. He's not my favorite instructor on this site, though, and I made good use of the 2x button on the screen.
Kat Jones
Well, I've been a Photoshop girl since the beginning and have dabbled with LR and thought I knew quite a bit about it!! It turns out I've just been playing with bits of it! This is an amazing course. I will need to buy it for all the tricky bits that I just haven't quite grasped. Jared is amazing. Clear, concise, methodical, smashing. Thank you, Creative Live. What a service! Cat Jones Wormit Fife Scotland PS - Delightful to see Jared's Scottish piccies - very familiar, although not with the model!!!
Elaine
What an excellent class. I'm a semi-beginner, already know the basics, but wow ... this class adds an extra layer of super AHA moments that shave years off your life! What a great teacher, thank you so much Jared!