Lessons
Class Introduction
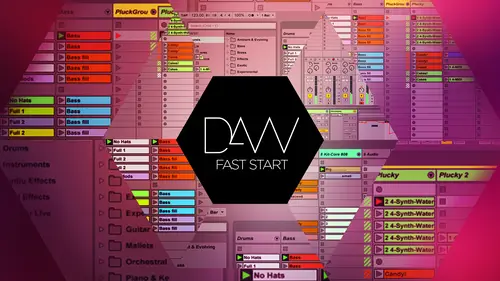
11:48 2Navigation in Live 9
22:29 3Live Browser and Libraries
08:59 4Controlling Time
09:45 5Warp Markers
30:01 6Warp Modes
26:05 7Building a DJ Set
21:00 8The Clip View
21:45Follow Action Breaks
09:27 10Sample Box
13:35 11Automation in Modulation
08:00 12Recording Audio in Ableton Live
18:06 13Using Midi in Ableton Live
06:33 14Editing MIDI Clips
08:33 15Creating a Beat
10:35 16Recording MIDI
17:32 17Mapping Browser
15:58 18Session and Arrangement
17:30 19Remixing in Ableton Live
30:50 20Final Q&A
12:36Lesson Info
Warp Markers
So now we're going to look at how we get these things to fit together so I talked before about these were different speeds, but then they sink together through warping so after working all these tracks played back in time and that's because it's slowed one down, it's sped one up to kind of fit together, but what is working? How the heck do we get these things to play back together? Like how can you slow and speed something up and still sound good? That's that's all newer technology and that is when we deal with warping audio in the first step toward ping our audio is understanding uh, what these are with wart markers, so life lets you stretch and manipulate audio as if it were elastic warping lets you speed up or slow down the timing in a free and easy way think of a sample as a rubber band that you want to add pins, too in the musical time ruler and live the pins air called wort markers a wart marker locks a specific point to the sample to a specific place in the measure. In other wor...
ds, I have this playing right and I've double clicks and I've been moving around that wart marker and notice how it kind of created points as a rubber band you put two pins in it and then you could stretch what's in between and that's what this these war markers do and it makes it very easy to morph push and pull samples put things in time whatever um but having those points is very important so that everything fits together so you can like even if you played it like wrong at a time you can create a point snap everything together so there are two main things that we need to know first one is one of transient is uh so a transient is a high amplitude short duration sound in other words it's a percussive hit so if I'm playing like a bow a violin that's not a transient that's like a that's a slow sound now if I pluck the bow I mean if I plucked the violin that's a transient that is a a peak so a drum sound anything that creates a spike is a transient these air usually good places to place warm markers because they're your beat their your group it's your transient and then we have war markers more markers represent the pin on the way form if you click and hold a war marker you can then stretch the audio so let's actually look at what this looks like enable tune all right so we're gonna play this track now while this is playing this is the awesome thing about able to I can do all this while it's playing still I can double click see how it put a little yellow flag there that's a war marker doubleclick another one and then slowing back to playback e also move this to speed it up so it's very elastic I'm just make points wherever I want I'm just undoing this I'm doing controls your commands he undoes so I could just make these little points moving around you notice that it moves in between the two other points so if you have two pins and you're making a new pain you can stretches between those points but if there wasn't any other wounds like I could delete these then I'm moving everything that's important to know if you're trying to correct like a single note like you might not want everything moving you might want to put one before and after so that you could move just that sound right so we can create war markers by double clicking and we complete them by double clicking and it's it might be a little hard to see but there's these little teeny gray lines those the transients so if I put my mouse over it we see a little gray flag that's a transient so able to automatically read your file and says oh I see a little spike there and it tells you if I double click that turns into war mark cool now let's listen to these two samples that are in time uh like the actual recording of this symbol is at a time it's the drummer that drink too much and is still playing and you recorded and you maybe drink too much and then you realize oh, this doesn't sound good well, technology is crazy like you can make somebody's performance who was totally off like you can see that that that really wanders away but if I play this symbols way off now if I come in here and use my war markers I can double click I'm gonna move that one and just real quickly snapped these all to the currin and those major hits look great I also you can see these little little one to transients some of these air off so I could just call it you know, just come in here and correct the timing and I've definitely done this in meaning occasions with musicians um either of my own fault or there's just fixing things cool. So now if I play these two well, I also showed you the long way of doing this because I'm doing this by hand, but we can automate that through quantum ization and basically what I do is I come in here and here's that same sample that wasn't fixed already now the first thing I want to do is this is really off on the hit, so I'm gonna double click and move that so now things are pretty close I could go in by hand to move all this or I can select all of it I can right click to finger click on mac and then I can say quan ties but I also have qantas settings so in the settings I can say all right I want it to be one eighth notes or one sixteenth notes and that's what it's looking at so let's go with one sixteenth um and the amount is if it was set for like let's say fifty percent then this space between it being on time and where it currently is off time it'll move it fifty percent so that way it can kind of keep some humanization if you want in this example we want to like really snap into the grid so I just press ok and then in automatically did that uh you might notice like this one it pushed it back one sixteenth note that I would like so I just did it I just change that manually but then there you go in a few seconds you quantity so now we're seeing how we can correct timing how we can get things the lock together how we can fix our samples all flow together in the same time through war markers and then we can get even further when we start looking into our work modes and how we can get things to play at the same time so we have a couple questions that came in doing take us about working so far what about working across tracks to be pm matched his live do this automatically or is there but I missed across tracks here. Ah, not quite sure if they mean like multiple tracks like if you can work all those tracks at the same time to correct the timing but it is really specifically a single clip ok? And in that clip you're correcting the timing. Okay, you can create the wart modes and move them or you can quantities that single one as far as how all the tracks are playing together that has to do with the war the overall warping the overall playback hopefully that answers the question if they clarify, we can answer that but what are some of the other ones? What I want is that the same thing is quantities quantity ization yes. So that last trick that I showed is clintonization yes. So they might have been asking before I showed that. Yeah, but so doing it by hand is the wort markers? Yep, right. And then there's the quant ization tab is locked into the grid. Yeah, I just sometimes like to show you the reason why automating it is really awesome instead of doing it by hand yep goes that good on questions yep, you guys have questions all good call sometimes when you're reading audio and whether it's auto or per you're trying to do it by hand, you'll get these kind of little artifacts in the audio light clipping sounds on somebody's voice, for example, we're just kind of wondering what you can do to mitigate that. Well, that is probably your, uh, work mode, like, for instance, I was working with a student that has these beautiful audio recordings and he has them enable tonight and they sound all weird they sound kind of study or, like there's kind of a spike once in a while is that you're talking about sort of thing well, that's because he had it in beats, mood and beat is looking at those transients that's all it cares about, so if you have any beats mode it's like it doesn't matter if it's a vocal, it doesn't try to make it sound human at all. So that's, where your war modes come in, how we get those things to lock together and what it's paying attention to two stretch it or not, so that will probably fix that problem. Yeah, there's also this thing called fades uh, which has do a phase shift thing? I'm not going to go deep into what phase shift is, but I'm gonna show this an arrangement view a little bit of a tangent, but it's good to know because I didn't know for a long time and that is if you right click and you say, where is it? Oh, there is ok show fades you get these little things at the beginning and if I double click out, move it it's like a volume fade so sometimes you want just a little fade at the beginning of a sample to get rid of phase shifting so if you had two samples playing like one into the next the if it jumps phase that will create a clip ah, so you can do that little faith the little as show fade and show if it is really awesome it's like an automatic volume change like that, like now it's changing volume as it goes that was I didn't know that for like three years and once I found it out, it's totally changed my work flow but all you have to do for that is again right click and then show fades go between those two it should fix that problem. So, uh now let's talk about warping and ah what we have from war from here. So basically when we have a track and we have all these little board markers right, those war markers are sink are snapping it to the grid now if I put in a whole track it's trying to create war markers it's trying to read the timing and snap into it it may or may not get it correct if it does not get it correct let's say you're deejaying two tracks, the beets are often it sounds really bad it sounds like a train wreck, so we're going to go over making sure that we were warp things in a way that everything is on the grid, so it has a smooth playback huge part of that is war from here. So this is just when you right click on something you get these options were going to go over these different types of work from here and as an example let's just look at work from here again. If you ah, get this off creative life, you'd be able to play with these example sets so you'll be able to download this and go through and on the master track I have exactly what to do, it says step by step kind of what I'm walking you through, but let's say I have this track right now it's not work at all you can tell because this button here is the war, but now if I played e was gonna play this doesn't example totally off, they're not worked sounds terrible to start well, how do I warp phase and make sure they're all on the grid there are a few steps to warping tracks this is going to be really important if you're deejaying at all um do either of you guys d j no interested in d j yeah, ok it's a really fun exercise when you're first getting into a bolton and highly suggested I d j for a year while I was creating my own music but it's very simple with in life, but what we do is if I press play the first step and here's the steps right here one by one first thing I knew is I want the original tempo, so I want to make sure but I have a good estimation how we do that past temple that showed early one, three, three so pretty much won twenty six I just need an estimate now that I have that I know what it should on average b but what is the first beat of the song is the next important aspect, so I zoom in you'll see this little magnifying glass you'll see this a lot live and that's the zoom, so if I click it zoom, I'm just clicking, holding and going up and down is a man I am a move this flag, this flag represents the start and I wanted to be at the very first hit close as I can once I have that now we know the original tempo, speed approximate now you know the first beat I right click on the flag or near the flag there it is on the flag and then I say set one one one here and basically that says that's the beginning because you notice that I had meant kind of dead air at the very beginning of my track that just happens sometimes with mastering or whatever it might be. So we want to say this is the beginning it looks at it it reads it it automatically puts in all the war markers and I would say eighty percent of the time it's done it's got a good and a good idea, but it might also be a little off, so we're going to check it. So, uh, what we have is once we do one loan from here er I can right click again whatever that first wart marker is that beginning and then I have these different options. So I have worked from here on and then let's look at this slide so war from here runs out of warp on the material and from the right of the selective material so basically it sees it and decides whatever it wants to do right work from here. Start at directs out of warp to use the current live sets tempo as a starting point of the tempo tracking so we'll start whatever bpm you had it set to work from here straight tells out of warp that this is a clip with no temple variation odd award will then set a single war marker derived from its guests of what the original tempos on then we'll talk about the later one but this one is I wrote this song it's an original I know that I wrote it enable teo on the beat like on a grid so I can choose work from here straight meaning it's going to look at it guess the b p m and then warp it from that single bpm point it's not going to fluctuate anyway so if I hit that you'll notice it's pretty much the same but it said it at one twenty six point twenty three and went all the way across now let's check this by pressing play and then go on to mention a great I'll skip later on I'd say in general that's kind of what happens you're throwing a you throwing something you put in warp do work from here straight if you know it's like elektronik lee made and then bam you're done very, very easy but there are a few other changes like a few things that kind of change things a bit one of them is like this song za remix someone made for me and of one of my original tracks and you'll notice that has this ambient intro with no beat, so what you want to do is just start from where the beat starts, so I'll move this be toget tempo one, three, four it looks like it's seventy I mean it's kind of dub step e so I wouldn't be surprised and then all I do is I assuming again I picked that beginning like I'm sure you guys before and then I just right click set one one one from here it views it, it warps it and then I put the flag back that's basically the only difference. Sometimes you'll have that and your intro it's going to be really hard for a bolton to know exactly what's happening to the beat so just started to beat move the flag back and you're good. So now when I play this cool, awesome, ah, and then we have one more example and this is let's say you have a band and you recorded band it's not on like it's, not a dog it's not electronically produced so it's going to move around it's going to change its bpm quite a bit so that's where we use a different war, a war from here, so I'm going to play this this was a, uh, creative commons track public domain is awesome funk track well that from blues but drums they're gonna kind of waiver they're gonna go faster and slower so we can do what we've done before waken do is again tactic good estimation same thing that we did before we zoom into where that first hit looks like which is right here come on zoom in there all right once we got that we do the same thing we've done before which is set one one one from here it's warped snapped now the interesting thing is you'll notice it has all these little war markers that's because live saw it changed and automatically tried to warp it so if you set one one one from here it's called out of warp it automatically views any fluctuation and tries to snap it but if you ever need to just you know you can always right click and then this would be a great instance of work from here which is basically what it did before but it reads it and it kind of estimates and kind of puts everything into shape now if I play this that sounds time check later so now it's in time that's very useful if you're ever like preparing a remix for something like that you warp everything's, they can chop it up and I'll be in time stuff like that so those the different warping techniques to get our song prepared so it's how we worked it too start but then we're going to talk about the ways that we're working it and what what warping actually is and what it does but now we're prepared for that right? Um yeah so here's the steps so step one we found the original tempo step to restart had the start marker step three we set one one one from here for we did the war from here setting and then we checked it with the metro gnome uh if you ever need to you can change this start flag remember when we had that ambient kind of intro we just move that over to the beginning? Uh oh, yeah very important. So let's say I worked this track well, I'm just gonna click here if I dragged this in um I'm going pretend it didn't happen. All right, so I dragged this in I have no settings. Everything I just figured out is not there. That is what happens by default unless you hit the safe button. Now this safe button right here if you press that it's basically saving an extra file that sits next to that wave file and has all these settings. So if I drag it in it's the exact same settings that's going to save you especially if you're like making a deejay set you warped like ten tracks and then you're getting ready to play your gig and then you dragon in from itunes and then it has none of those warping settings totally sucks so just hit the save button every time you like come in here and you're warped things just go ahead and press safe cool awesome so ah yeah do we have questions on that whole section yes after you save those working settings and you're bringing songs in for various too eating sets can you then just ah attenuate the tempo up and down as you need to depending on where you're mixing in for example exactly so once it's warped I'm gonna keep the way make sure it's time now it's making its slower faster like we're showing before yeah so um once you have it worked it's going to stay toe whatever your global timing is whatever your global timing up here moves to it's going to be in time to that if it was not warped like this is unwatched now I do that by turning on this war button right there which I just showed you how to warp something but if you ever need to turn eleven off here now if I have this off I play this let's just call it independence which can be useful because sometimes you might want a song that's not worked playing its own timing and it bringing something else it's up to you but uh yeah when it is warped it will stick to that time call other questions there's one question in quantities ization how do you know when to use quarter notes eight no sixteen minutes to get the track to snap to the grid. Right. So good question s o let's say I'm just going to go to something like where the drum loops all right, so I have this one well, this is all pretty much in time um because I created in able to but but in this case pretty much everything would be sixteenth notes because you can see it's all like sixteenth so if one was slightly off were all of them were slightly off from the sixteenth note I would put it to that thirty two is super specific like it might not really help you because like let's say you have a drummer that she's playing the high hats and the high hats are kind of moving a little bit he's probably not playing third two notes the whole time so you'd be better off choosing sixteenth notes just depends on the speed of what's happening. Um so yeah, if we look at this quantas settings you know you had all these different ones so I generally pick with sixteenth because that works now keep in mind if I did it to sixteenth, I can always go in and manually move that like two thirty second notes that they had that were a little off um and then you also have triplets and stuff like that which is all dependent if your music has triplets but sixteenth is generally wouldn't go for thirty two is if it's like some crazy fast thing go any other questions guys, I think this might be a good moment it's a break because we have the next section goes into warp modes I'll just quickly put out this idea and then we're going to go through what it is after the break cool but, um here's a really quick concept wart modes let's say we have a track it's playing its playing it like, uh I don't know seventy bp ems now you know let's make it one hundred forty it's playing in one hundred forty bpm so a certain speed now let's slow that speed down to one hundred if it slowed down the playback to stay in the same timing we basically filling a bunch of information something has to go in there there is dead space that needs to be displaced in it to make it fit still within that timing and so here's like a sample as an example well here's it at that slower play back if I were to chop up the major aspects of that beat and put on this grid I have all this empty space now what do I do with that space that is warm owes it might be a stuttering sound that you're hearing in your vocals through beats mode because it's, trying to keep the beat it might be this weird, mangled noise because a complex mode because it's kind of repeating it's, it's, the tonal quality or whatever we're going to go over this specific tools and the types of war modes to make sure we have the best one. And when you really know this, you can actually use this very creatively. But once we have that, we totally have control over timing. We make sure that everything is playing on the beat, if if it's slower fast, it still sounds pretty good because of our warp modes and everything's locked together. Just the fact that you can do that in live gives you a gigantic advantage. You can have a ninety bpm be playing at one hundred bpm, record a sax part and one hundred twenty and have it all fit together. That's amazing that's, very fantastic tool that again, we've not had as musicians until recent time period, so it's opened up whole new worlds of manipulating samples and just to make sure you guys can use it for your own music, so, yeah, we're gonna get in that section next.
Class Materials
Bonus Materials with Purchase
Ratings and Reviews
Malcolm King
Hello, Firstly gotta thank you for your great tutorials, and sharing the knowledge of making music; then I wanna say, I bought the Ableton Live 9 tutorial package, but I didn't heard or better say understand some of Mr. Cotec's words; that's why I wonder would you please send me an English subtitle of his excellent teaching? I will be much grateful for this. Best Regards, Malc
Casey Dart
Isaac is the man! He is such a great teacher and you can tell has full control over the information. I already feel like I am many steps above friends who have used ableton for years because of this course setting a foundation for me to learn and experiment. Thank you Isaac and crew!
Claudio Martins
Great start course! And Isaac is a super-teacher. Many lessons and great tips. This the first time Im really learned how to handle Ableton!
Student Work
Related Classes
Electronic Music Production