Lesson Info
6. 360 From Any Camera
Lessons
Lesson Info
360 From Any Camera
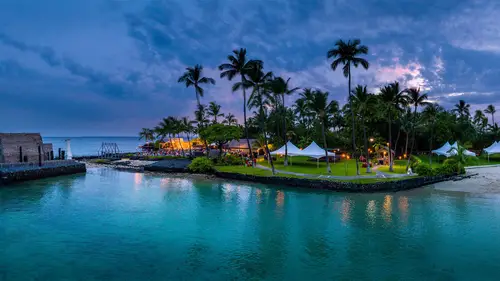
Okay, so there's one other thing we can do. What if we don't have a 360 degree camera? What do you do? Well, too bad, buy one. No, I'm kidding. Okay, so, this is what we could do. We could shoot another photograph and stitch it. And you know what, I showed... This is going to be interesting. I normally do this inside of Lightroom. Look at all these pictures here. I'm gonna open these inside of Camera Raw. Okay, I'll explain what I did before I just rush ahead. So this is what I did, is I took all of these photographs with my drone and this is a 360 degree. I didn't use the auto thing, although I could've. But I literally just moved my drone around, took a picture, took a picture, all the way around, tilt the camera down, did the same thing. And I captured the environment. So, and this point here, the drone does have an auto 360 option in it though, as I mentioned at the very beginning, so we won't go over that again. And I'm just gonna right click on here and open these in Camera Raw. ...
Now, normally I do this in Lightroom, but because this is Photoshop week, I'm gonna do this in Camera Raw. We're gonna select all of these, and also I showed you how to do that in a previous class. Now we get them all selected, we are going to... Did they all select? No they didn't, here we go. Merge to Panorama, and we'll see if this works. And Colin quick question, someone could also do this with a tripod to shoot 360-- Absolutely, yeah I'm just using the drone. You could use off your phone, you could do it with a regular camera. Okay, let's see if this worked. Okay, it didn't work, there was a miss. Oh you know why, remember I told you guys something before? You've gotta go into the Lens Correction. If you don't enable the lens correction, it's gonna see distortion, and it's gonna be confused. Okay, so let's see if that works. Merge to Panorama now... There's a lot of images to be merging, but, you know, let's see. And what's it saying there, Mavic Pro... Okay. Yeah, that was with the Mavic Pro. Okay forget it. Okay, let's find one, like I said, I don't normally do it inside of Camera Raw that particular one, Oh there, there it is, it worked. Okay. So if we get the error message, I have no idea why that error message was there. And I'm just gonna use a Boundary Warp, I'm gonna stretch it all the way out, and there's a 360 degree photo that we shot from the drone. So, it was just psyching me out. (laughter) And now I'm gonna click on Merge, and we're gonna save this, why don't I save it into our 360 Editing folder, and we're gonna call this 360panoCL... for CreativeLive. Save it, and there it is. So there's a 360 degree panorama, and I'm gonna open this as just an image. Now, we would do all our adjustments and all that kind of fun stuff, we're opening up Photoshop right now. Okay, we normally would do all that fun stuff, you know adjustments and all that stuff, but that is the entire 360 degree there. So here's what we need to do. What you need to do is just create a blank document from the THETA... Or something just with the metadata. So all you need to do is, you can go to it, there's a thing called the eXifer, theexifer.com, and you can take an image and you can add the metadata from its 360 camera, so you need to put that metadata into Facebook so that it thinks it was shot on a 360 degree camera. So the eXifer, or... I have right on here... a 360 degree template that I have and you don't. (audience laughing) So, all this is, is just a blank document with that metadata applied to it. So, I'm gonna figure out a way to get this to you. So if we in the Image, in fact, go to photoshopcafe.com/cl for CreativeLive, and you can download it there, and I'll figure out a way for Jim to get it to everybody else. So let's have a look here, so we've got the image here, and what we need to do now, is this has the metadata in it. So if we go under here, all I wanna do is drag this... into there... and release it. So, we're gonna zoom out, "Control + T," this is a little bit bigger. And then what you wanna do is drag it down. Now here's a trick, you wanna squash it. See what I'm doing, I'm squashing it into the space. It looks really weird right now, but trust me. Once you put this into the 360, this is gonna look good. So basically what this is, it's just a JPEG right now, it's just saved out to the maximum size allowable which is... Image Size, let me just show you here. So in pixels, let me change this to Pixels, so 6000 by 3000 pixels. So if you just create a blank document, 6000 by 3000, and you can apply that metadata or I'll get you this template that you can use. And then all we need to do at this point here is just File, Save As, Save for Web... File, Save for Web, where are you? I'm staring right at you aren't I, it's been a long day. It's under Export. Thank you. There we go, and it's gonna go in here, and now we don't want want a GIF we just wanna get a JPEG. And then there's just one little thing you need to do when you're in here, is... So we go down here... Metadata, see where it says Metadata? Make sure it says All. Make sure you've got all that metadata in there. And... Looks good. And at that point there, you're just gonna save it. And we don't want it as a template. Let me just try something here real quick. Close that down, don't save that, just go back here. All right, there it is, there's our image. Show you again, File, Export, Save for Web. Make sure we're not in GIF, make sure you're in JPEG. And... See it hasn't updated. Original... Okay so right now, the preview hasn't updated yet, but that is actually gonna be the image you want. See it still thinks it's still working on it. [Student] We don't have to select? [Colin] No. And then, we're just gonna hit Save. Make sure that that metadata is turned on, that's important, too. Okay, so right now, this is just a preview that's pulling up, but that will save it out. And then you're just gonna choose Save, and you're gonna call it the 360 CL, and then save that. And then what you would do from there, is the next step, is you just take that, upload it to Facebook, and you're gonna have that, which I can't do here right now, but just upload it to Facebook like normal, and then it will work. So one of the things I recommend you do though, when you update it onto Facebook, is go into Facebook and set it to private first. Don't be public, and then make sure it's working correctly. And then once it's working correctly, change your profile to public and people will see it. And then you'll be able to upload your 360 pictures there. Now there's one little tip that I didn't share, and that's in the edges, you know if you wanna play around, you wanna get those edges to match. Sometimes what you have to do is, you have to kinda blend the edges. It looks like I cut that off, actually, because that did go all the way around. But what you wanna do is just take those edges there, let me show you quickly. That should go all the way around which is nice. I didn't put the whole picture in there, but essentially, you would go there, you would hit "Control + J," and then see how you've copied that bit there? You hit "Control + T" for Free Transform, Right click, flip it, and then just drag it over there. Go there and then you would just blend it along that seam there using masks, and that will make it seamless. But in this case because when I resized it, I accidentally trimmed the end off, and actually, on a proper 360, you will see it will match pretty closely. There won't actually be a lot of work you have to do there, just create a gradient to blend it. I'm just gonna create the mask there, grab the gradient there, and then you would just kinda drag that across like that. Not on this one, but obviously, when you've got the whole picture in there.